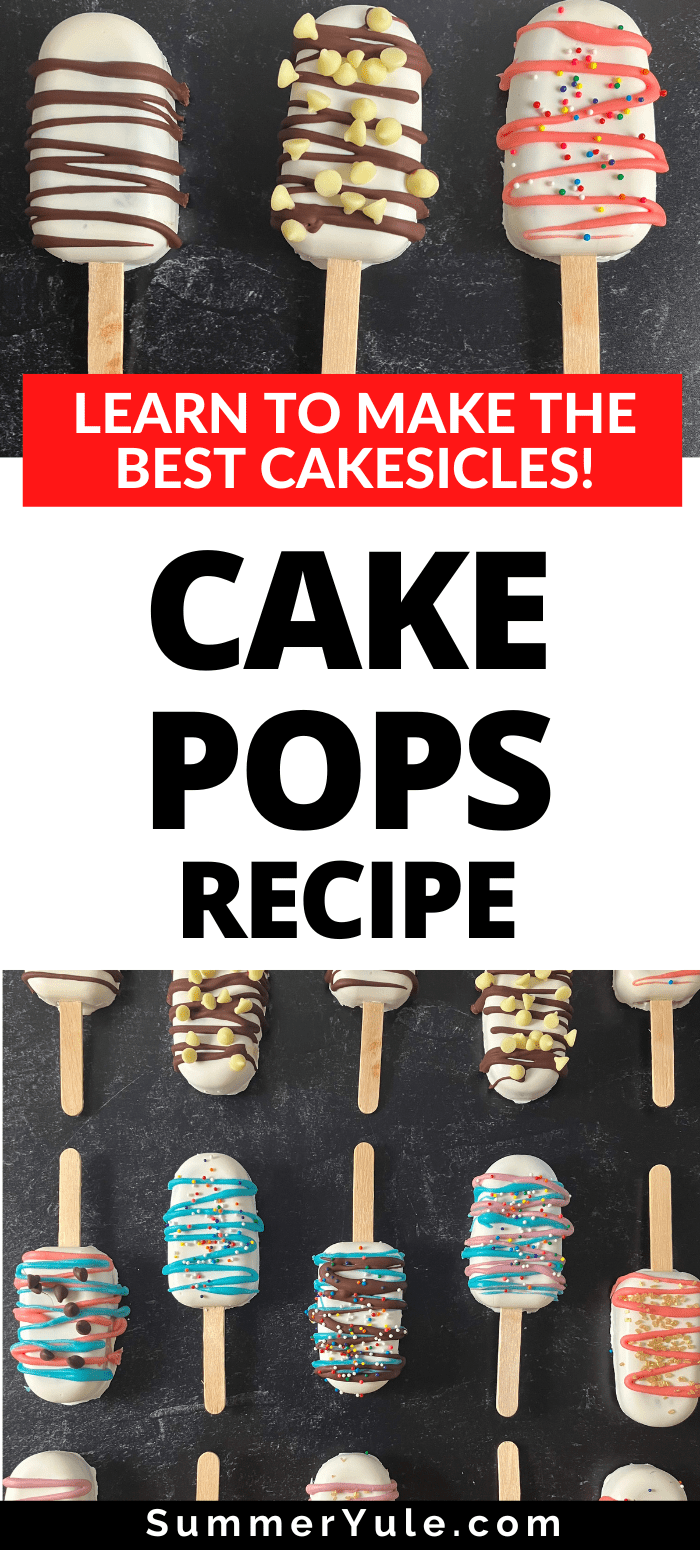
Learn how to make cake popsicles with this easy cakesicles recipe! This cake on a stick is a great use for leftover cake. You can make chocolate cake popsicles, vanilla, funfetti, or your favorite flavors. Learn to make a cakesicle that doesn’t crack, sweat, or fall off the stick. You’ll also get info on the best cakesicles mold, cake popsicle pricing, and much more.
Want to save this post?
Enter your email below and we'll send it straight to your inbox. Plus you'll get great new recipes from us every week!
Table of Contents
- ⭐ What are cakesicles made of?
- 🍭 What is the difference between cake pops and cakesicles?
- 🍫 What is the best melting chocolate for cake pops?
- 🍡 Cake Popsicles Mold
- 🔪 How to Make Cakesicles
- What do you dip cakesicles in?
- ⏲️ Should cakesicles be refrigerated?
- 🧁 Cakesicles Filling Ideas
- 🎂 Cakesicles Designs
- 📋Cakesicles Calories
- FAQs
- 👨🏾🍳 More Dessert Recipes
- 📖 Recipe Card
- 💭 Expert Tips from Dietitian Summer Yule
- 💬 Comments
⭐ What are cakesicles made of?
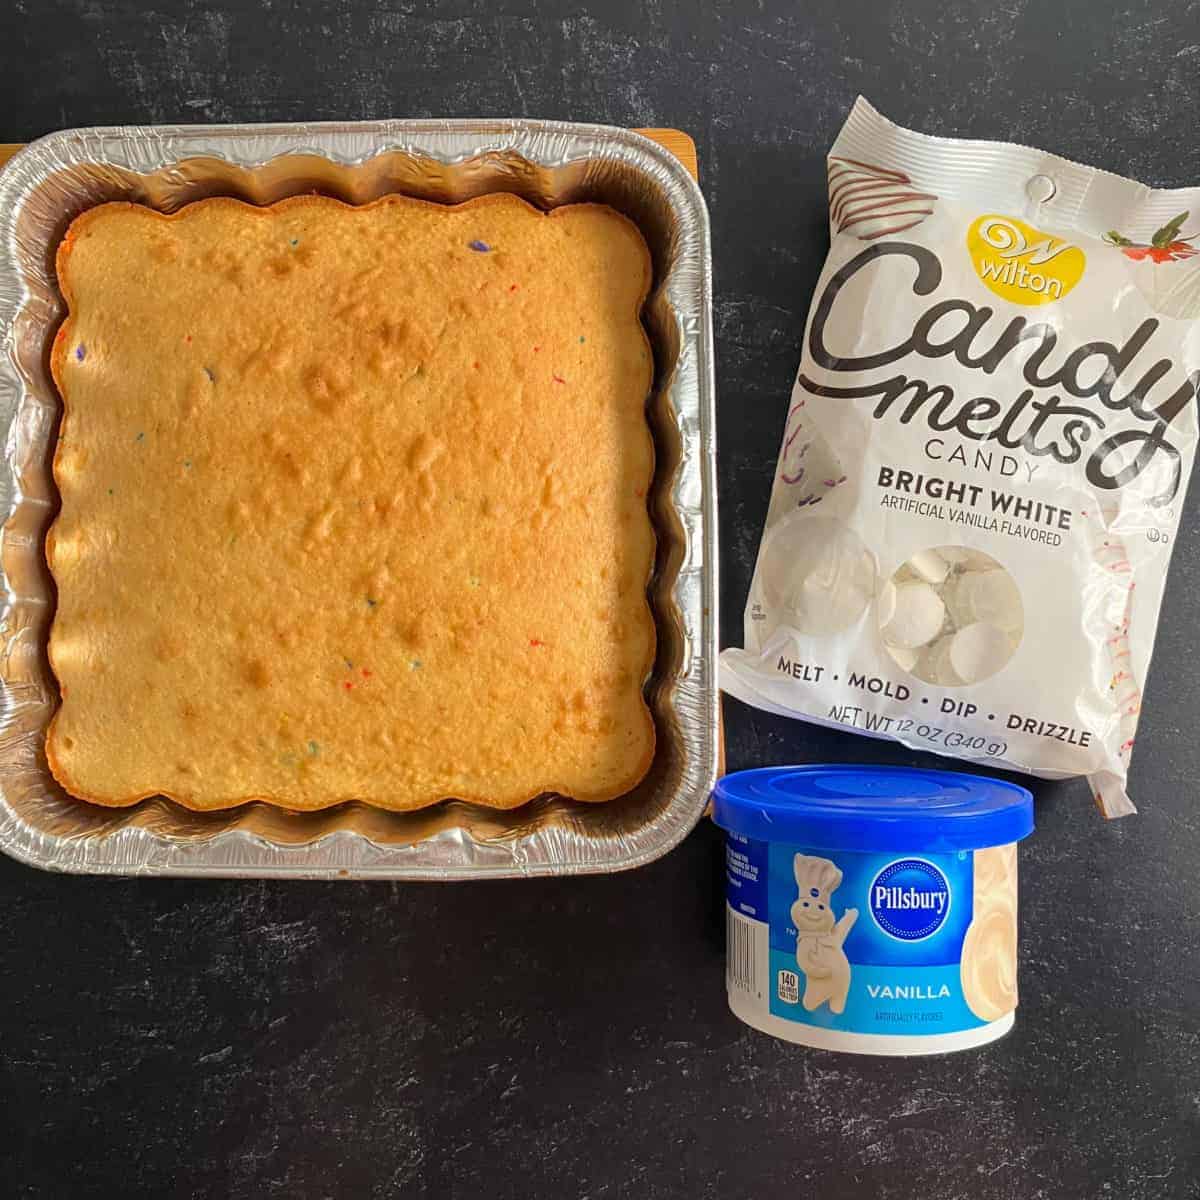
What's in a cakesicle? This cake popsicles recipe uses a baked 8x8-inch cake (20.3x20.3 cm), buttercream frosting, and candy melts. That’s all you need to make beautiful popsicle cake pops (“fake pops”) that are perfect for parties or even wedding favors.
Though I used boxed cake mix, you can use homemade cake from scratch if you’d prefer for this recipe. Using applesauce in place of all of the oil in your recipe stops cake pops from being too greasy or oily. Since you’re mixing frosting into the cake, there will be plenty of fat to keep the cake pop dough from becoming too dry.
I mixed 1 cup water, ½ cup applesauce, and 3 large eggs into the boxed mix. One regular-sized box of cake mix makes two 8x8-inch cakes, twice what you need for this recipe. You can save half the cake for snacks later.
🍭 What is the difference between cake pops and cakesicles?
Cake pops are typically shaped into a small ball and then dipped in chocolate. Cakesicles are formed into a popsicle shape, and the chocolate coating is often brushed on.
In this cakesicles tutorial, I’ll teach you how to make cakesicles with a mold. The advantage of making cakesicles this way is you’ll get a smooth and shiny coating with no hand dipping. Additionally, your cake lollies are less likely to fall off the stick when you make them this way.
🍫 What is the best melting chocolate for cake pops?
I prefer using candy melts for making cake popsicles. Chocolate candy melts (AKA almond bark or confectionary coating) form a smooth coat on cake pops that is less likely to crack. Best of all, there is no need to temper it, as you have to do with regular chocolate.
You can find Wilton’s Candy Melts in the craft section at Walmart, or online. You can usually find almond bark in the baking aisle of grocery stores. For this recipe, you need 3 cups of candy melts for the coating, plus more for decorating.
I used white candy melts, and then colored them in different ways for decorating. You could also use colored candy melts for holidays. Here are some ideas:
- Halloween cakesicles: orange and black candy melts
- Christmas cakesicles: red and green candy melts
- Easter cakesicles: pastel candy melts
- Gender reveal party: pink and light blue candy melts
- Birthday cake popsicles: use the person’s favorite color(s)
To melt candy melts, put ½ cup room temperature melts (or small almond bark pieces) at a time in a microwave safe bowl. Microwave at 50% power for one minute. Then stir, and continue to microwave at 50% power in 30 second intervals until melted.
Make sure to stir the melts each time you check on them. To prevent burning, stop microwaving the candy melts slightly before they’re fully melted. After stirring, they should become completely smooth and ready to use.
Don’t melt the candy melts until you’re ready to use them. Once they’re melted, they’ll harden again quickly and you need to work fast.
How to Temper Chocolate
Though candy melts form a perfectly thin and smooth shell on cake pops, I find real chocolate rich in cocoa butter has the best flavor. To get the best of both worlds, you could use candy melts for the cake pop coating, and real chocolate for decorating. The disadvantage of using real chocolate for cake popsicles is that it must be tempered.
Tempered chocolate is stabilized with a specific heating and cooling process. Tempering makes the chocolate glossy instead of streaky, perfect for cake pop coatings. Candy melts and chocolate chips have stabilizers added, and simply need melting rather than tempering.
According to Ghirardelli, to temper chocolate, you need to heat it in a double boiler to 110-115 degrees Fahrenheit (43-46C). Cool the chocolate to 95-100F (35-38C), stirring until fully melted. These precise temperatures require a candy thermometer.
Make sure to chop the chocolate into very small pieces (about chocolate chip-sized) before tempering.
I recommend adding ½ teaspoon coconut oil per ½ cup of chocolate or chocolate chips you use. This helps thin out the chocolate for a thin cake pop coating, without seizing the chocolate. Your chocolate may seize, or separate, from adding water or from overheating.
I’ve had good results tempering chocolate in a microwave, and it doesn’t require a candy thermometer. Simply place ½ cup of finely chopped chocolate and ½ teaspoon coconut oil in a microwave-safe bowl.
Microwave at 50% power for one minute, and stir. Continue to microwave at 50% power in 30 second intervals, stirring frequently, until melted.
You want to stir the last bits of unmelted chocolate in to make it smooth. If you try to fully melt it in the microwave, you run a high risk of your chocolate seizing. This shortcut for tempering chocolate is riskier than stovetop tempering.
🍡 Cake Popsicles Mold
I recommend using a silicone mold to make cakesicles. Here are the silicone cakesicle molds that I use. These cake pop molds come complete with cakesicle sticks, which are simply short popsicle sticks.
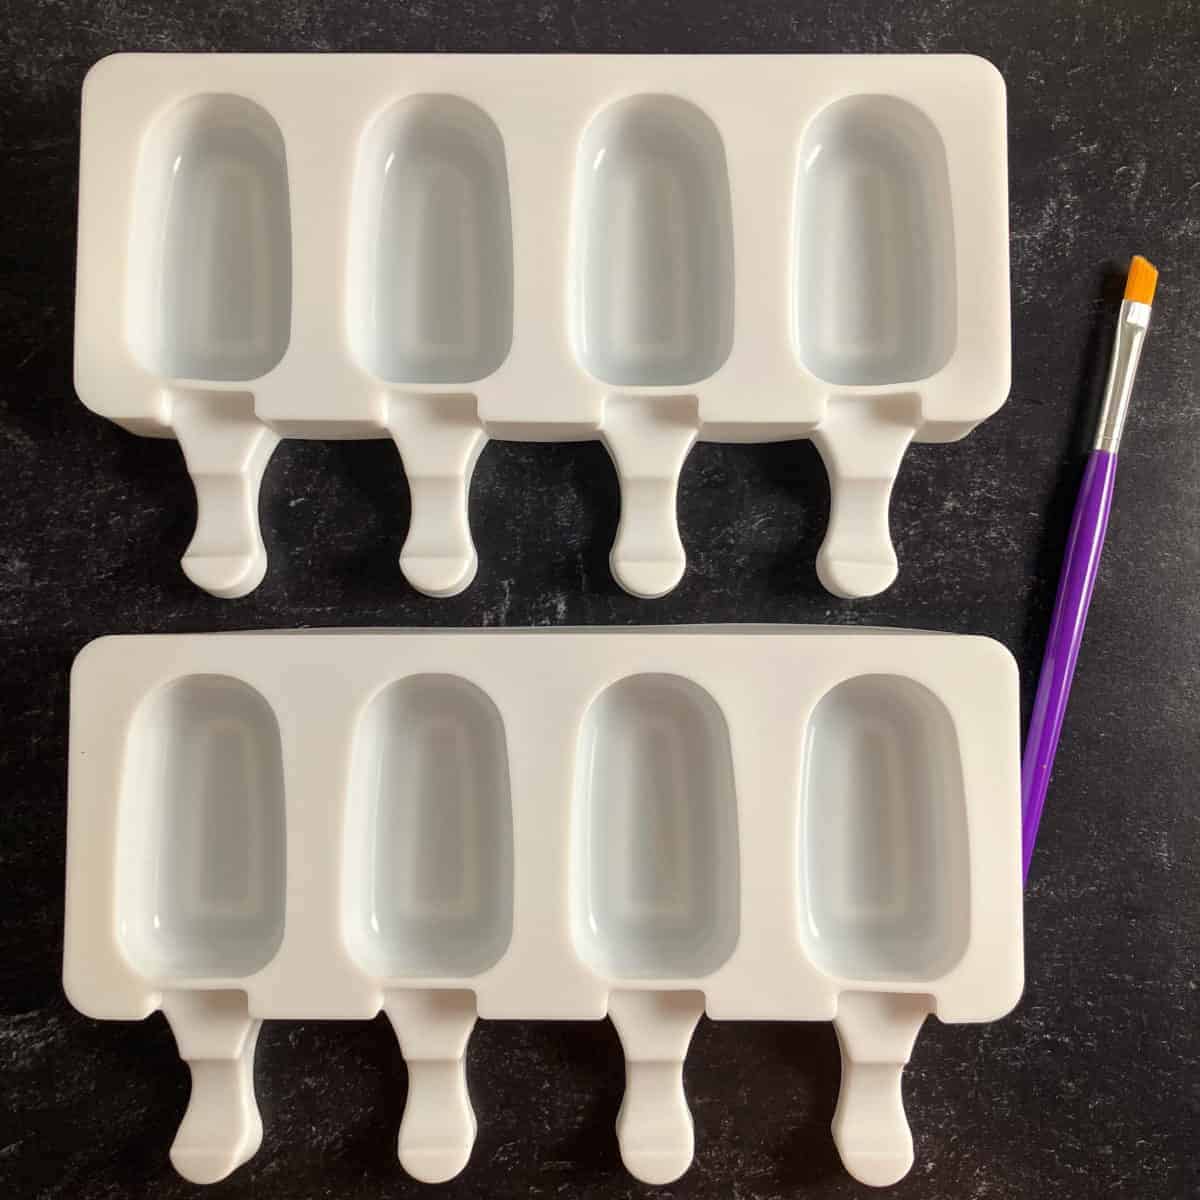
You could also use lollipop sticks for cakesicles. However, since cakesicles are larger than traditional cake pops, you may prefer using popsicle sticks.
Something important to note is that most molds for cakesicles DO NOT go in the oven. You make a cakesicle dough with cooked cake and frosting, and then fill the moulds. You may also be able to use cake popsicle molds for ice cream, since they are freezer safe.
🔪 How to Make Cakesicles
Cake Popsicle Dough Instructions:
- Crumble an 8x8-inch (20x20 cm) cake into a large bowl using clean hands. (Make sure to cool the cake first!)
- Mix ⅓ cup frosting into the cake crumbs (yes, this step is messy). Add an additional 1-3 tablespoons of frosting if needed to get a cohesive ball of dough. You may need to add more frosting depending on the cake you use. Put your cake popsicle dough in the fridge.
How to Make Cake Popsicles:
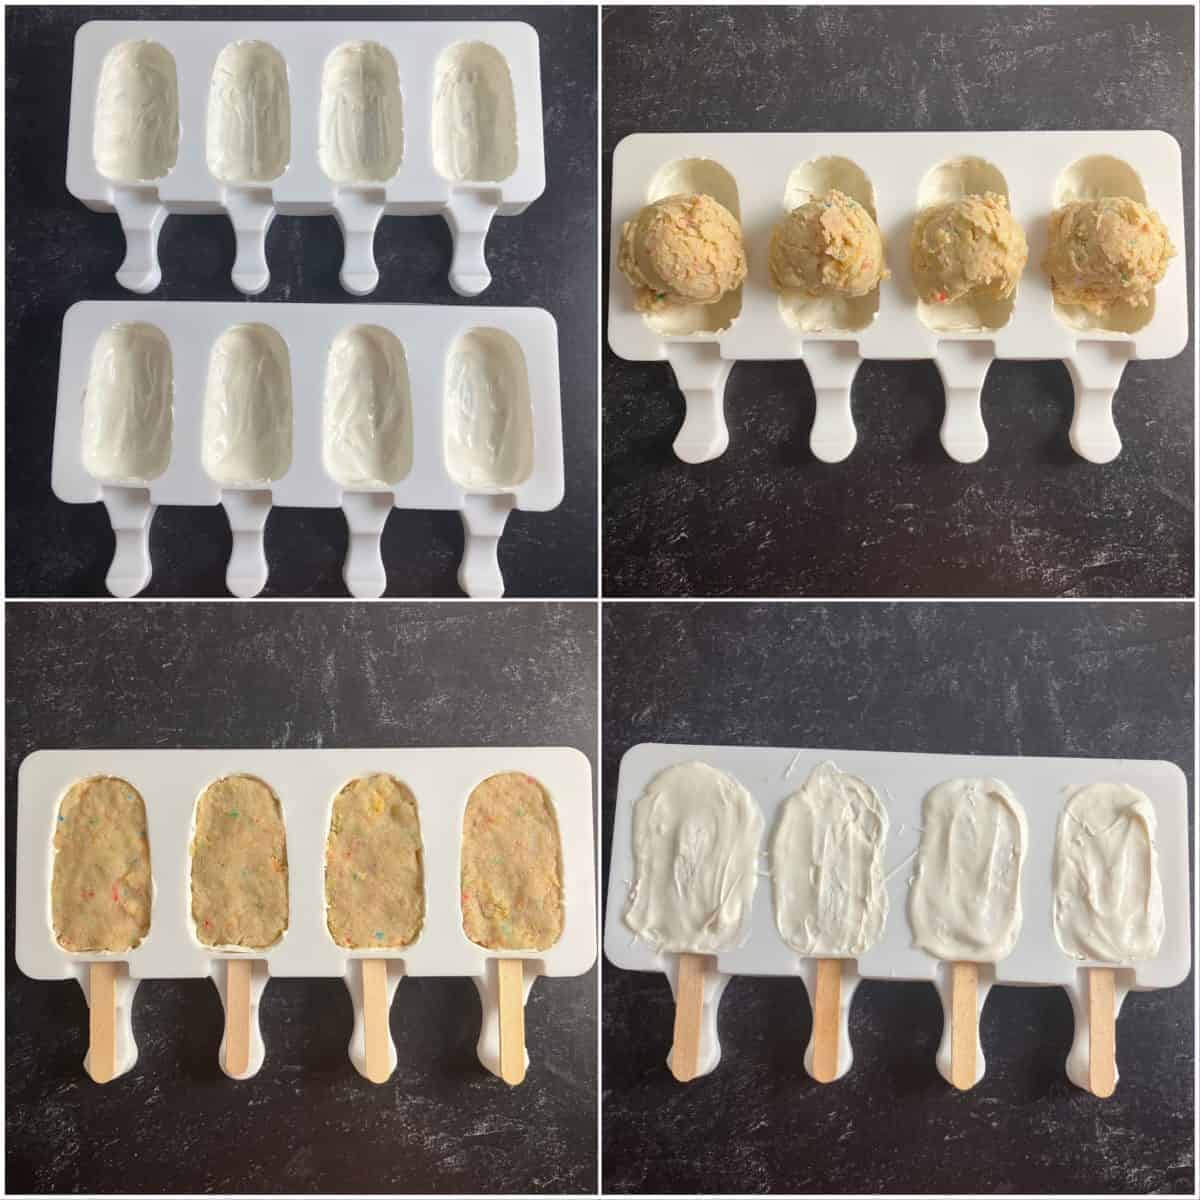
- Melt ½ cup candy melts (following the directions above). Use a food-safe brush to brush a thin chocolate layer into the 8 cake pop mold compartments. Make sure to brush the chocolate up the sides of each cavity to completely coat it. Each compartment uses about 1 tablespoon of candy melts.
- It doesn’t matter if the coating doesn’t look perfectly smooth, as the side facing you is the inside of the cakesicle.
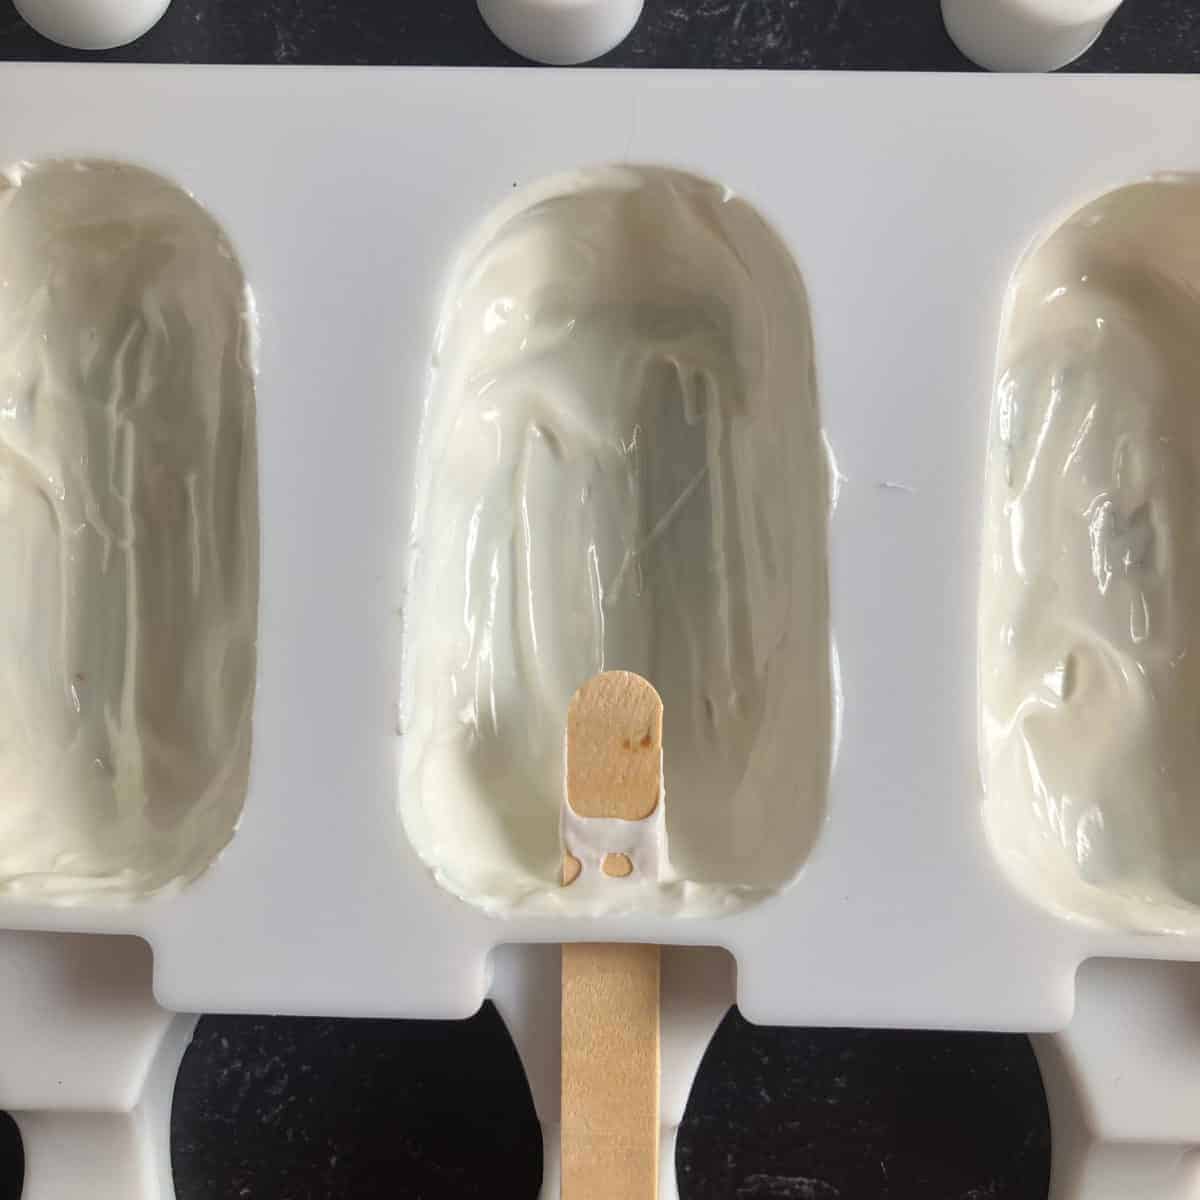
- Push a popsicle stick through the pop mold hole to ensure it stays open. Then remove the stick.
- Freeze the coated pop molds for 10 minutes, to firm the chocolate shell up completely. Then move the cakesicles molds to the fridge until you are ready to fill them.
- Press 1.5-2 tablespoons of cake popsicle dough into each shell. I used a small cookie scoop to measure the dough. You want to completely fill each mold (no air bubbles!), leaving room at the top for more melted chocolate.
- Push the popsicle sticks into the cake pops. Try to be gentle, but if the candy shells break, no worries, as you’re adding more chocolate shortly.
- Melt another ½ cup of candy melts. Use about 1 tablespoon to completely cover the cake pops. Use a spoon or small spatula to smooth the melts out. (Don’t worry too much about perfection- these are the backs of the pops.) You can trim the excess chocolate later using a sharp knife.
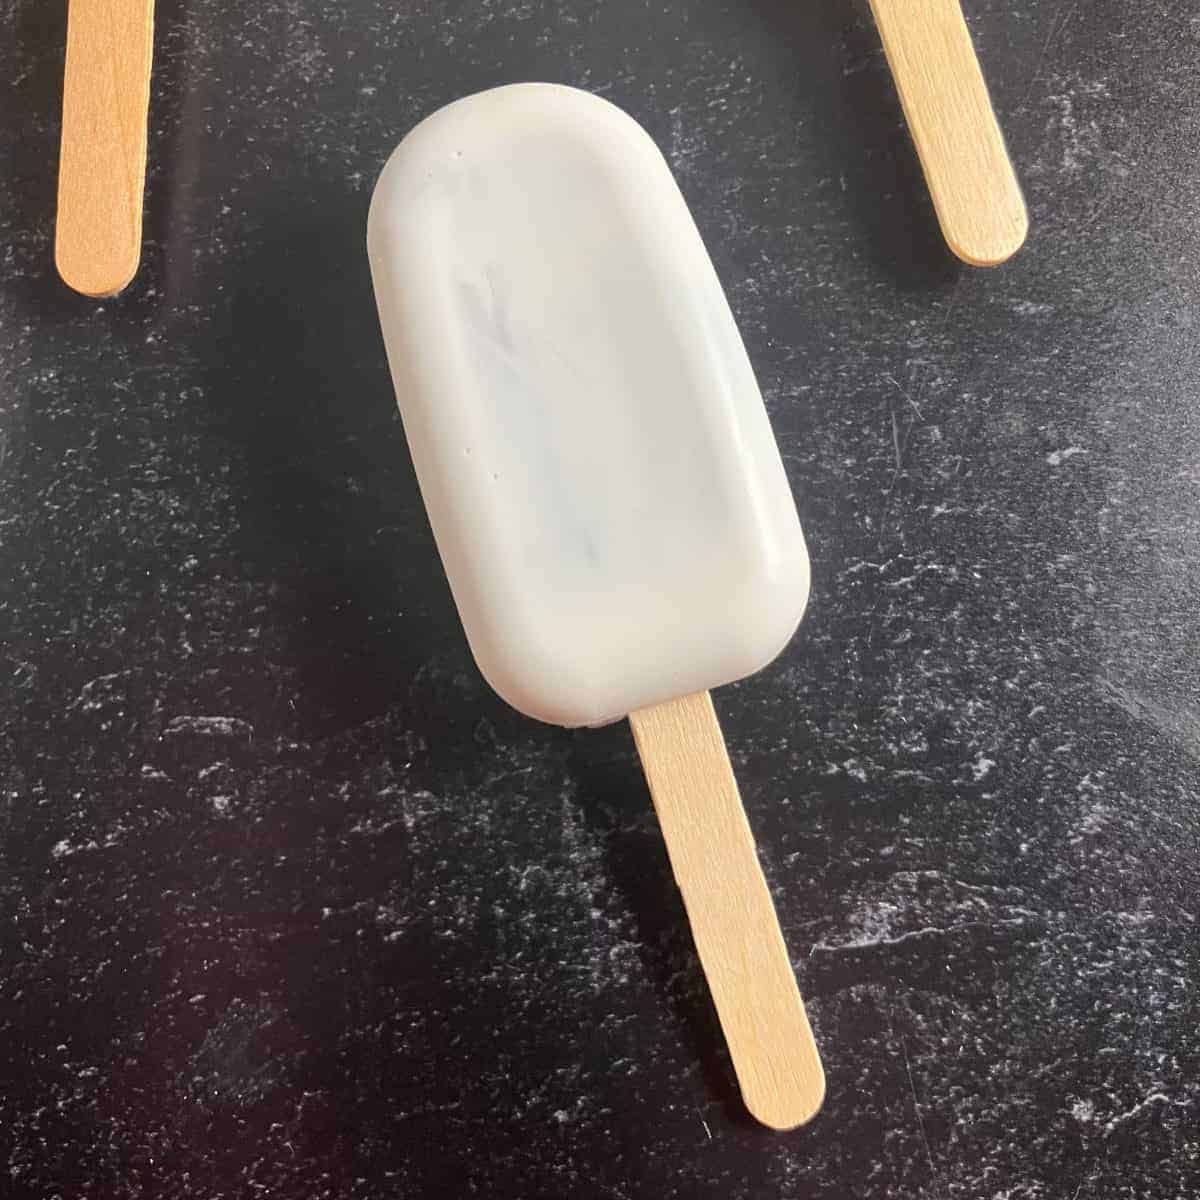
- Freeze the cakesicles for 10 minutes to firm up the melted chocolate, then *carefully* pop the pops out of the molds.
- Store the cakesicles in the fridge until you’re ready to decorate them.
- Repeat the steps above until all of your cakesicle dough is used. You should yield 16-19 cake popsicles.
How do I stop my cake pops from cracking?
One way to stop cake popsicles from cracking is to ensure the chocolate shell and cake pop dough are cold. The dough should be chilled and the cake pop shells cool and firm before filling.
Another issue that can cause cracking is that the candy coating was too thick. Try to brush the candy melts on as thin as possible, without leaving uncovered areas in the mold. Candy melts tend to make a thinner shell than real chocolate shells.
If you’re making chocolate cakesicles (with chocolate cake inside), you may need a thicker shell if you use white candy melts. Otherwise, the cake may peek through the shell. If you’re having trouble getting adequate coverage while avoiding cracking, consider using a different color combo of cake and melts.
Why are my cakesicles sweating?
Cake pops sweating, or condensation forming on cakesicles, happens with quick changes in temperature. Moving cakesicles from the fridge to a warm room can cause cake pops to sweat. You may also see condensation on the coating of cakesicles when moving them from freezer to fridge.
Why did my cake pops fall off the stick?
Adding too much or too little frosting can cause a cake pop to fall off the stick. An issue that can make cake pop coatings fall off the stick is brushing them on too thickly.
What do you dip cakesicles in?
Cakesicles are not typically dipped (unless you use the no mold cakesicles directions in the FAQs). All cake popsicles are commonly coated with either melted candy melts or tempered chocolate.
⏲️ Should cakesicles be refrigerated?
Can you leave cake pops out overnight? No! Cakesicles that have been left out at room temperature overnight should be discarded to reduce the risk of food poisoning.
Cakesicles are a perishable item that should not be left at room temperature for more than 1-2 hours. After this time, cake popsicles should be stored in the refrigerator.
How long can you store cakesicles?
Like most perishable cooked foods, you can keep cakesicles in the refrigerator for up to 3-4 days. After this time, though the cake pops may not be moldy, the risk of foodborne illness increases (source: Consumer Reports).
In a pinch, you can wrap cake popsicles individually in plastic wrap and keep them in a freezer bag in the freezer with the air pressed out. To thaw, unwrap the cakesicles and place on a plate in the fridge. The cake popsicles may sweat a bit while defrosting, so I don’t recommend doing this for catering or parties.
However, if you have a small family and lots of leftover cake pops, freezing can keep them out of the trash.
🧁 Cakesicles Filling Ideas
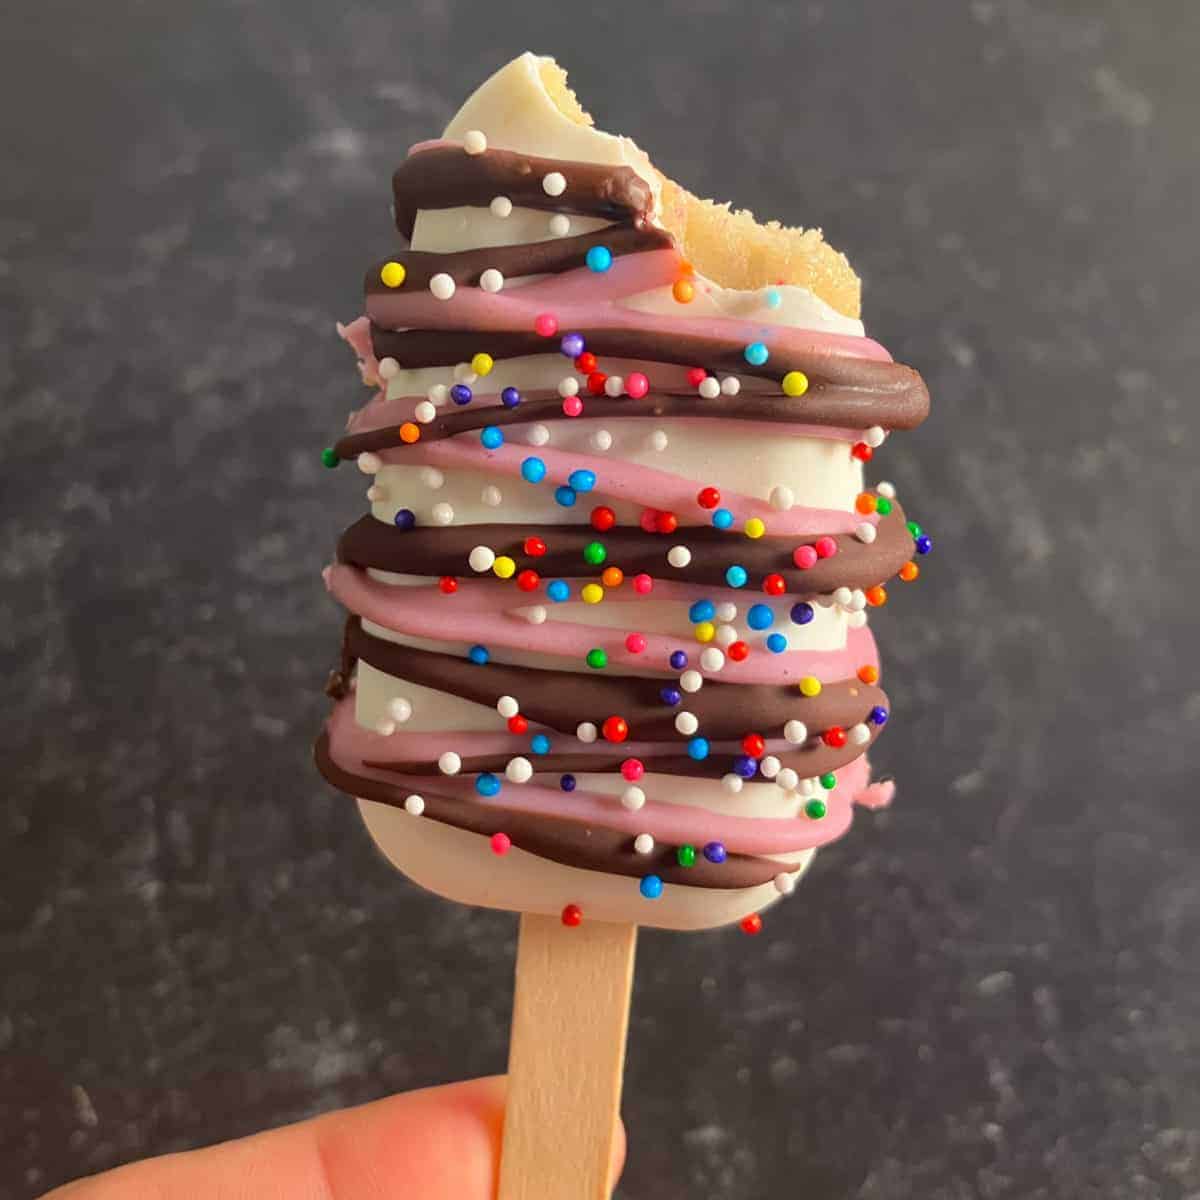
The cakesicles flavors you can make are only limited by your imagination! I made funfetti cake popsicles. Here are some other cake popsicle filling ideas:
- Chocolate cake
- Yellow cake
- White cake (or vanilla cake)
- Strawberry cake
- Spice cake
- Carrot cake (try mixing with cream cheese frosting)
- Lemon cake
- Coconut cake
- Butter pecan cake
- Orange cake
- Butter cake is a possibility, but the results may be too greasy
You could also use your favorite homemade cake flavor. Another option to experiment with is using canned pumpkin in place of the applesauce when making boxed spice cake mix. Pumpkin spice cake pops would be perfect for fall!
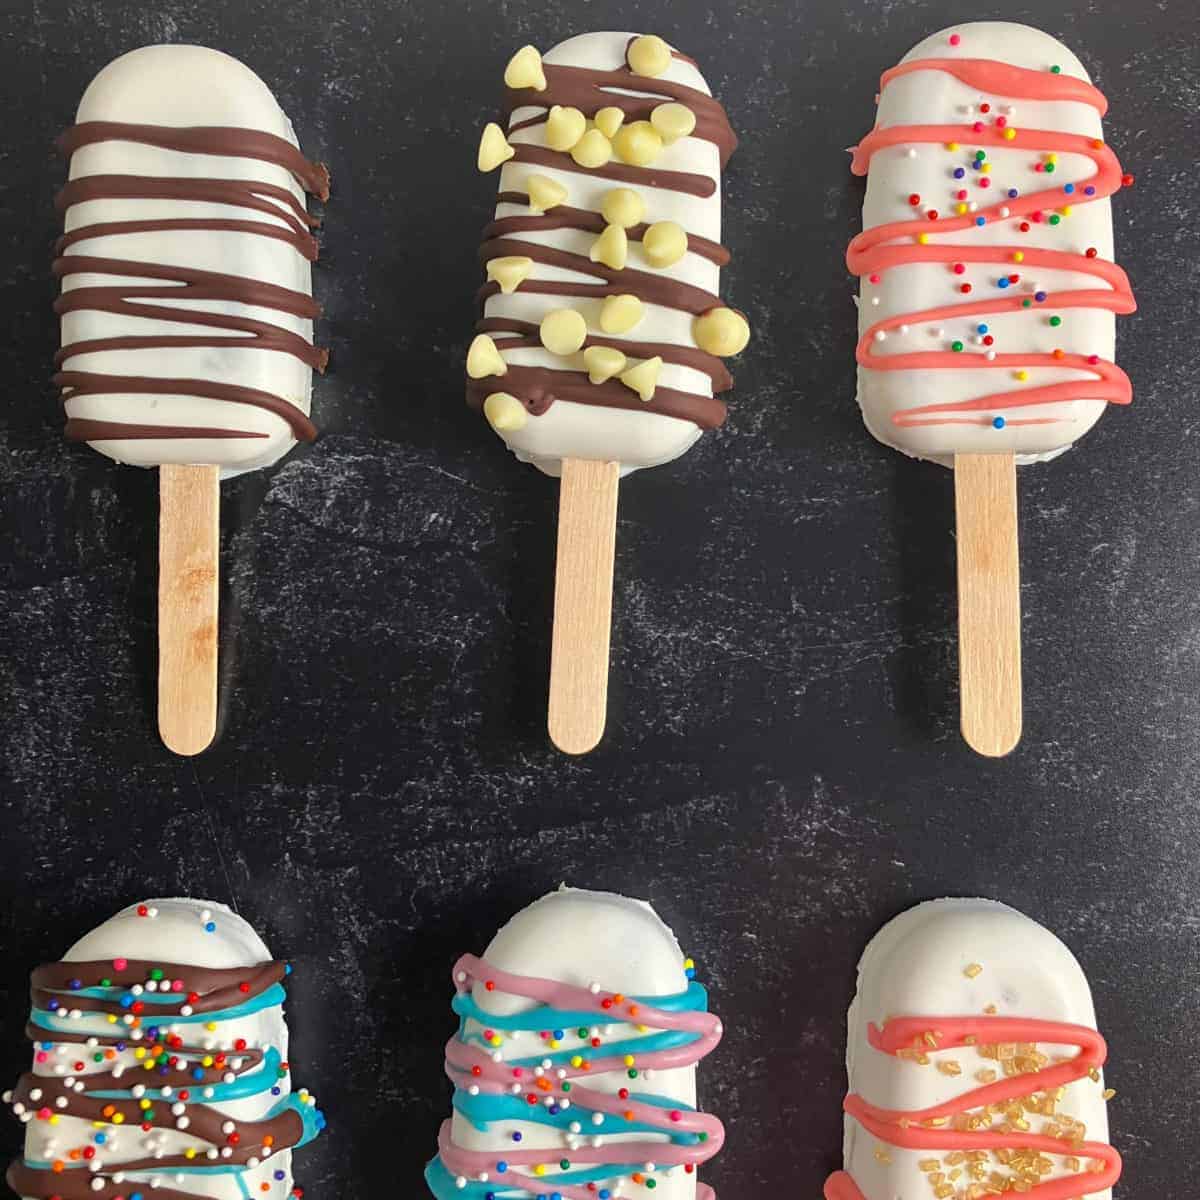
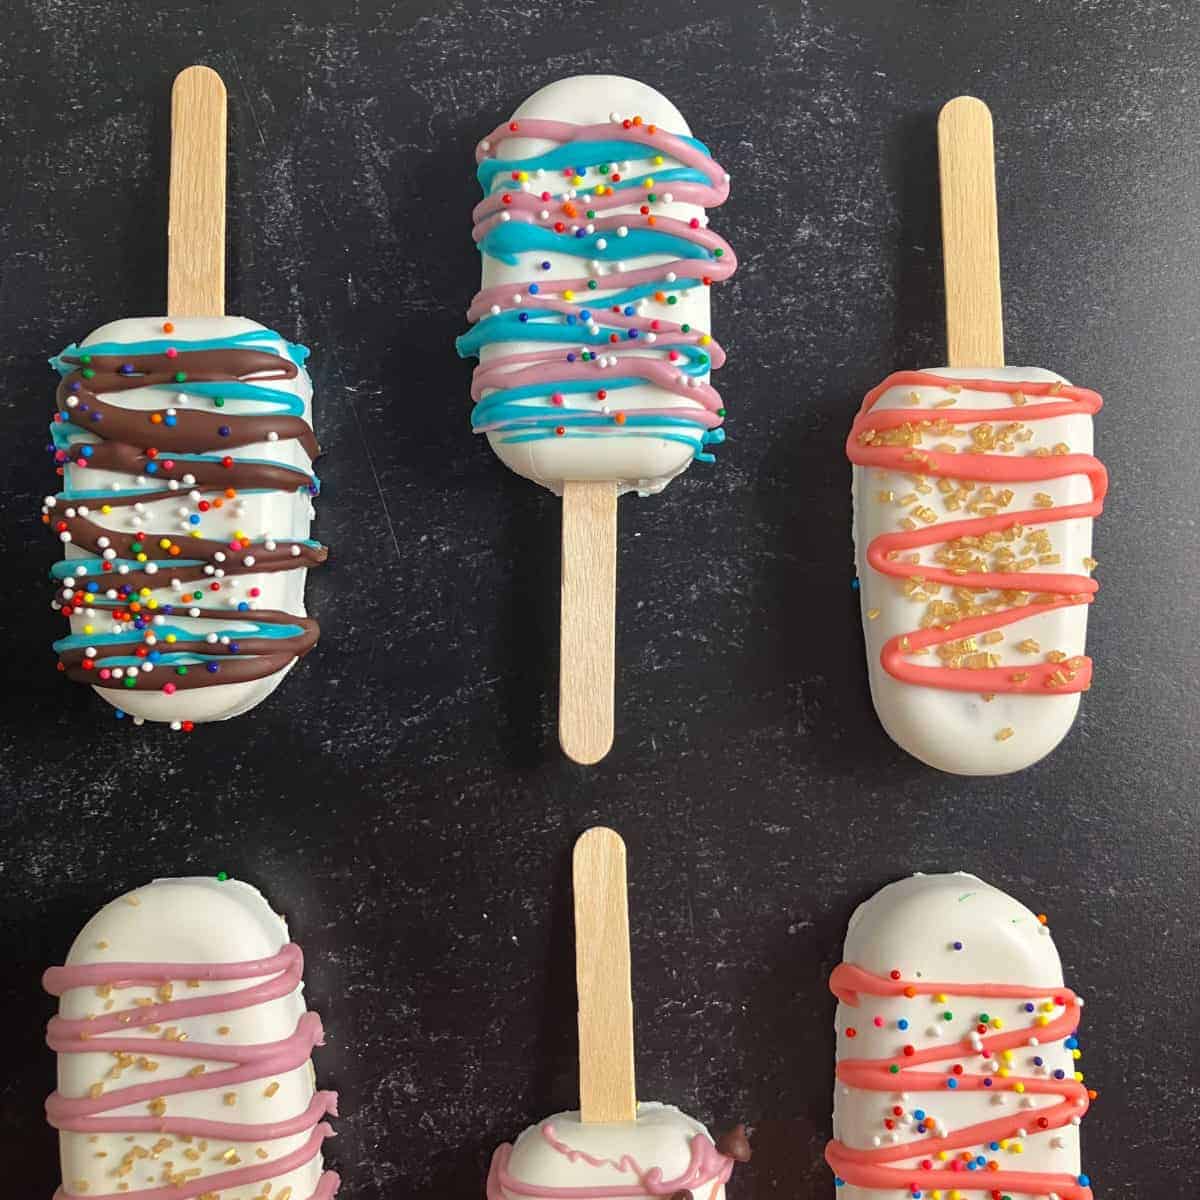
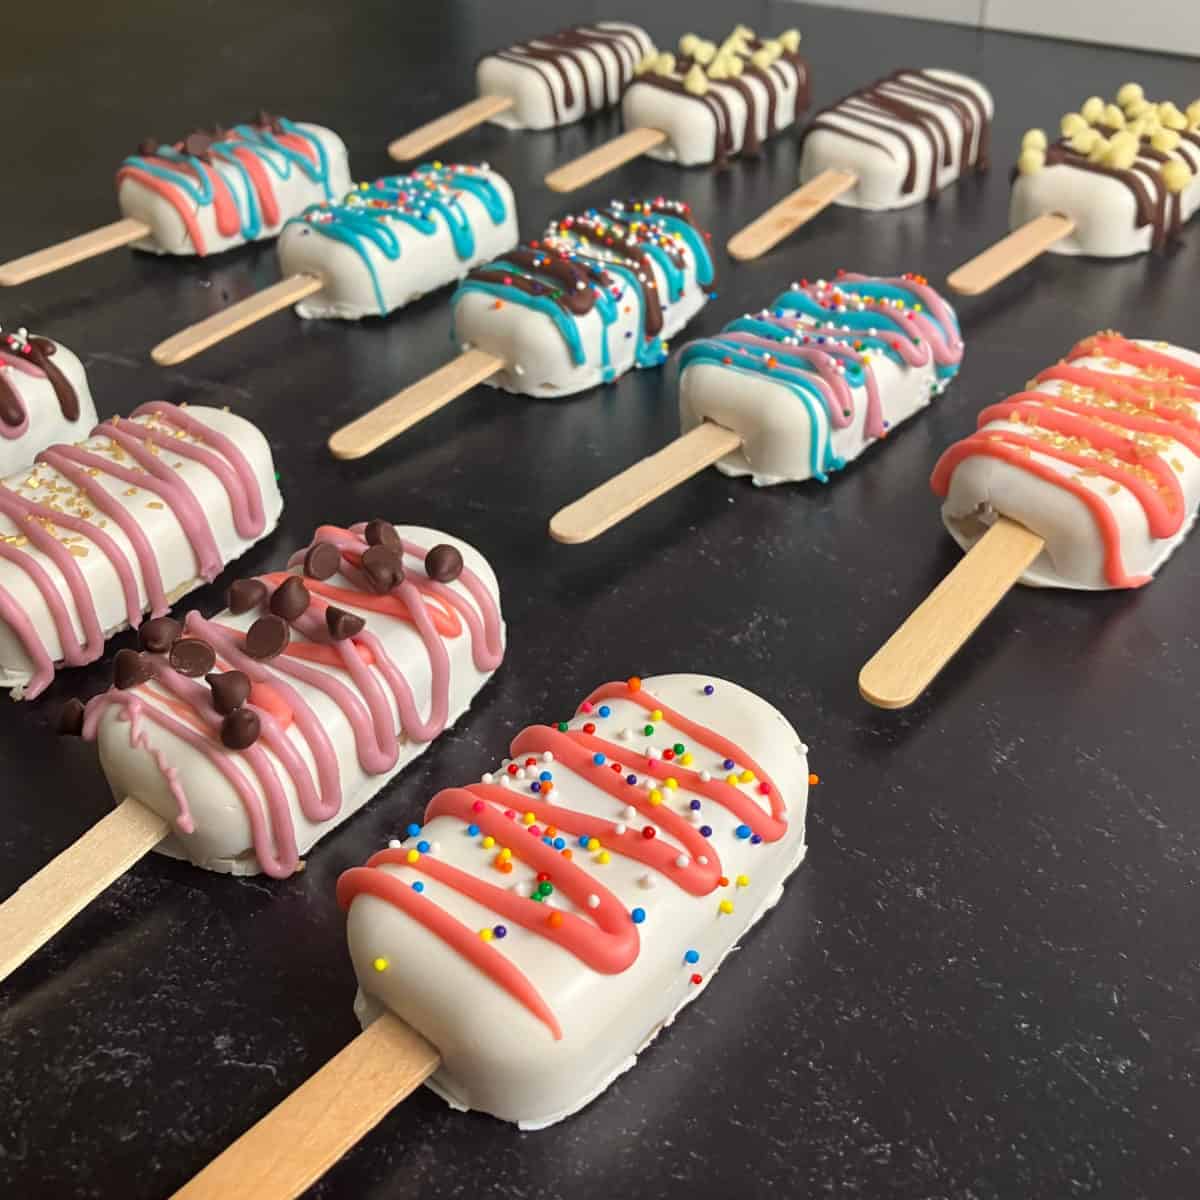
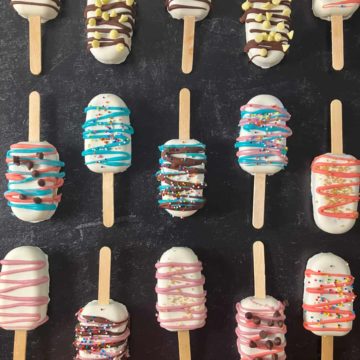
🎂 Cakesicles Designs
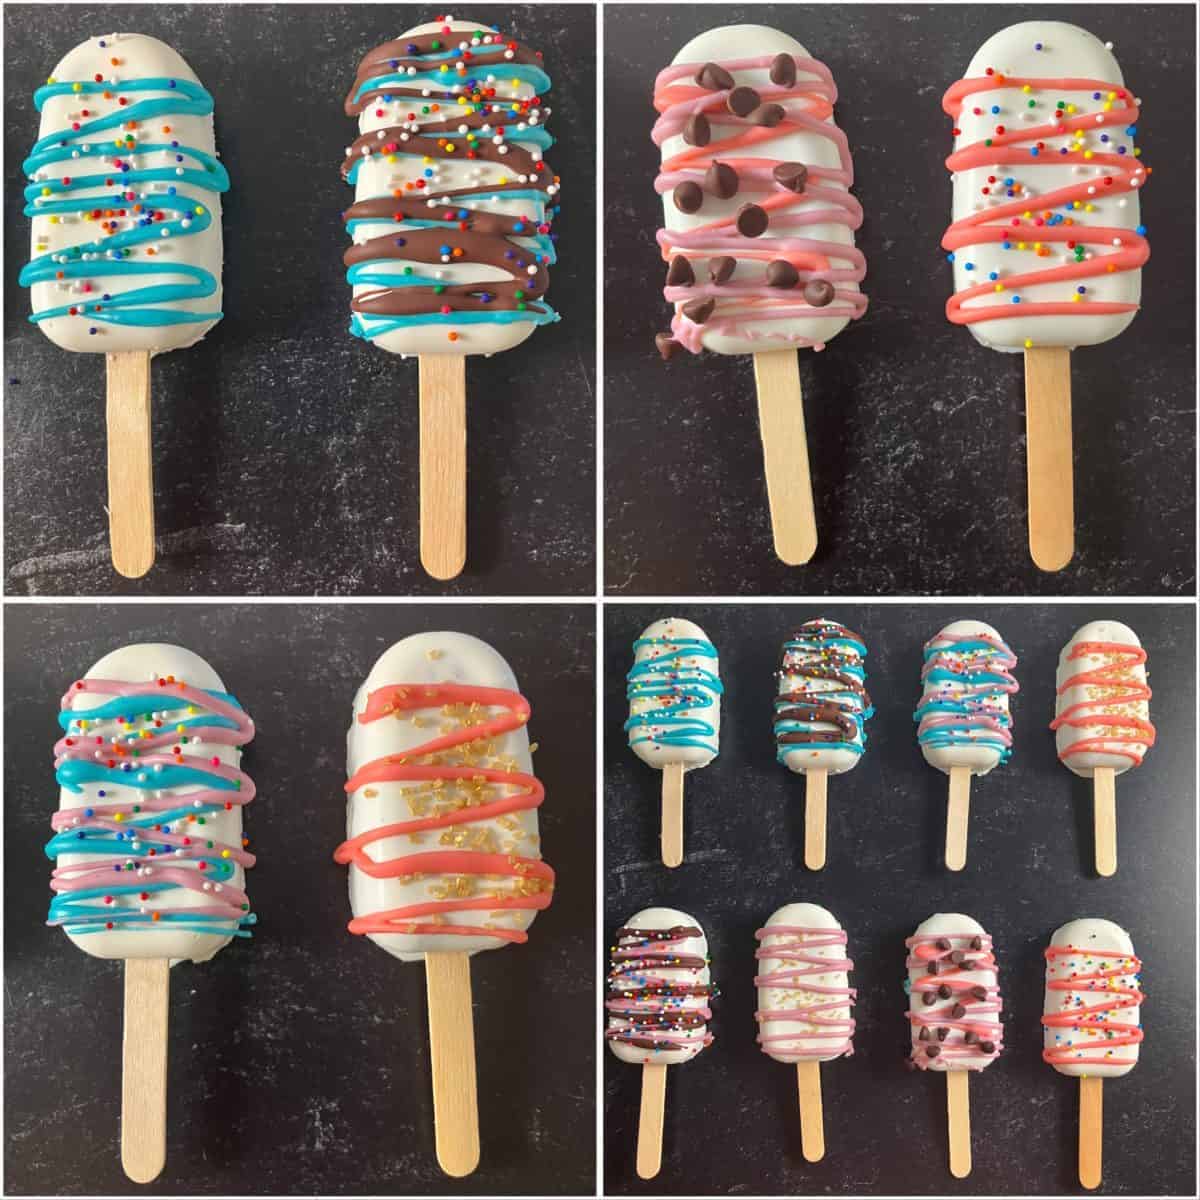
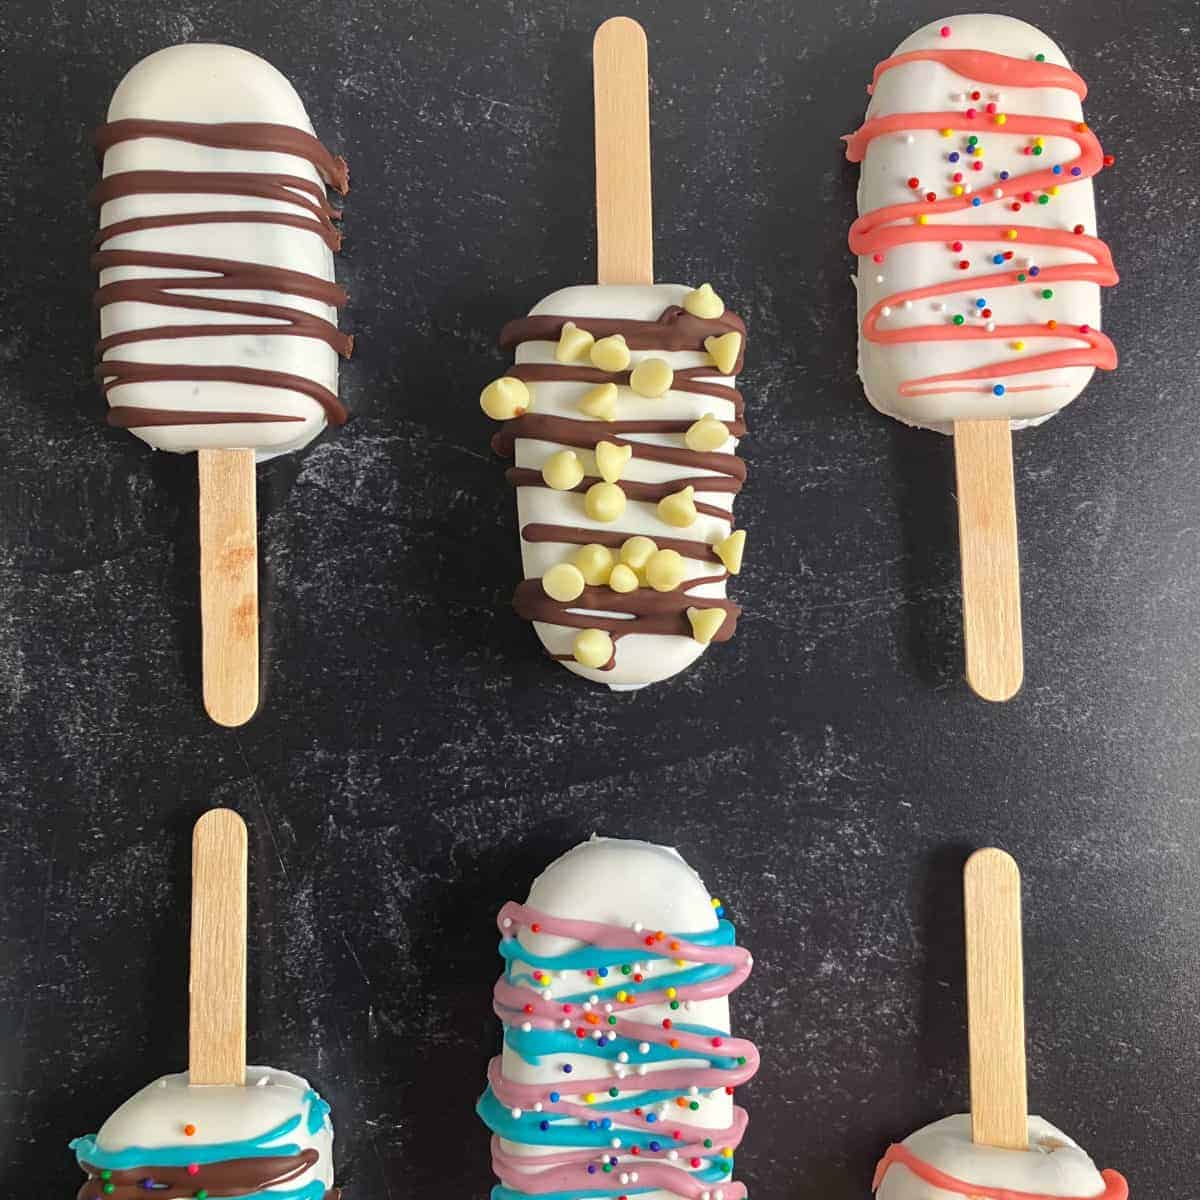
After making cake pops, you can decorate them in a variety of ways. Try melting more candy melts and coloring them with various food coloring to make a drizzle.
Gel food coloring gives especially vibrant colors. Alternatively, grind freeze-dried fruits into a powder for natural food coloring. You could also use melted white chocolate, dark chocolate, or milk chocolate chips.
After melting the chocolate, I put it in a small plastic baggie, and snipped a corner of the bag. The snipped baggie can then be used as a makeshift piping set to drizzle chocolate on the cake popsicles. You could also use the Wilton drizzling spoon.
While the drizzle is still wet, you can then add sprinkles (AKA jimmies), decorating sugar, or mini chocolate chips. Some also decorate cake pops with jam or royal icing. After decorating, let the drizzled cakesicles set in the fridge before serving.
You can display cake pops on a serving platter or stick them in a styrofoam block. I prefer to serve cakesicles flat, so the nicely decorated side faces up.
📋Cakesicles Calories
One cakesicle has 194 calories, 30.3 grams net carbs, and 2.4 grams protein. This is for 1/19 of the recipe made with funfetti cake mix using applesauce in place of oil, and vanilla frosting. The nutrition information for your cake popsicles will depend on the specific ingredients you use.
FAQs
What is the average cakesicles price?
How much do cakesicles cost near me? You can get a cake pop at Starbucks for $1.95, and I’ve seen cakesicles sold online for $4-7 per piece. The cost of cake popsicles may vary by location.
How many cake pops does a box of cake make?
I can yield 32-38 cake popsicles per box of cake mix. Cake pops (the round ones) contain about half the dough of a cakesicle. Thus, you can yield up to 64-76 small cake pops per box of cake. Larger cake pops require more mix.
How to make vegan cakesicles?
To make cakesicles vegan, use your favorite vegan cake mix, vegan frosting, and vegan chocolate. When making the cake, you’ll need to use an egg substitute, such as flax gel “eggs.” These swaps also make cakesicles eggless and dairy free.
Does a cake pop maker work?
Cake pop makers bake the cake batter into a ball shape. Your cake pops will have a different consistency than those with a dough made of crumbled cake mixed with frosting. If this isn’t a problem for you, using a cake pop maker may be a good option.
How to make cakesicles without mold?
You can make cake popsicles without a mold, but the results may not have a professional look. Tightly pack cake pop dough into a popsicle shape on the sticks. Then hand dip each cake pop in melted candy melts, and allow to set before decorating.
Should cake pops be cold before dipping?
Cake pops made without a mold should be chilled before dipping. You need the cake pop dough to be cold and firm before dipping in warm melted chocolate. Otherwise, they may not hold their shape well.
👨🏾🍳 More Dessert Recipes
Is it time for dessert? If so, you need these recipes for desserts in your life:
📖 Recipe Card
Watch How to Make It!
Cakesicles Cake Pops (Cake Popsicles Recipe)
Ingredients
- 1 8x8-inch baked cake (20.3x20.3cm) I used half a box of cake mix made with applesauce instead of oil
- ⅓ cup frosting (plus more as needed)
- 3 cups candy melts (plus more for decorating)
- cakesicle toppings optional; sprinkles, mini chocolate chips, sanding sugar, etc.
Instructions
How to make cakesicle filling:
- Crumble the cake into a large bowl using clean hands. (Make sure to cool the cake first!)
- Mix ⅓ cup frosting into the cake crumbs (yes, this step is messy). Add an additional 1-3 tablespoons of frosting if needed to get a cohesive ball of dough. You may need to add more frosting depending on the cake you use. Put your cake popsicle filling in the fridge.
How to make cakesicles:
- Melt ½ cup candy melts using the directions on the packaging or in the article above. Use a food-safe brush to brush a thin chocolate layer into the 8 cake pop mold compartments. Make sure to brush the chocolate up the sides of each cavity to completely coat it. Each compartment uses about 1 tablespoon of candy melts.
- It doesn’t matter if the coating doesn’t look perfectly smooth, as the side facing you is the inside of the cakesicle.
- Push a popsicle stick through the pop mold hole to ensure it stays open. Then remove the stick.
- Freeze the coated pop molds for 10 minutes, to firm the chocolate shell up completely. Then move the cakesicles molds to the fridge until you are ready to fill them.
- Press 1½-2 tablespoons of cake popsicle dough into each shell. I used a small cookie scoop to measure the dough. You want to completely fill each mold (no air bubbles!), leaving room at the top for more melted chocolate.
- Push the popsicle sticks into the cake pops. Try to be gentle, but if the candy shells break, no worries, as you’re adding more chocolate shortly.
- Melt another ½ cup of candy melts. Use about 1 tablespoon to completely cover the cake pops. Use a spoon or small spatula to smooth the melts out. (Don’t worry too much about perfection- these are the backs of the pops.) You can trim the excess chocolate later using a sharp knife.
- Freeze the cakesicles for 10 minutes to set the melted chocolate, then carefully pop the pops out of the molds. Store the cakesicles in the fridge until you’re ready to decorate them.
- Repeat the steps above until all of your cakesicle dough is used. You should yield 16-19 cake popsicles.
- Decorate cake popsicles by drizzling on colored melted candy melts and topping with sprinkles and mini chocolate chips. Allow the cakesicle decorations to set in the fridge, and enjoy!
Equipment
Notes
💭 Expert Tips from Dietitian Summer Yule
This is a level 3 recipe (weight maintenance and active lifestyles). Most are aware that cake and cake-like desserts are not the best choices for weight loss. But do you know why? Sure, cake is filled with delicious things like added sugar, white flour, and added oil. These are generally not considered “healthy” foods. However, it’s possible to lose weight on “unhealthy” diets and gain on “healthy” diets. The real deal is that you must maintain a calorie deficit to lose weight. And cake, frosting, and chocolate all pack a ton of calories into a tiny amount of food. If you are trying to eat at a calorie deficit for weight loss, you may end up very hungry at the end of the day if you include a few cake pops. Even if you aren’t a volume eater, the high carb, high fat, low protein macro combo in cake isn’t very filling. Keto and low carb diets cut foods like cake, cookies, pastries, etc. out. Though the person on the diet is focusing on macros, calories are often reduced as well, potentially leading to weight loss. Something good about this recipe is that it includes some portion control and you can freeze leftovers with okay results. If you bring these to a party, they’ll likely disappear fast! A plate of beautifully presented cakesicles is a special occasion treat that’s best shared. Nutrition information is for one serving of the recipe made with funfetti cake mix using applesauce in place of oil, and vanilla frosting. The nutrition information for your cake popsicles will depend on the specific ingredients you use.
nutrition info disclaimer
All recipes on this website may or may not be appropriate for you, depending on your medical needs and personal preferences. Consult with a registered dietitian or your physician if you need help determining the dietary pattern that may be best for you.
The nutrition information is an estimate provided as a courtesy. It will differ depending on the specific brands and ingredients that you use. Calorie information on food labels may be inaccurate, so please don't sweat the numbers too much.
"To taste" means to your preferences, which may have to be visual to follow food safety rules. Please don't eat undercooked food x
Nutrition
Join our community! Subscribe for all of the latest and greatest recipes, and follow me on Facebook, Pinterest, Instagram, and YouTube!

Hello! I'm Summer, a registered dietitian and home chef who loves to cook, eat, and create high quality content for you! Every recipe on this site has been tested by me to help ensure your success in the kitchen. All eaters are welcome here 🙂
Comments
No Comments