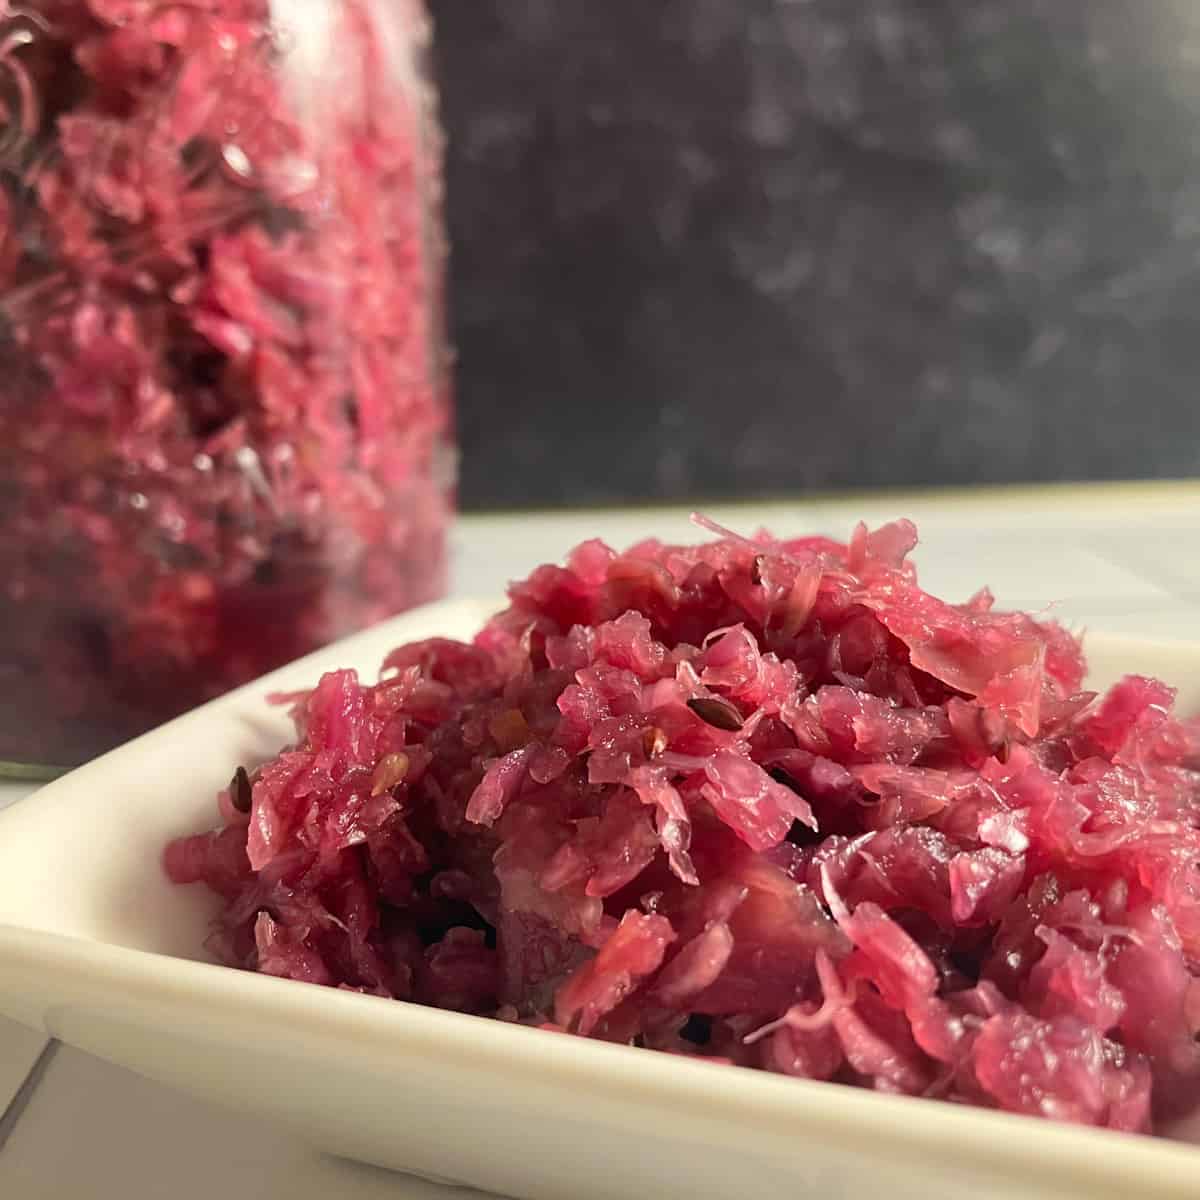
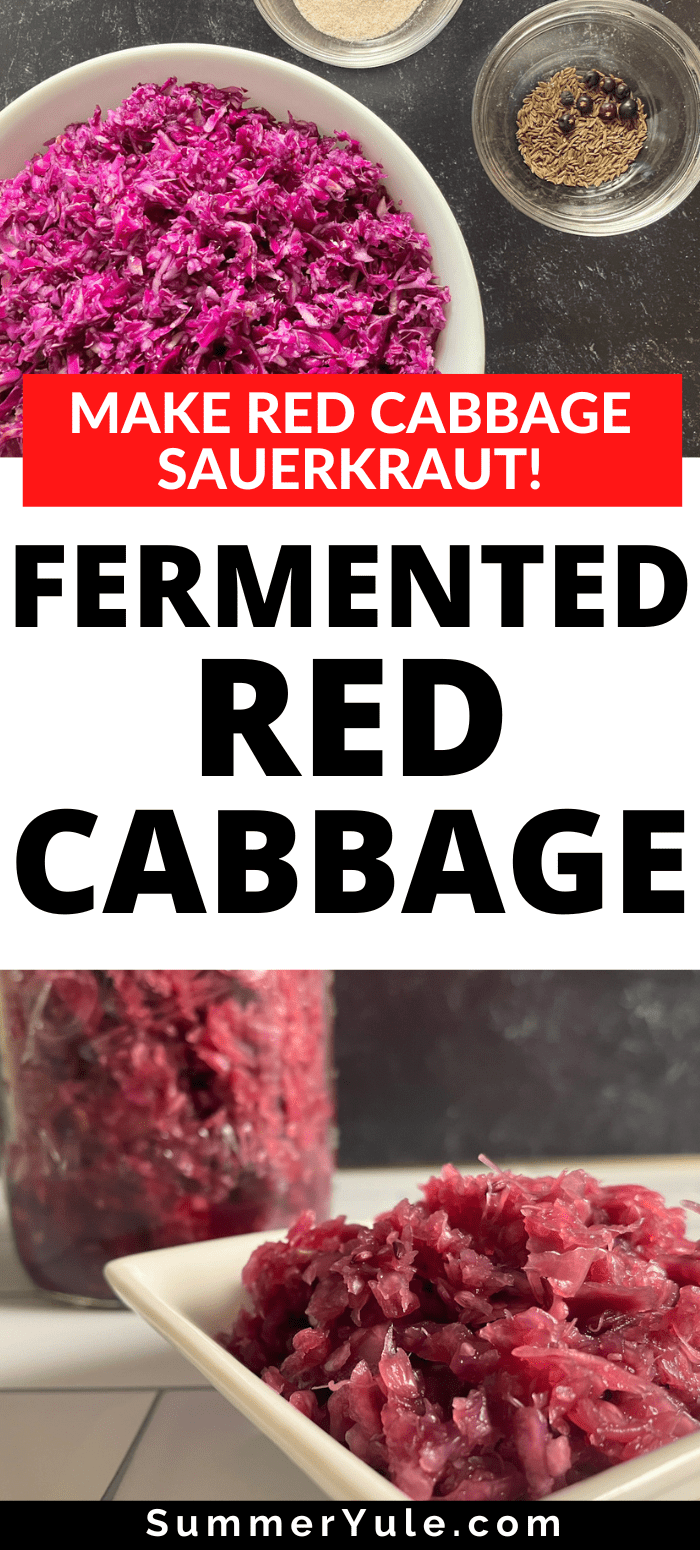
Can you make sauerkraut with red cabbage? Yes! Making this fermented red cabbage recipe is not too difficult and can save you money. You can make this vibrant red cabbage sauerkraut at home with just cabbage and salt; no starter culture is needed! Also, I’m going to share the secret sauerkraut-making trick that will help tell you if you have a successful batch!
Want to save this post?
Enter your email below and we'll send it straight to your inbox. Plus you'll get great new recipes from us every week!
I have a long, unsuccessful history with sauerkraut making. My first attempt at making a fermented red cabbage recipe was for a microbiology class at Cornell University back in the late 1990s. It was a total flop.
My group chopped the cabbage into large pieces instead of shredding or grating it. Our second error was not pounding the cabbage shreds long enough to release the water needed to create sufficient brine. I remember the professor expressing disappointment that we did not invest enough time in this project.
So, my first takeaway is that fermenting red cabbage is a slow food process. You need to be willing to put in the time on this one.
I had different issues with a more recent (but also failed) batch. With this batch, I DID take the time to grate the cabbage finely. And then I pounded the heck out of the salty cabbage with a mallet and tightly packed it into a jar.
I could see that I had plenty of brine with this one. And yet, when I checked on the jar a few weeks later, it was riddled with mold.
When I opened the jar, my poor family could smell the failed fermented red cabbage recipe from another room. What I created was definitely not fit for human consumption. So, what went wrong?
Table of Contents
- How to Make Red Cabbage Sauerkraut
- Fermented Red Cabbage Recipe Tips
- Sauerkraut-Making Tips for Beginners
- Best Cabbage Variety for Sauerkraut
- How to Make Red Cabbage Sauerkraut in a Crock
- What do you eat with fermented red cabbage?
- Red Cabbage Sauerkraut Storage
- How many calories in sauerkraut?
- Red Cabbage Kraut Nutrition
- Recipe FAQs
- 👨🏾🍳 Red Cabbage Sauerkraut Recipes
- 👨🍳 More Ferments and Pickles
- 📖 Recipe Card
- 💭 Expert Tips from Dietitian Summer Yule
- 💬 Comments
How to Make Red Cabbage Sauerkraut
Before I get to what went wrong, I want to mention the things I did right with my last failed batch. First, I thoroughly cleaned and sanitized my equipment in the dishwasher beforehand. Since this ferment is not occurring in an anaerobic environment nor being canned, I did not sterilize the equipment (source).
Red Cabbage Sauerkraut Salt Ratio
Another thing I did right was using the USDA’s recommended amount of salt for sauerkraut. They advise using three tablespoons per five pounds of cabbage (source).
Can you make sauerkraut low sodium?
No, don’t try to make this recipe lower in sodium. You can wind up with unwanted bacterial growth when you skimp on the salt.
A potential issue with using a volume measurement for salt is that you could end up short if you use a coarser salt grain. A smarter way to go about things is to weigh both the salt and the cabbage. In this case, I’ve been advised to use salt in the amount of 2% of the weight of cabbage.
The USDA recommends using a canning or pickling salt. It’s also OK to use a fine grain sea salt or kosher salt, as I did. They advise that you do not use iodized salt not because it will alter the salt to cabbage ratio, but because it can discolor the ferment (source).
One more thing I did correctly was using a food-safe container for my ferment, in this case, a glass canning jar. I love sauerkraut dearly, but making a ginormous batch in a garbage bag or a clean garbage can is a bad idea. The USDA recommends not trying to ferment foods in metal containers, other than those that are stainless steel.
Fermented Red Cabbage Recipe Tips
The biggest mistake I made in my failed batch of sauerkraut was not investing in a few key items upfront. I tried to save money by using free (or almost free) alternatives and ended up having to throw out food as a result.
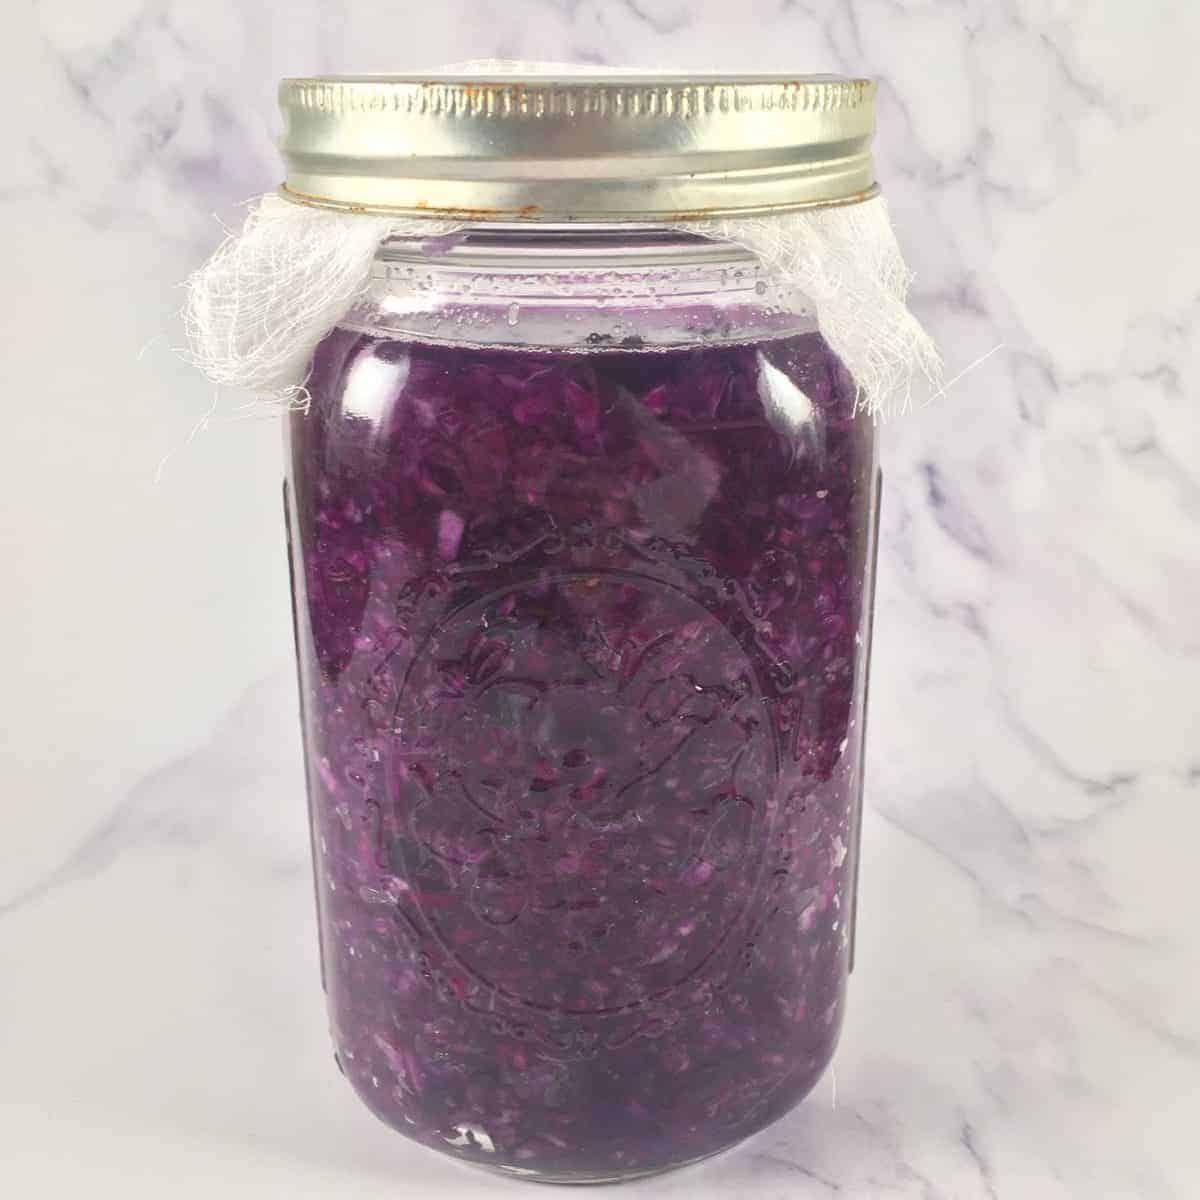
Some air needs to be able to get into the jar when you ferment red cabbage sauerkraut. However, you need to keep the jar covered in some way to help keep dust and mold out. Also, the cabbage needs to stay below the level of the brine while it ferments.
Initially, I weighed the shredded cabbage down with clean outer cabbage leaves and covered the jar with a cheesecloth. In our dry winter air, the brine was evaporating too quickly with this setup. As a result, I had to add more brine several times per week.
Frustrated, I read that you can fill a food-safe baggie with brine and use that as a weight. The baggie prevents more evaporation, so that (supposedly) you do not need to keep adding brine. The tutorial I found online said that you do not need to check on the ferment for weeks.
HUGE MISTAKE! This resulted in a dried out, horribly smelly jar of mold. Please do not try this at home!
It is important to check on your ferment daily and skim off any foam or “scum” forming on the brine. Another benefit is that you will quickly see whether you need to add more brine.
Sauerkraut-Making Tips for Beginners
Most sauerkraut tutorials online will not tell you what I am about to say. However, I’ve found the following two things have greatly helped in fermenting cabbage.
The first is to invest in a fermenting kit that (at minimum) contains glass jar weights and airlock fermentation lids. The jar weights keep the cabbage under the brine, both during the ferment and later in the fridge. Airlock fermentation lids help maintain the right amount of moisture and air in the jar while keeping dust out.
Your family is going to wonder what you are up to. The airlock lids give the appearance that some sort of weird science experiment is going on. Indeed, my first experience with fermenting was in a microbiology class, so I’d say that impression is right on target.
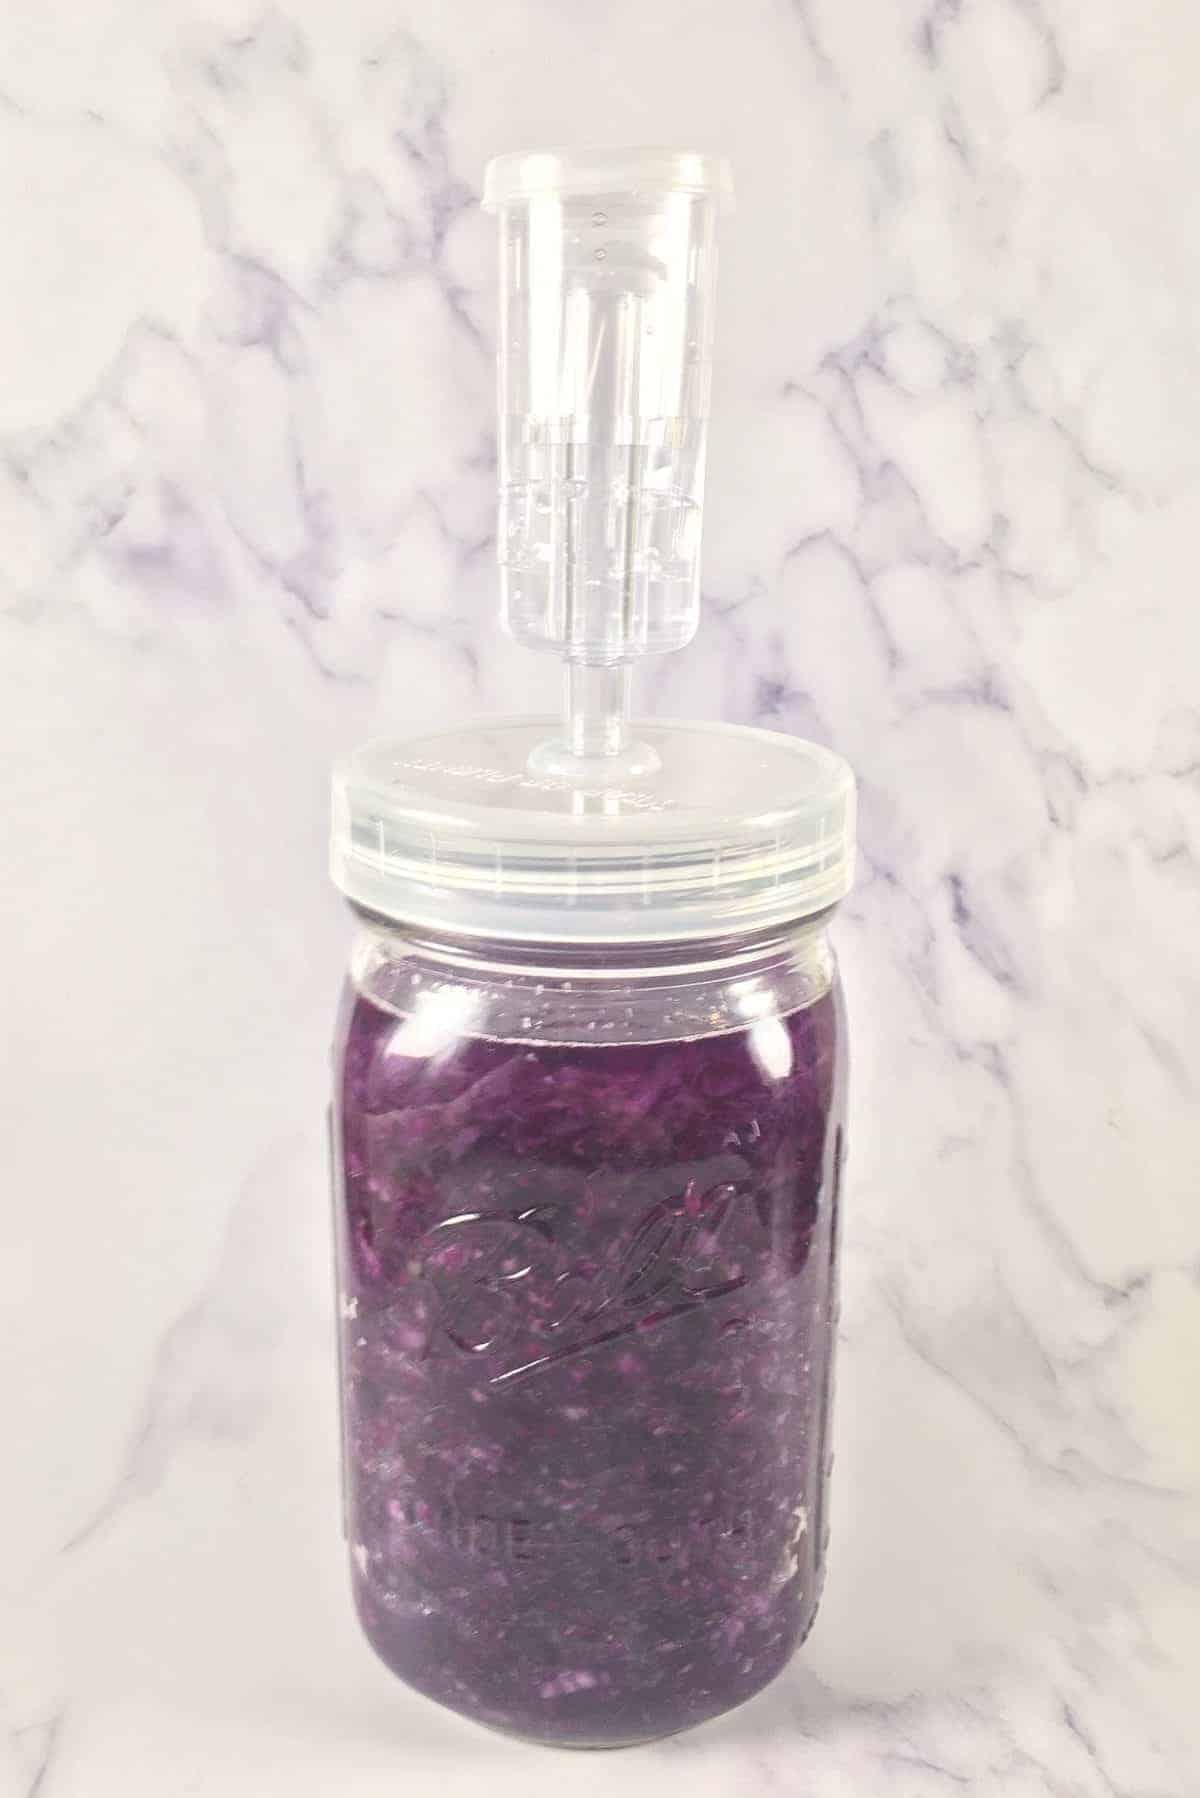
I am using the Year of Plenty Complete Fermenting Kit, which includes jar weights, airlock lids, and a cool bamboo tamper. The tamper is entirely optional; a mallet works just as well for bashing the water out of the cabbage. However, I did find the tamper to be the best option for tightly packing the cabbage into the jar.
The set is an investment up front, but I figure it will last me forever. (Update: I already broke one of the jar weights. Oops. Haha)
Best Cabbage Variety for Sauerkraut
My second tip is to make your first ferments with red cabbage, not green. Not only is red cabbage sauerkraut a beautiful magenta color, it also provides an indicator of success.
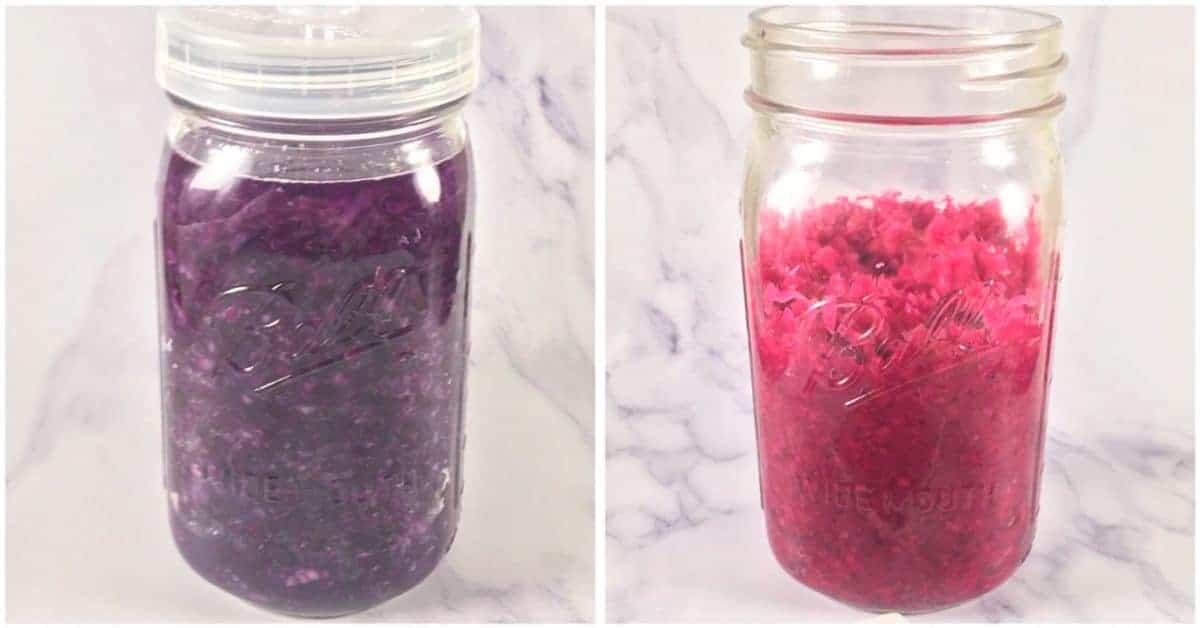
Remember using red cabbage as an acid-base indicator in junior high chemistry? The red means your ferment has turned acidic, precisely what you want!
How to Make Red Cabbage Sauerkraut in a Crock
One more thing I tried was making purple cabbage sauerkraut in a fermentation crock. The crock came with jar weights and a tamper for fermenting.
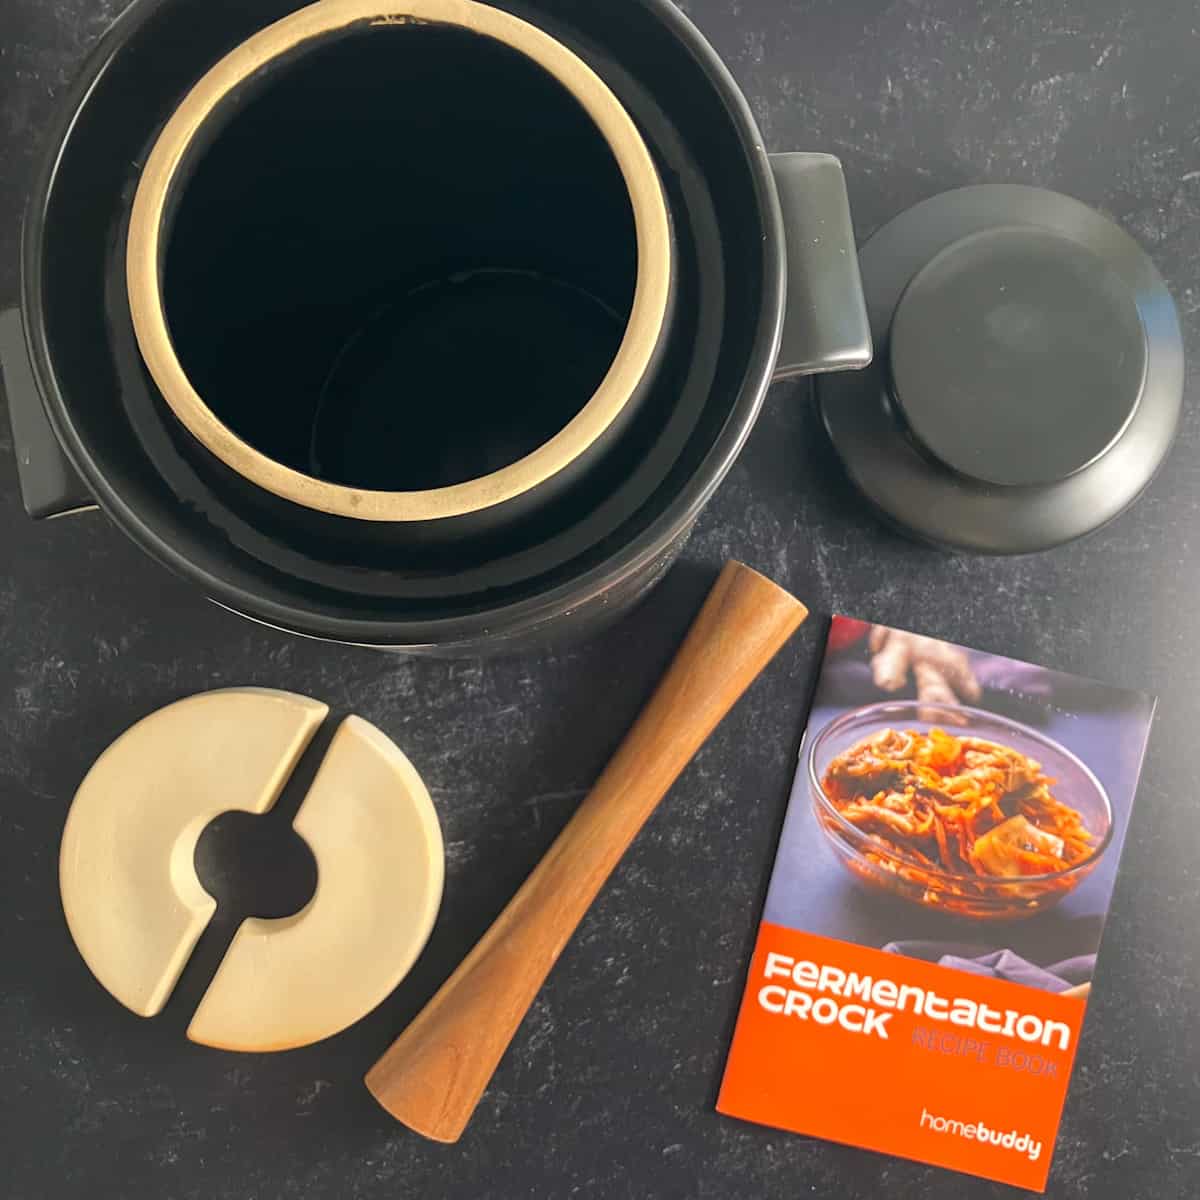
I found the results less reliable using a crock compared to the mason jar and airlock lid method. The sauerkraut was more susceptible to environmental factors (like temperature and humidity). As a result, I ended up with a pinkish purple sauerkraut rather than pink sauerkraut.
The benefit of making sauerkraut in a crock is it’s the traditional way of making sauerkraut. Also, the crock is large enough to make 3-4 times this recipe, if you wish. Here are the step-by-step directions for how to do it.
Red Cabbage Sauerkraut Crock Instructions
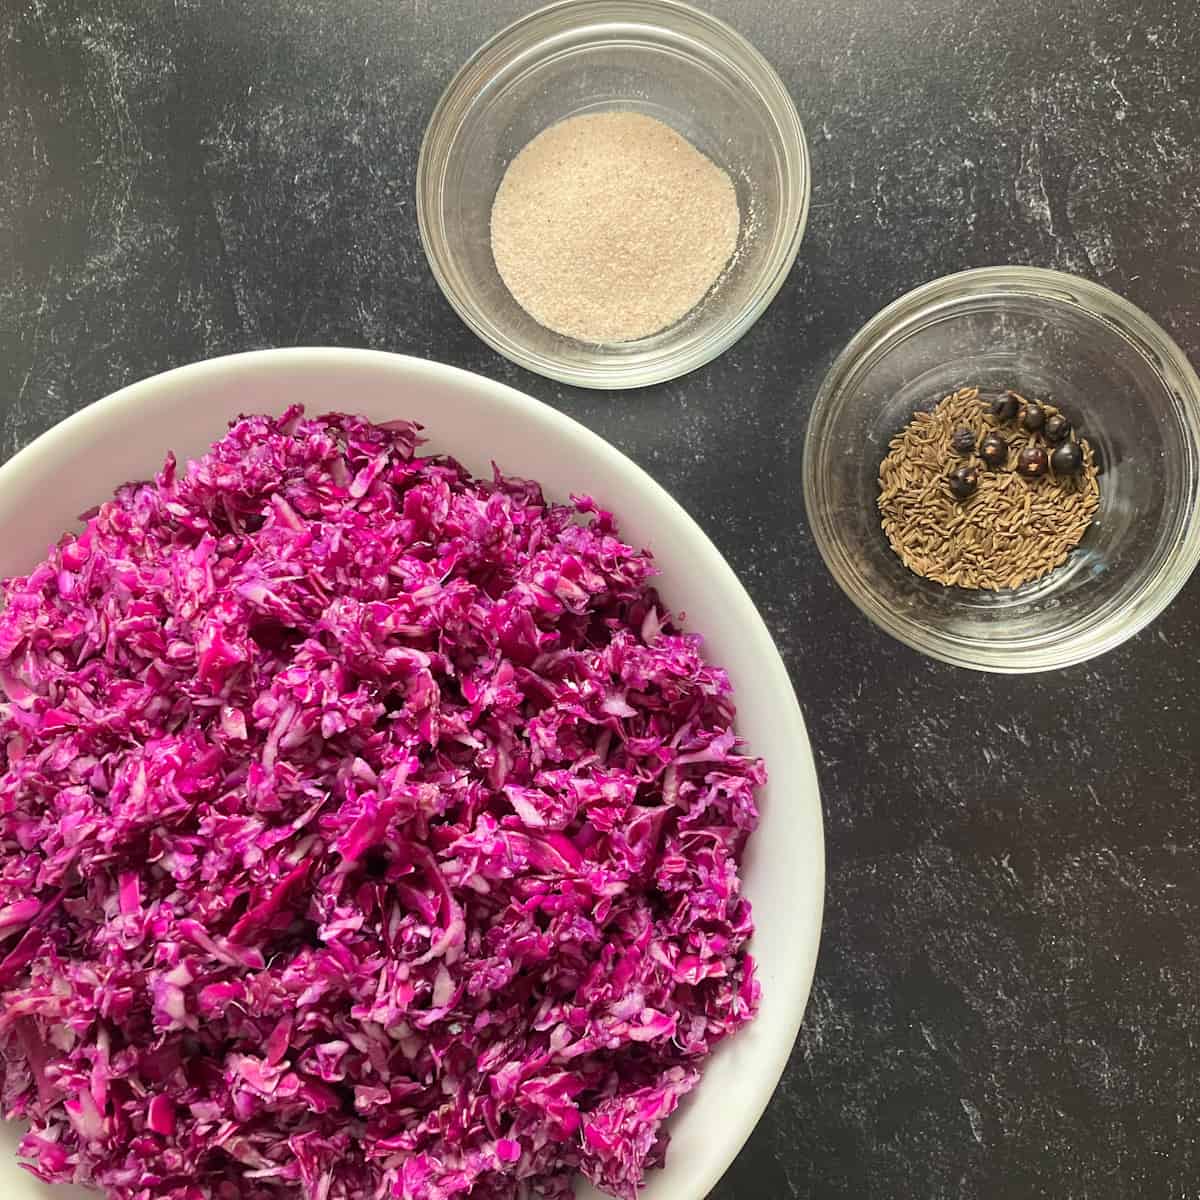
- Rinse the cabbage and set aside the outer leaves. Core and shred 23 oz (652 grams) of cabbage. I find the shredding disc of a food processor is the best cabbage shredder for sauerkraut.
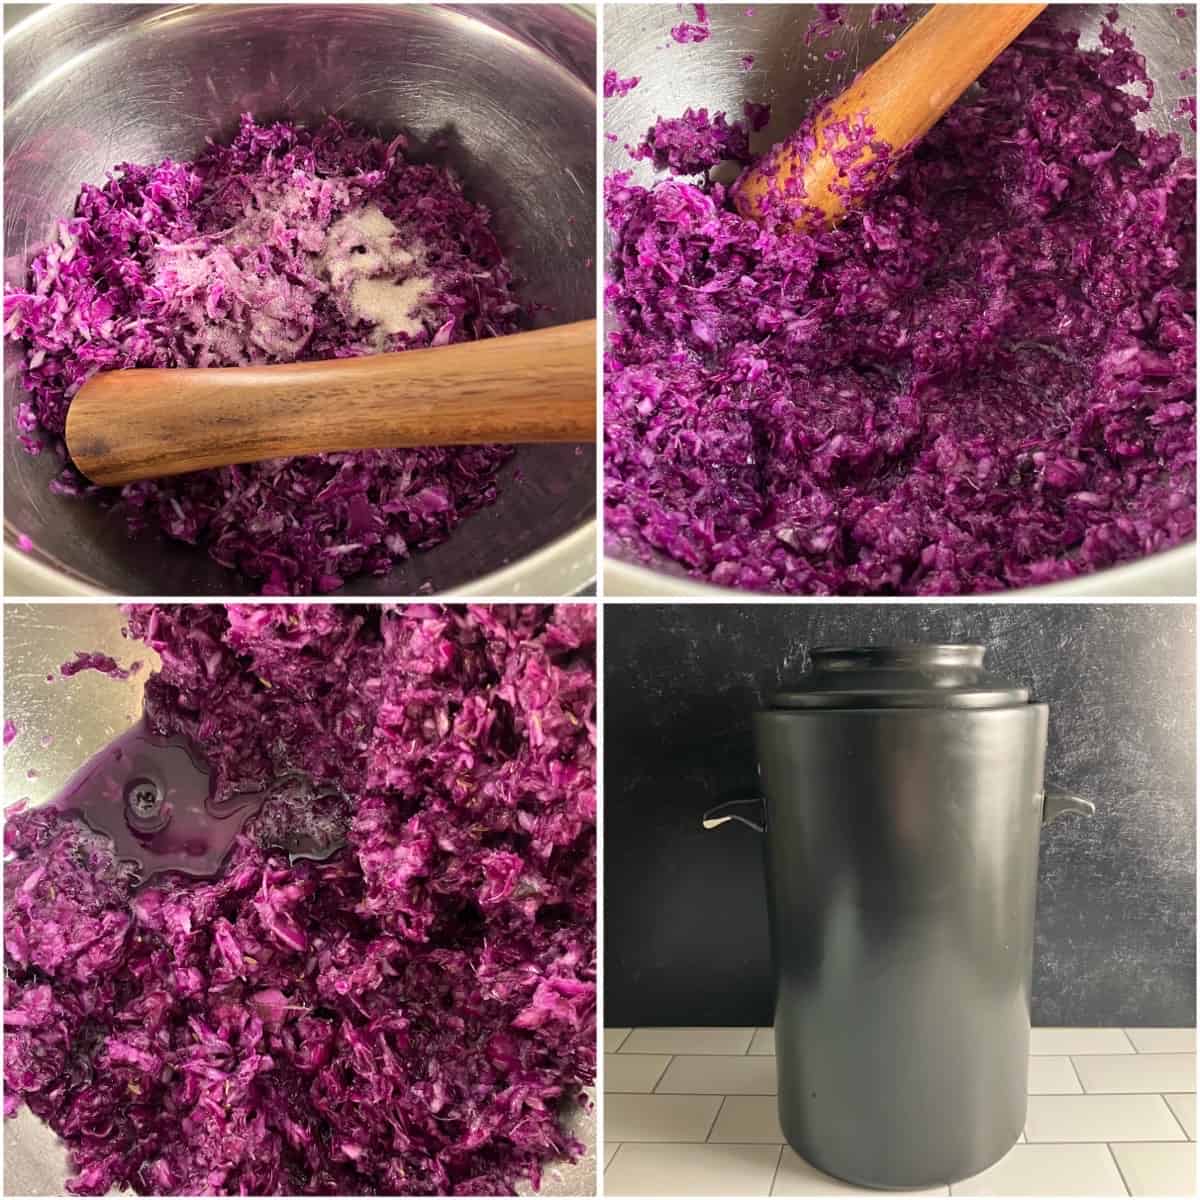
- Put the cabbage in a large bowl and sprinkle with 1 tablespoon salt. Stir and pound the cabbage for at least 10 minutes. The cabbage should release a lot of liquid, creating a salty brine.
- Stir in 8 dried juniper berries and ½ teaspoon caraway seeds. (Other herbs and spices to add to sauerkraut include peppercorns, ginger, garlic, turmeric, mustard seeds, or dill.)
- Pack the cabbage very tightly into the crock. Press the cabbage beneath the brine with the outer cabbage leaves you set aside earlier. Put the jar weights into the crock to keep everything down.
- The cabbage should be submerged below the level of the brine. If not, you can add more brine (1½ tablespoons salt per 4 cups of water).
- Put the lid on the crock. Leave the crock at room temperature to ferment (approximately 70°F/21°C.)
- Check the crock daily. Open it and skim off any foam or "scum" that has formed on top of the brine. Replace the lid when you have finished. You can also add more brine if needed.
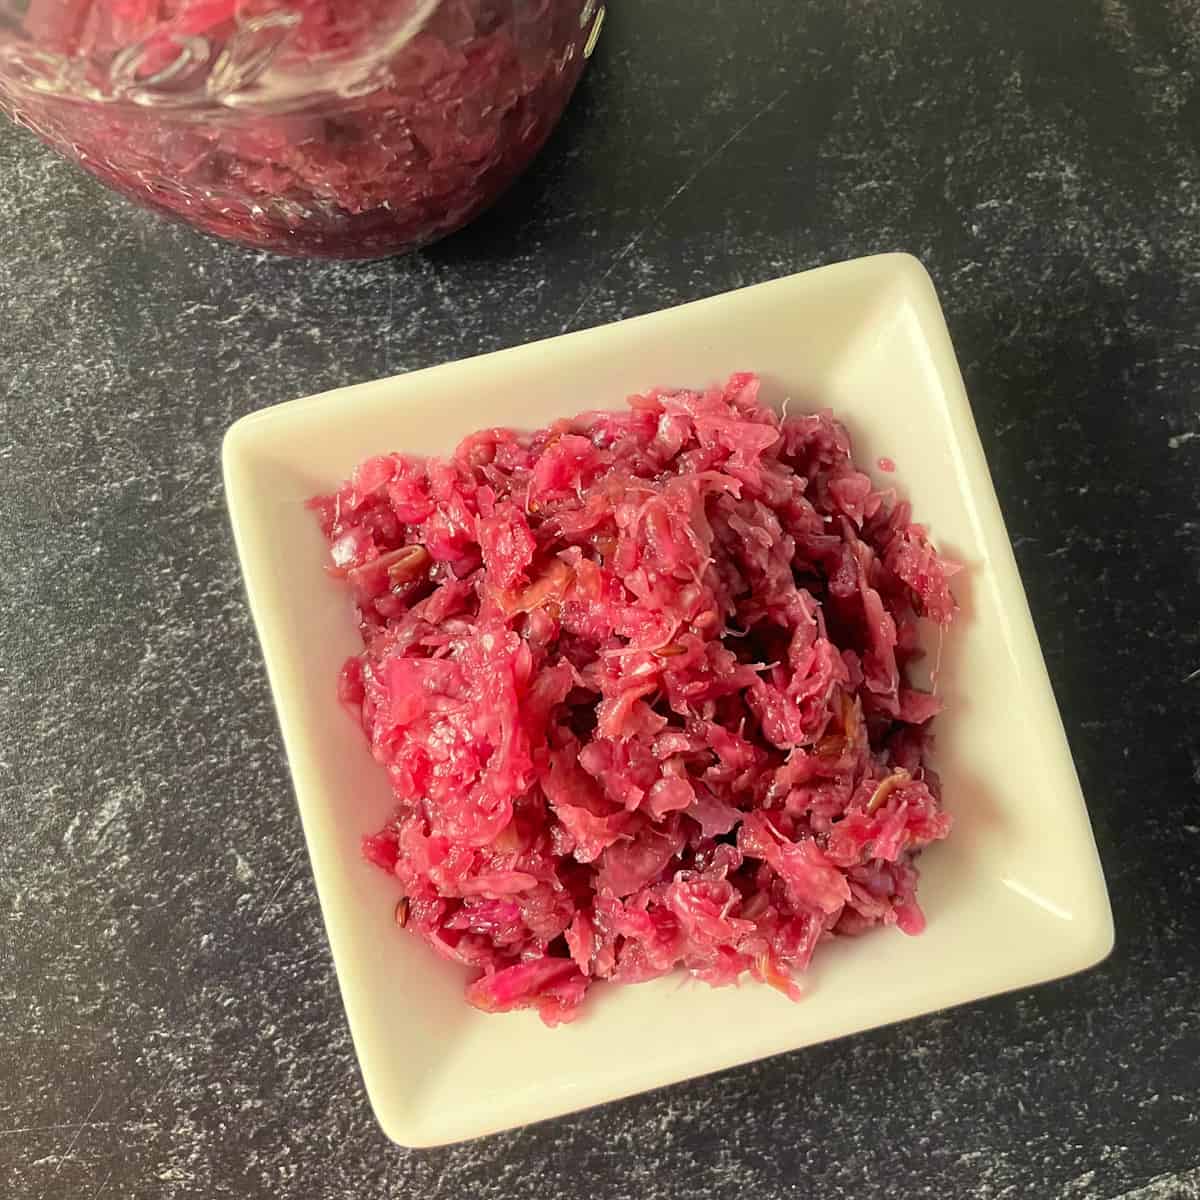
- The fermentation process takes three days up to six weeks. I let my batch ferment for five days. Let yours ferment longer if you'd prefer a more tangy sauerkraut.
- When it is finished fermenting, discard the outer leaves. Store your sauerkraut in the fridge with a regular canning jar lid and rim. Keep a jar weight in the jar to keep the sauerkraut pressed below the level of the brine.
What do you eat with fermented red cabbage?
Having some delicious, homemade sauerkraut on hand is a reason to celebrate! I wanted to pair it with a special meal. I went with air fryer brats sausage, homemade unsweetened applesauce, and roasted sweet potatoes.
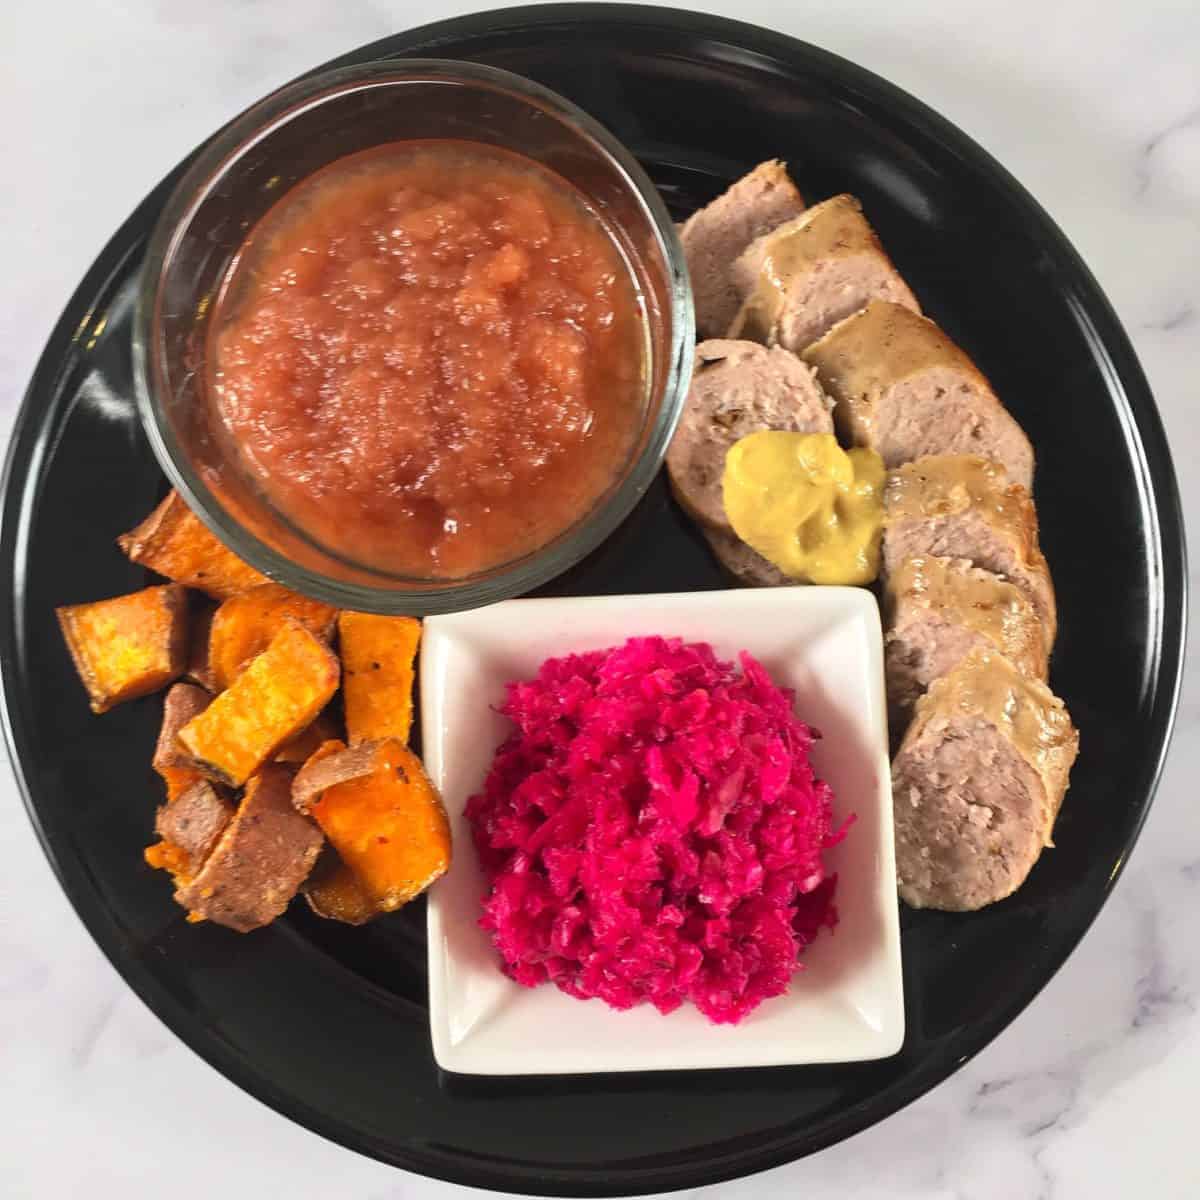
Beets, apple, onion, carrot, fennel, and green beans are some fruits and veggies that go well with sauerkraut. They are good side dish ideas for your meal.
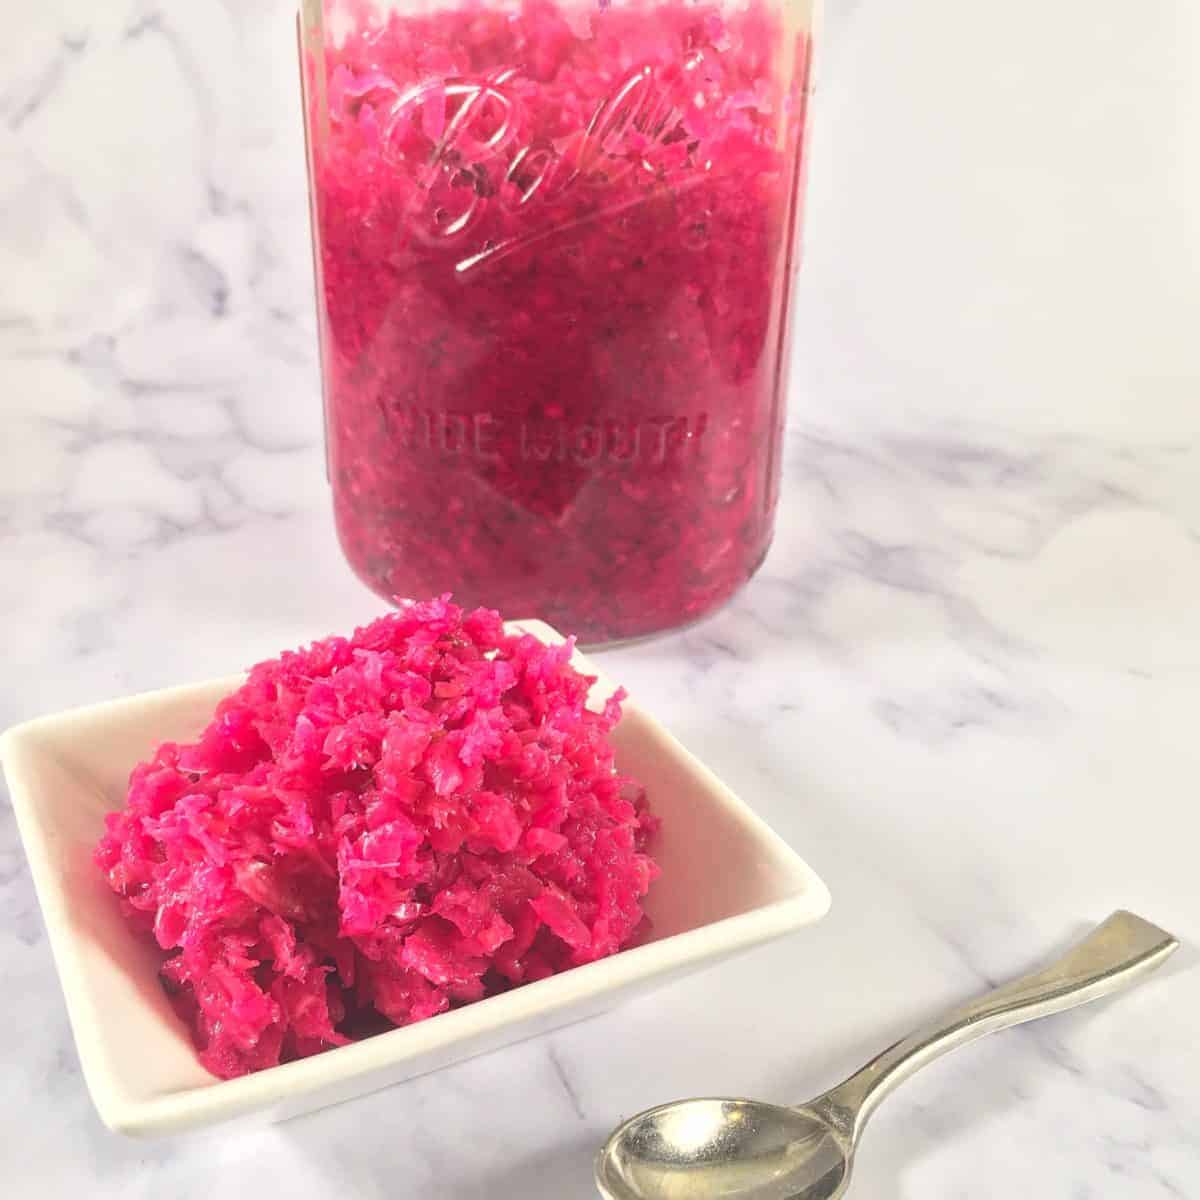
Red Cabbage Sauerkraut Storage
Homemade fermented red cabbage lasts in the fridge for up to 3 months. This helps to preserve the potentially beneficial probiotics that may largely be lost during hot bath canning. I enjoy it occasionally as a low-calorie snack, or with my meals.
If you find the sauerkraut to be a little too salty for your taste buds, you can give it a rinse before eating. The downside to this is that you will lose some of the probiotics along with the salt.
Whatever you do, don’t reduce the salt in this recipe! As mentioned above, it is needed to help prevent the growth of unwanted bacteria.
A funky odor or off color (such as brown) indicates your red cabbage ferment has spoiled. If this is the case, it should be thrown out.
How many calories in sauerkraut?
This easy red cabbage sauerkraut has 17 calories, 2.9 grams net carbs, and 0.8 grams protein per ¼ cup serving. Sauerkraut is a naturally low carb, keto, gluten free, dairy free, and vegan food.
Sauerkraut Calories 1 Cup
One cup of sauerkraut has 68 calories. That’s a whole lot of sauerkraut! I think you’ll find a little goes a long way in meals.
Red Cabbage Kraut Nutrition
Here are the nutrition facts for red cabbage sauerkraut (per Cronometer for ¼ cup):
- Calories: 17
- Total Fat: 0g
- Saturated Fat: 0g
- Cholesterol: 0g
- Sodium: 599mg
- Total Carbohydrate: 4g
- Fiber: 1.1g
- Total Sugar: 2.1g
- Protein: 0.8g
- Vitamin C: 41% DV
- Vitamin K: 23% DV
- Iron: 2% DV
- Potassium: 5% DV
- Calcium: 3% DV
Please keep in mind that the actual sodium consumed will likely be lower than what is listed above. That’s because the sauerkraut brine is not typically consumed, and it contains a lot of salt.
What does fermented red cabbage taste like?
IMHO, fermented red cabbage tastes very similar to green cabbage sauerkraut. It has the same tangy flavor, pungent smell, and it’s a delicious addition to many meals.
Recipe FAQs
What are the instructions for canning red cabbage sauerkraut?
To reduce the risk of botulism, only use canning recipes for low acid foods from reputable sources like the USDA. Here is the USDA’s recipe for canned red cabbage sauerkraut.
How to make spicy red cabbage sauerkraut?
Make red cabbage sauerkraut spicy by adding red pepper flakes or gochugaru flakes. Gochugaru or gochujang red pepper is a spicy Korean ingredient that’s important in kimchi. Adding it to your ferment will give you the flavor of a fermented red cabbage kimchi.
What are the fermented red cabbage benefits?
Some red cabbage sauerkraut health benefits include that it’s rich in vitamin K, the antioxidant vitamin C, and the phytonutrient anthocyanin. Sauerkraut is a prebiotic food that helps nourish healthy gut bacteria. It may also contain probiotics that promote gut health, depending on how it was prepared.
Is pickled red cabbage the same as sauerkraut?
Pickled red cabbage is sometimes called “quick red cabbage sauerkraut” because it’s pickled with vinegar instead of a slow ferment. However, it’s not the method used to make traditional sauerkraut. You can find a recipe for red cabbage sauerkraut with apple cider vinegar here.
What is lacto fermented red cabbage?
Lacto-fermented red cabbage is the traditional way to ferment vegetables. The goal is to create a salty or acidic environment for the beneficial bacteria to thrive, while killing harmful bacteria. The good bacteria are lactic acid bacteria from the lactobacillus family, hence the name “lacto fermented.” This is a lacto fermented red cabbage sauerkraut recipe.
Is fermented red cabbage low FODMAP?
According to Monash University, red cabbage is low FODMAPs. German red cabbage sauerkraut (AKA rotkohl or German sweet and sour cabbage) is typically made with a sweetener and is moderate in FODMAP.
👨🏾🍳 Red Cabbage Sauerkraut Recipes
What are some ways to use red cabbage sauerkraut? Try serving sauerkraut with these:
- Kielbasa Sausage in Air Fryer
- Frozen Pierogies in Air Fryer
- Elk Burger
- Keto Big Mac Salad Bowl
- Air Fryer Pork Roast
Fermented red cabbage is also great on hot dogs with mustard, as well as classic Reuben sandwiches.
👨🍳 More Ferments and Pickles
Looking for more recipes for pickled or fermented foods? Try these next:
- Fermented Lemons
- Middle Eastern Pink Pickled Turnips
- No Cook Refrigerator Pickles
- Oat Milk Yogurt Recipe
📖 Recipe Card
Watch How to Make It!
Fermented Red Cabbage Sauerkraut Recipe
Ingredients
- 23 ounces red cabbage (652 grams; about 1 small head)
- 1 tablespoon pickling salt or finely ground sea salt (not iodized salt)
- 8 juniper berries (dried)
- ½ teaspoon caraway seeds
Instructions
- Important! Please read the post accompanying this recipe before you begin. It contains essential equipment and food safety information that you do not want to miss.
- Wash and sanitize your metal and glass equipment in the dishwasher before you begin. I did not use a boiling water bath to sterilize the equipment, since we are not fermenting in an anaerobic environment nor canning the sauerkraut. I accidentally broke a jar weight in a boiling water bath once, so please be careful!
- Core and shred your cabbage. I used the grating plate on my food processor to save time with this step. The finer you shred your cabbage, the faster it will ferment.
- Put your cabbage in a large bowl and sprinkle with the salt. Stir and pound the cabbage for at least 10 minutes. The cabbage should release a lot of liquid, creating a salty brine.
- Stir in the juniper berries and caraway seeds. (No worries if you do not have these, they are optional but nice.)
- Pack your cabbage very tightly into the sanitized 4-cup canning jar. Put your glass jar weight into the jar.
- The brine should be at least 1-inch (2.54 cm) above the level of the cabbage. If not, you can make additional brine by mixing ¾ tablespoon salt per 2 cups of water. Your jar should be about 3 cups full.
- Put the airlock lid on the jar. Leave the jar at room temperature to ferment (approximately 70°F/21°C.) My house is a little cooler than this at this time of the year, so I snuggled the jar next to a heating pad on the lowest setting.
- Important! Check the jar daily. Open it and skim off any foam or "scum" that has formed on top of the brine. Replace the airlock lid when you have finished. You can also add more brine if needed, but this will likely be unnecessary if you use the airlock lid.
- Your sauerkraut will be ready in three days up to six weeks. I let my batch ferment for five days. Let yours ferment longer if you'd prefer a more tangy sauerkraut.
- When it is finished fermenting, store your sauerkraut in the refrigerator with a regular canning jar lid and rim. Keep the jar weight in the jar to keep the sauerkraut pressed below the level of the brine.
- This recipe makes approximately three cups of sauerkraut, or twelve ¼-cup servings.
Notes
💭 Expert Tips from Dietitian Summer Yule
This is a level 1 recipe (may help support fat loss). Is red cabbage sauerkraut good for you? Sauerkraut is a mere 17 calories per ¼-cup (per Cronometer) and is great as a condiment, snack, or side. Unless you have certain medical contraindications (e.g., needing to be on a low-sodium diet), consider adding this ferment to your meal plan. This is a low-calorie food that is rich in beneficial phytochemicals and prebiotics. Plus, red cabbage sauerkraut is an excellent source of vitamin C and vitamin K. What’s not to love? To eat fermented red cabbage, remove the jar weight and scoop the cabbage out with a fork. You’ll leave the brine (and much of the sodium) behind. To reduce the sodium further, you can rinse the sauerkraut before eating. Nutrition information is for one serving. Actual sodium content consumed will likely be lower than what is listed, as brine is typically not consumed.
nutrition info disclaimer
All recipes on this website may or may not be appropriate for you, depending on your medical needs and personal preferences. Consult with a registered dietitian or your physician if you need help determining the dietary pattern that may be best for you.
The nutrition information is an estimate provided as a courtesy. It will differ depending on the specific brands and ingredients that you use. Calorie information on food labels may be inaccurate, so please don't sweat the numbers too much.
"To taste" means to your preferences, which may have to be visual to follow food safety rules. Please don't eat undercooked food x
Nutrition
Join our community! Subscribe for all of the latest and greatest recipes, and follow me on Facebook, Pinterest, Instagram, and YouTube!

Hello! I'm Summer, a registered dietitian and home chef who loves to cook, eat, and create high quality content for you! Every recipe on this site has been tested by me to help ensure your success in the kitchen. All eaters are welcome here 🙂
Gerhard says
German guy here. The very best way to ferment the sauerkraut is to do it exactly as described but put it in a fermentation jar with a one-way valve. If you do it properly your cabbage will make a ton of CO2 gas which needs to escape. The jar's environment will thus become anaerobic automatically. Let it ferment at least three weeks.
Google the German word "Gartopf" to find the vessels our ancestors traditionally fermented their cabbage in!
Gerhard says
I wrote it wrong. The word to look up is "Gärtopf" or "Gaertopf" - the Umlaut makes all the difference. Get one of these with a "Beschwerungsstein" (weight for keeping it below the liquid) and you're fully equipped.
A "Gartopf" without the Umlaut is a cooking pot, not what you want for fermenting cabbage!!
Summer Yule says
Hi Gerhard, thank you for the great information! Coincidentally, I recently won a fermentation crock in a contest... I think it's essentially a Gärtopf (at least according to what I see on Google). I plan on updating this post in the future after I get a chance to experiment with it. Thank you for dropping by! Summer
Brittany says
What a great idea to use red cabbage to see the progress being made! I've only ever had white sauerkraut before. Is there a difference in taste? Thank you for sharing!
Summer Yule says
Thank you! I think sauerkraut made with white and red cabbage tastes fairly similar. That said, I like the magenta color that you get with red cabbage so much more. I find homemade sauerkraut to be a bit crisper than the sauerkraut on store shelves, even when I let it ferment for longer periods. Thank you for visiting! 🙂
kagucuisine says
What gorgeous color! I have yet to tackle homemade sauerkraut, but with such a beautiful example I might just take it on soon.
Summer Yule says
Thank you! I'd love to hear about how it goes if you try it!