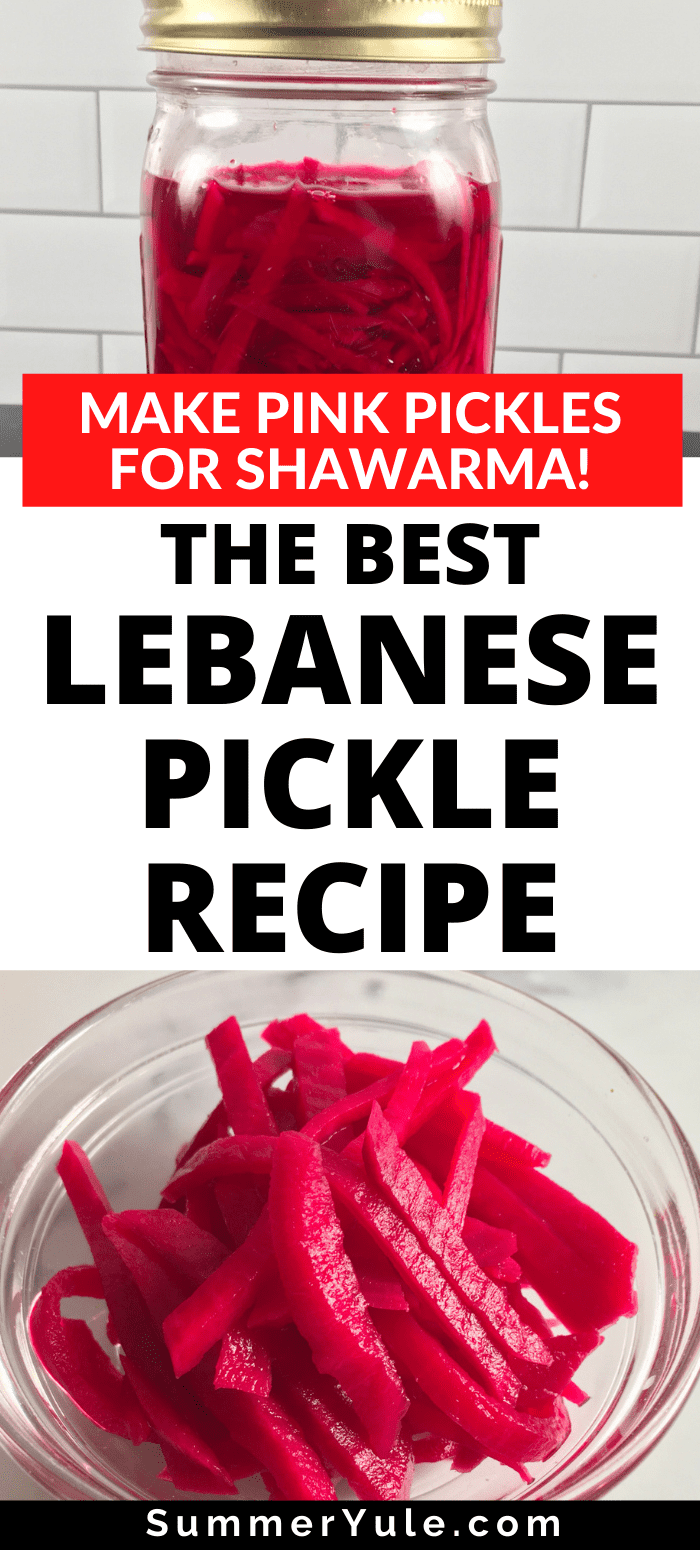
What are the pink pickles in shawarma? The Lebanese pickles used for shawarma are actually pink pickled turnips! Learn to make your very own Middle Eastern pickles with this easy shawarma pickles recipe. Lebanese pickled vegetables are naturally vegan, gluten free, and low carb. You’ll love the vibrant color and tangy flavor they add to wraps, sandwiches, and so much more!
Want to save this post?
Enter your email below and we'll send it straight to your inbox. Plus you'll get great new recipes from us every week!
There are many different types of pickles out there. Most of us are familiar with pickles made with cucumbers. However, you can also make pickles with eggplant, green beans, onions, okra, and a variety of other veggies.
For years, I had assumed the pickles in shawarma were made with red onions. However, these Lebanese pink pickles had a bright color and sharp flavor that didn’t quite match onions.
So, what kind of pickles are in shawarma? And why are Lebanese shawarma pickles pink?
That is the topic of today’s article, my friends. You’re going to learn everything you need to know to make the perfect topping for your air fryer chicken shawarma.
A word of warning before we begin- these are SO GOOD! I could seriously snack on them right out of the jar.
Table of Contents
- 🥒 What are Lebanese pickles?
- ⭐ Lebanese Pickles Benefits
- 🥘 Middle Eastern Pickles Ingredients
- 🍽 Equipment for Making Lebanese Pickles
- 🔪 How to Make Lebanese Pickles
- 🌡️ Lebanese Pickle Storage
- 📋 Lebanese Pickles Calories
- FAQs
- 👩🏻🍳 Other Pickle Recipes
- 📖 Recipe Card
- 💭 Expert Tips from Dietitian Summer Yule
- 💬 Comments
🥒 What are Lebanese pickles?
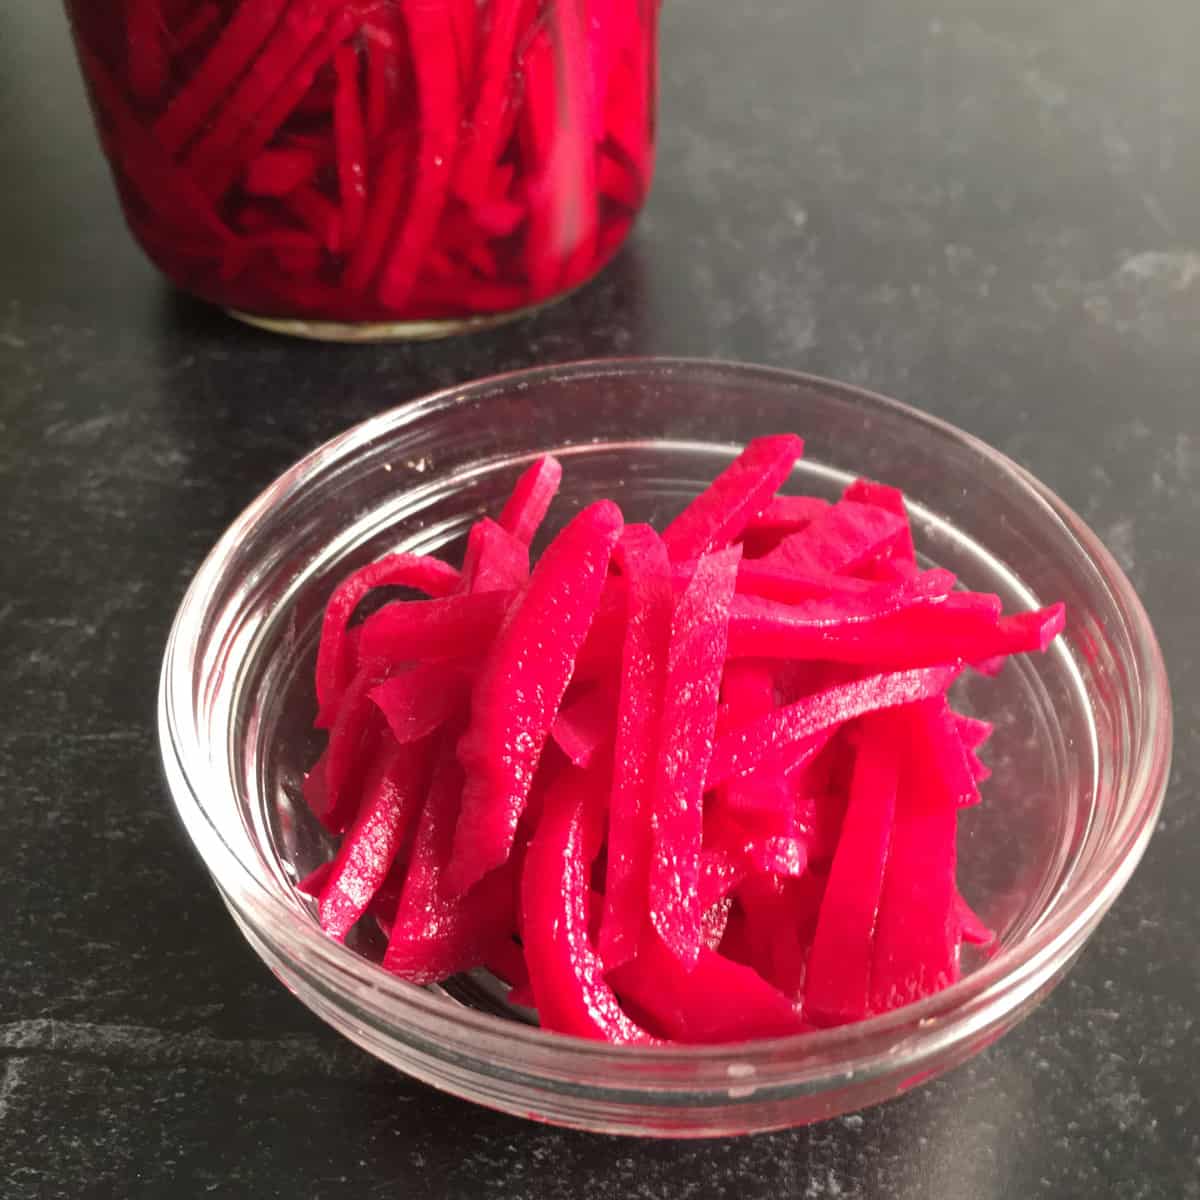
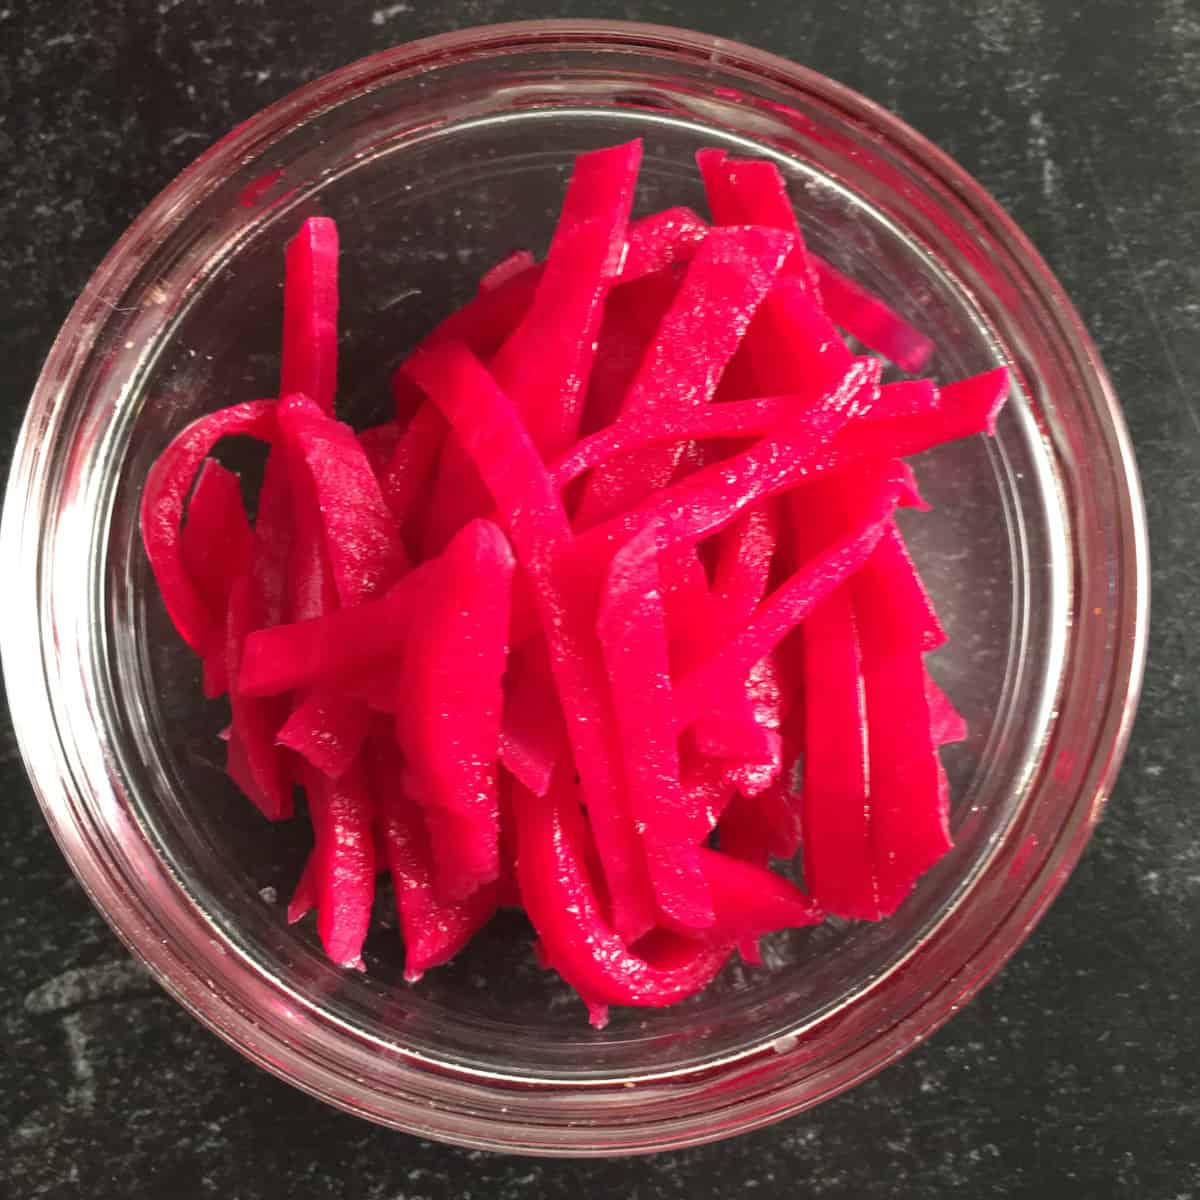
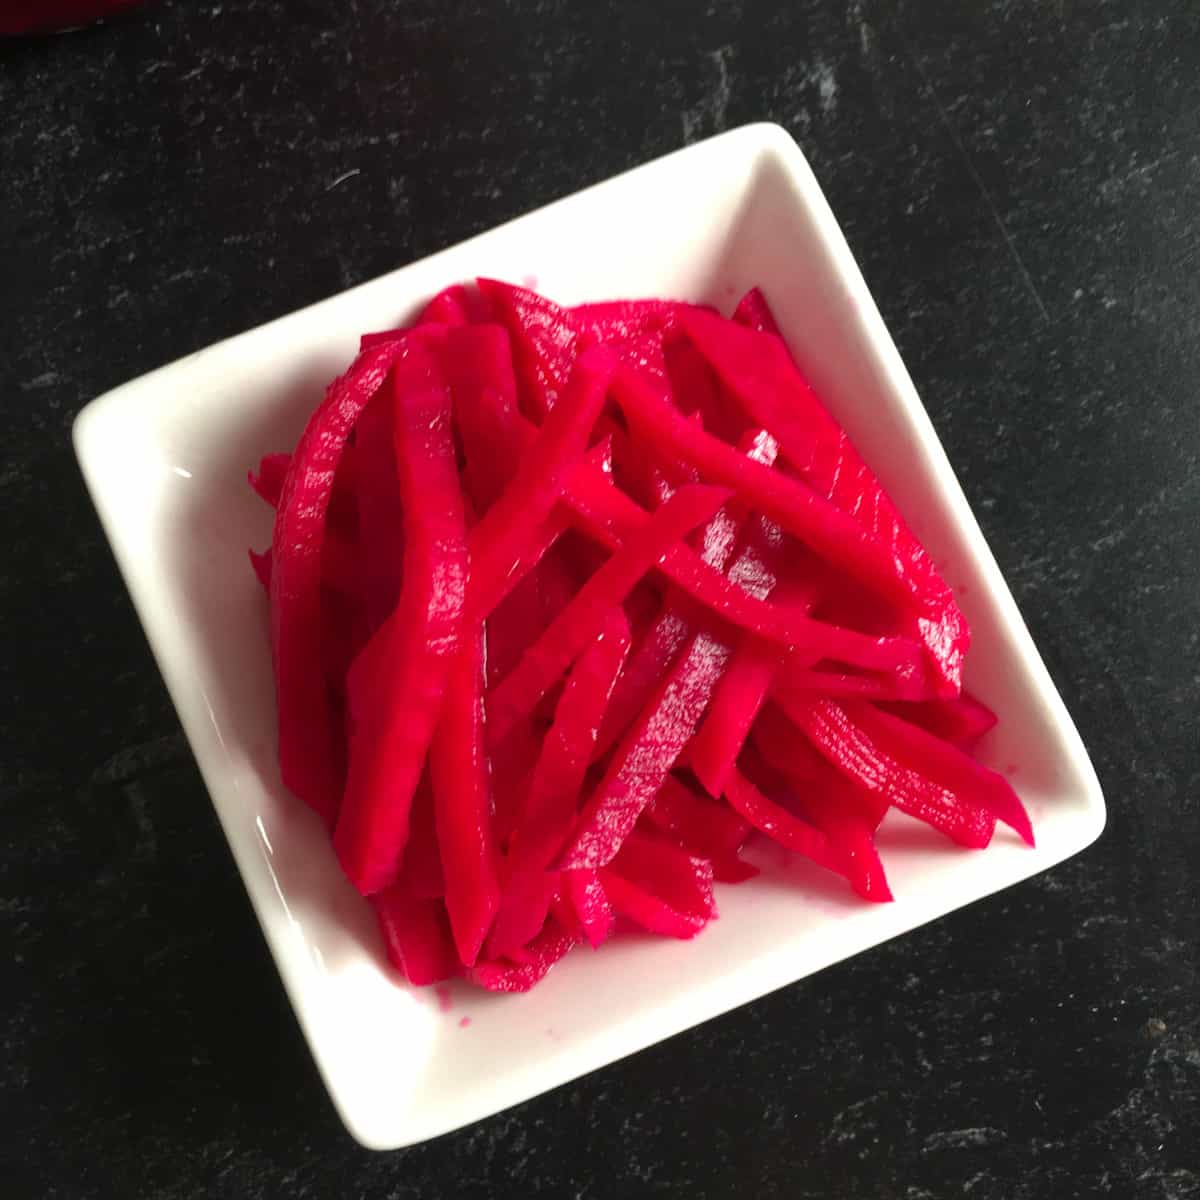
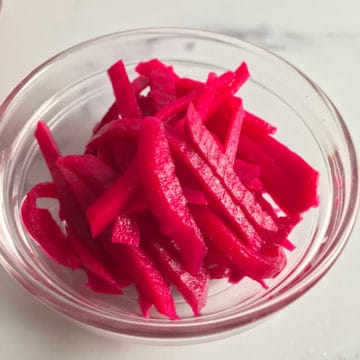
Lebanese pickles for shawarma are a mixture of fermented turnips and beets. You can also make quick pickles with a vinegar brine, as we’re doing below.
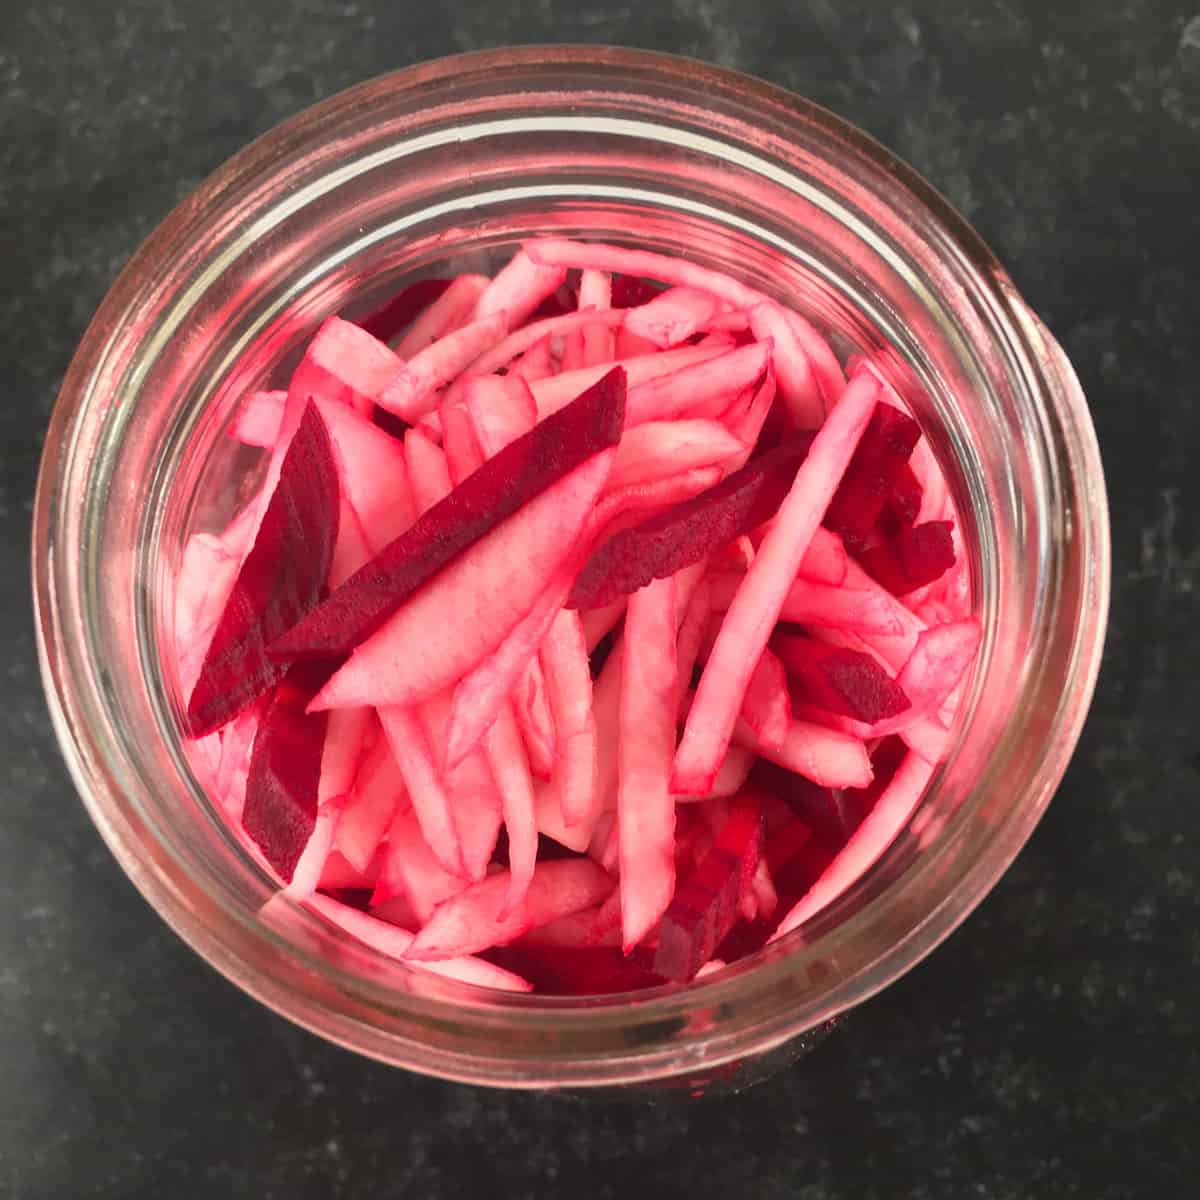
These pickles are lighter on the beets and heavier on the turnips. When packed together in a jar with an acid (such as vinegar), the brine and veggies turn bright pink. After pickling, you won’t be able to tell which strips of veggie are beet and which are turnip.
⭐ Lebanese Pickles Benefits
Why make Middle Eastern Pickles? Here are a few reasons:
- Gut health: It’s easy to find cucumber pickles and sauerkraut in the stores, but other vegetable ferments are less likely to be available. You can greatly broaden the diversity of fermented veggies in your diet when you DIY. It’s good for the health of your gut!
- Nutritious: Pink pickles provide vitamin C, potassium, and fiber. Naturally fermented beets and turnips also add probiotics into your diet. (The vinegar in quick pickles may kill these beneficial bacteria, though vinegar is a fermented product too.)
- Versatility: Use this tangy condiment as a salad topping, on a grain, or to top a burger! It’s also super with Mediterranean falafel wraps, gyros, shawarma, salads, or hummus and pita.
- Simple: The only ingredients you need are veggies, vinegar, and salt. You can find these in most major grocery stores.
- Special diets: Pink pickles are vegan, gluten free, dairy free, and low carb. They’re a great way to flavor up meals for the whole family, and they add a gorgeous pop of color.
- Delicious: This Lebanese pickles recipe is super tasty, whether you choose to use it as a side dish, topping, or snack!
🥘 Middle Eastern Pickles Ingredients
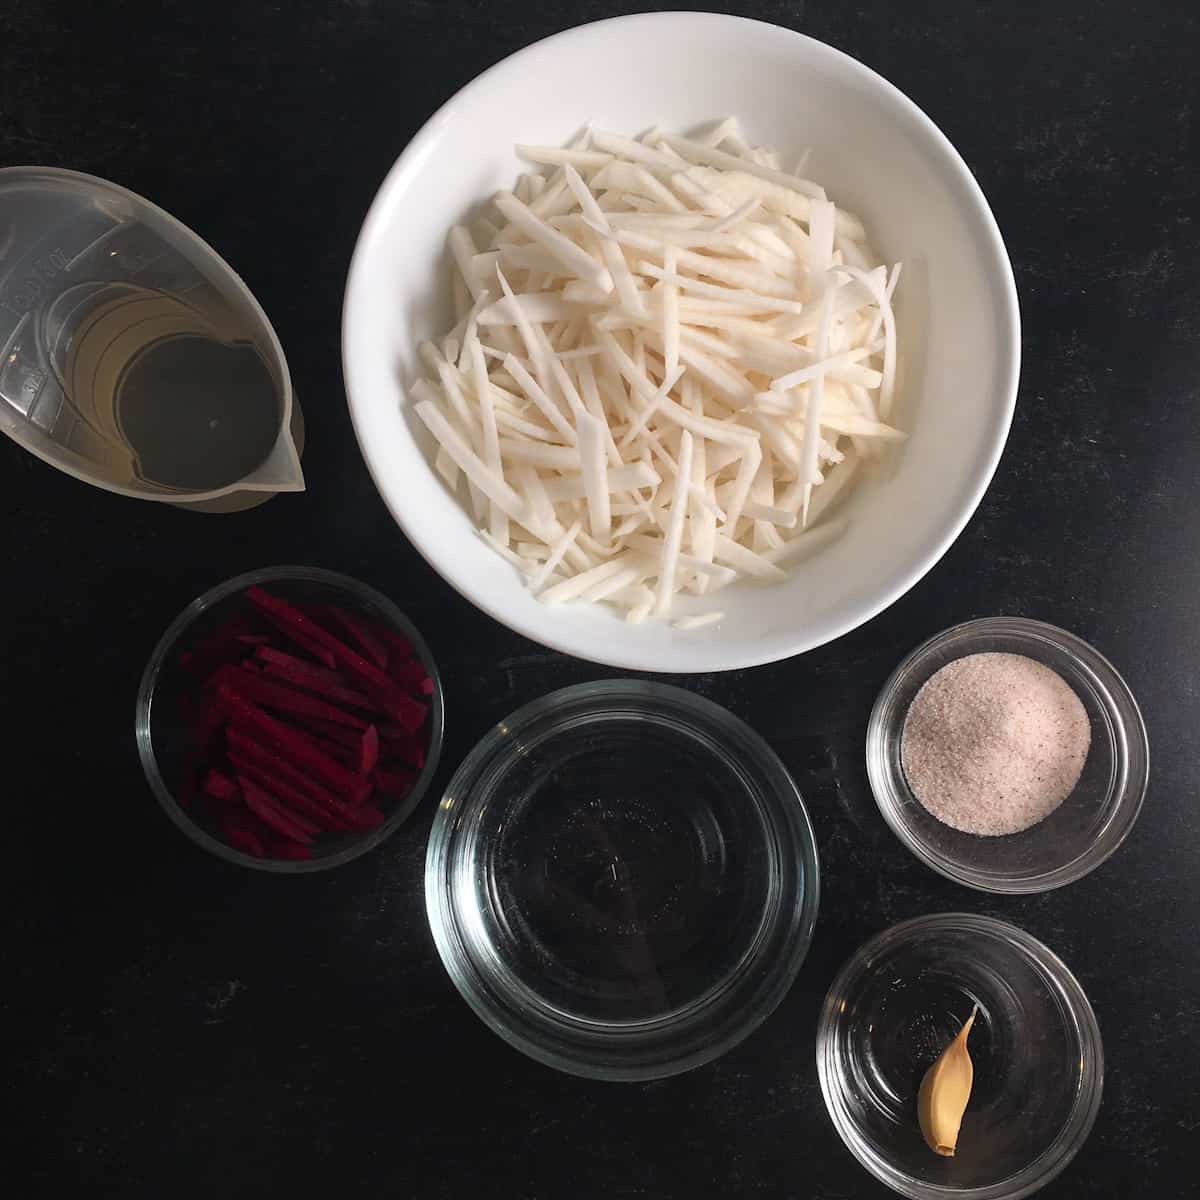
Here is what you need to make Lebanese pickles:
- Fresh peeled turnips
- Fresh peeled beets
- Garlic clove
- Water
- White vinegar
- Finely ground sea salt
Specific quantities of ingredients are located in the recipe card at the bottom of the post!
Similar to cabbage ferments, you should use canning salt, pickling salt, or fine-grain sea salt. Iodized salt is not a good choice for this recipe (USDA).
I kept this recipe very simple, but you could also add some dried herbs for additional flavor. Bay leaves, mustard seeds, and dill are a few of your many options.
🍽 Equipment for Making Lebanese Pickles
You have a greater chance of pickling success with a few special pieces of kitchen equipment. Here is what I recommend:
- Fermenting kit with jar weights and airlock lids
- Wide-mouth quart jar with lid (glass mason jar)
- Good knife
- Vegetable peeler
The jar weights and lids are for use with quart-sized wide-mouth canning jars. The jars can be purchased inexpensively in stores like Walmart, Target, or Amazon. They are also great for storing dried legumes, dried grains, and Instant Pot yogurt.
Make sure to properly sanitize your equipment before beginning the recipe. This will help discourage any bad bacterial growth that could spoil your batch.
You don't need to use a boiling water bath to sterilize the equipment, since we're not fermenting in an anaerobic environment nor canning the pickles.
🔪 How to Make Lebanese Pickles
Begin by peeling the beets and turnips and slicing them into very thin batons (matchsticks). I recommend cutting them small enough where they practically look shredded. Smash a clove of garlic.
Set the veggies aside while you prepare the brine.
Put the water, white vinegar, and sea salt in a small saucepan on the stovetop. Dissolve the salt over medium heat, stirring occasionally. Allow the brine to cool for a few minutes.
Pack the prepared veggies (including the garlic) into a clean wide-mouth quart jar. The veggies should be below the shoulders of the jar. If they don’t fit, they weren’t cut small enough.
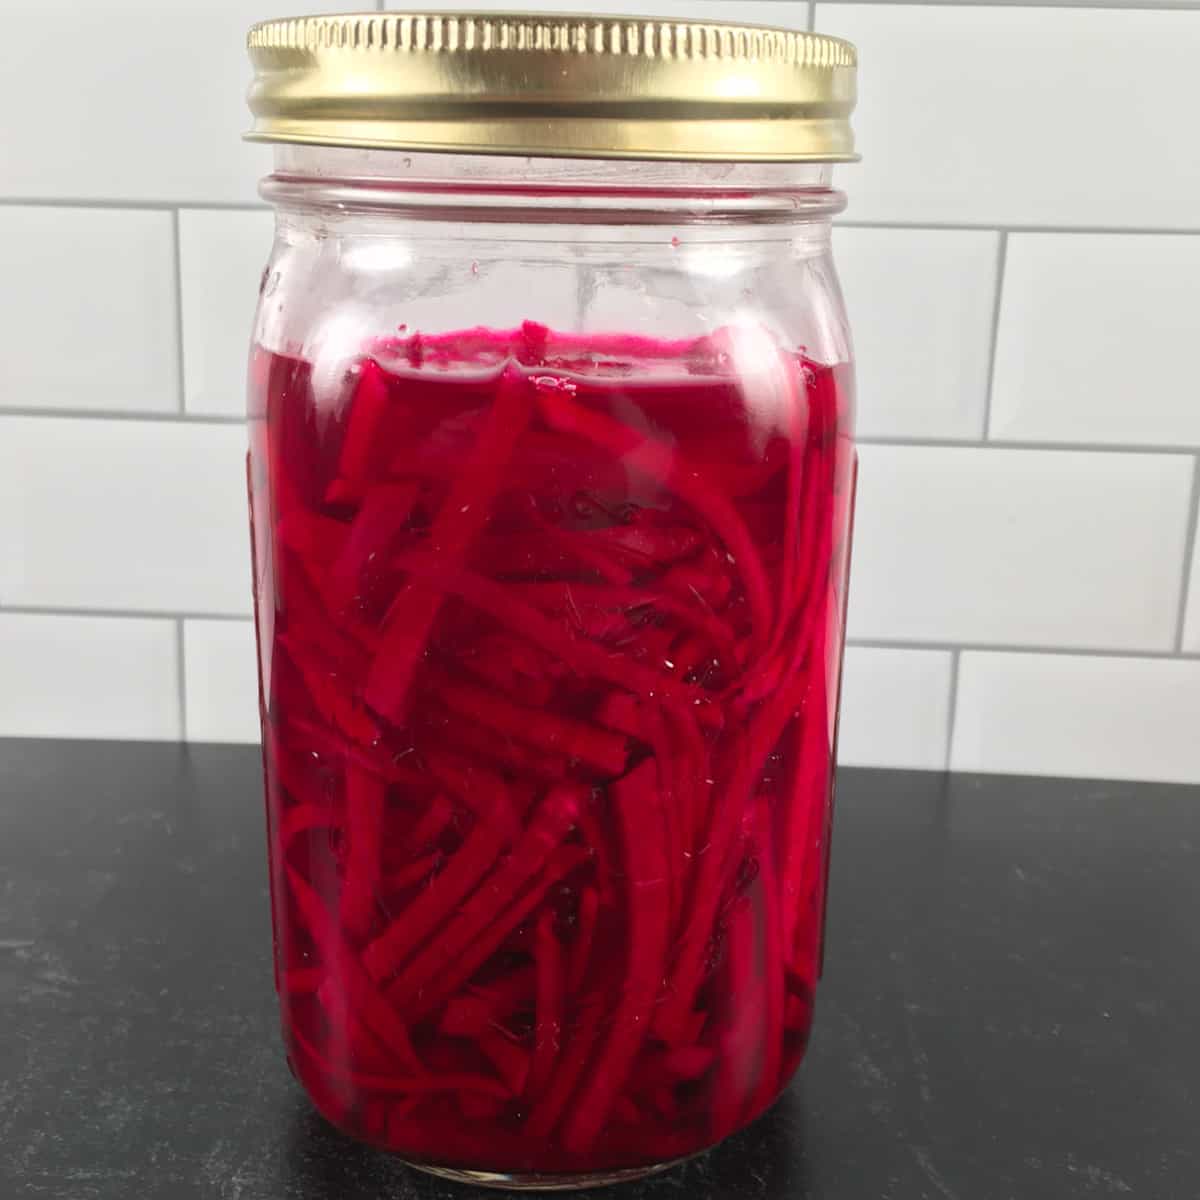
Pour the liquid over the veggies in the jar and place the jar weight in the jar. You may not use all of the brine- this is fine.
Press the jar weight down if needed to submerge the veggies. The veggies should be completely below the level of the liquid. Both the liquid and the jar weight should be below the lip of the jar.
Put the airlock lid on the jar. You may need to add water to the lid, depending on the type of lid you have.
Leave the jar at room temperature to pickle for 3 days (approximately 70°F/21°C.) If your house is a little cooler, snuggle the jar next to a heating pad on the lowest setting. After that, put the regular lid loosely on the jar and pop it in the fridge.
🌡️ Lebanese Pickle Storage
How do you store pickles after fermenting or pickling? Simply put a regular lid and ring loosely on the glass jar and put it in the fridge. Make sure the turnips and beets stay below the level of the liquid.
Lebanese pickles mellow out and becomes better with age after a few days in the fridge. The turnip flavor becomes less sharp, and the flavor is just more enjoyable overall. The pickles will last in the fridge for 1-2 months, and they just get better and better, IMVHO.
📋 Lebanese Pickles Calories
How many calories in Lebanese pickles? One serving of Lebanese pickled turnips has 8 calories, 1.3 grams net carbs, and 0 grams protein. This is for 1/12 of the vegetables in the jar, without the brine.
FAQs
Where to buy Lebanese pickles?
You can get Lebanese pickles Amazon if you don’t want to make your own. Ziyad Arabic Pickled Turnips or Al Dayaa Middle Eastern Pickled Turnips are two options.
What do Middle Eastern pickles taste like?
Are Middle Eastern pickles sweet? I find these pink pickles to be more salty and tangy than sweet. That said, some may pick up a subtle sweetness from the beets.
Is there a lot of salt in pickles?
Yes, pickles tend to contain a lot of salt, though much of it stays in the brine (which isn’t consumed). To make pickles less salty, drain and rinse them well before eating.
Why do we add vinegar to pickles?
Vinegar adds acidity to the brine and helps to preserve vegetables for pickles. In short, vinegar helps us make tangy quick pickles when we don’t have time to slow ferment using just salt.
Are Lebanese pickles healthy?
Lebanese shawarma pickles are a produce-packed condiment that adds more veggies to our meals. If you aren’t on a low sodium diet, Lebanese pickles can be a healthy and nutritious food to enjoy.
👩🏻🍳 Other Pickle Recipes
Looking for more fruit and vegetable pickles? Try these:
📖 Recipe Card
Watch How to Make It!
Lebanese Pickles Recipe (Middle Eastern Pink Pickled Turnips for Shawarma!)
Ingredients
- 10 ounces peeled turnips (283 grams)
- 3 ounces peeled beets (85 grams)
- 1 clove garlic, peeled
- 2 cups water
- ⅔ cup white vinegar
- 2 tablespoons pickling salt or finely ground sea salt (not iodized salt)
Instructions
- Important! Please read the post accompanying this recipe before you begin. It contains essential equipment information that you do not want to miss.
- Peel the beets and turnips and slice them into very thin batons (matchsticks). I recommend cutting them small enough where they practically look shredded. Smash a clove of garlic.
- Set the veggies aside while you prepare the brine.
- Put the water, white vinegar, and sea salt in a small saucepan on the stovetop. Dissolve the salt over medium heat, stirring occasionally. Allow the brine to cool for a few minutes.
- Pack the prepared veggies (including the garlic) into a clean wide-mouth quart jar. The veggies should be below the shoulders of the jar. If they don’t fit, they weren’t cut small enough.
- Pour the liquid over the veggies in the jar and place the jar weight in the jar. You may not use all of the brine- this is fine.
- Press the jar weight down if needed to submerge the veggies. The veggies should be completely below the level of the liquid. Both the liquid and the jar weight should be below the lip of the jar.
- Put the airlock lid on the jar. You may need to add water to the lid, depending on the type of lid you have.
- Leave the jar at room temperature (approximately 70°F/21°C) to pickle for 3 days. After that, put the regular lid loosely on the jar and place it in the fridge.
- Lebanese pickles mellow out and becomes better with age after a few days in the fridge. The pickles will last in the fridge for 1-2 months, and they just get better and better, IMVHO. Make sure the veggies stay beneath the level of the liquid.
Notes
💭 Expert Tips from Dietitian Summer Yule
This is a level 1 recipe (may help support fat loss). Think of low and moderate-carb veggies as your BFF if your goal is weight loss. These pickles are a nice way to add some extra zing to meals and you get more veggies and prebiotic fiber in. As mentioned above, we prefer the flavor of shawarma pickles after several days in the fridge. They're also great on a salad, grain bowl, or as a burger topping! Since we are using a lot of salt, this recipe is not appropriate for those on low-sodium diets. You will consume less salt than is used in the recipe if you drain the brine from the veggies prior to eating. Rinsing the pickles decreases the sodium level even more. Unfortunately, you’ll also lose some flavor. If you’ve naturally fermented the beets and turnips (with just salt), you’ll lose some of the beneficial probiotics as well. Nutrition information is for 1/12 of the vegetables in the jar, without the brine.
nutrition info disclaimer
All recipes on this website may or may not be appropriate for you, depending on your medical needs and personal preferences. Consult with a registered dietitian or your physician if you need help determining the dietary pattern that may be best for you.
The nutrition information is an estimate provided as a courtesy. It will differ depending on the specific brands and ingredients that you use. Calorie information on food labels may be inaccurate, so please don't sweat the numbers too much.
"To taste" means to your preferences, which may have to be visual to follow food safety rules. Please don't eat undercooked food x
Nutrition
Join our community! Subscribe for all of the latest and greatest recipes, and follow me on Facebook, Pinterest, Instagram, and YouTube!

Hello! I'm Summer, a registered dietitian and home chef who loves to cook, eat, and create high quality content for you! Every recipe on this site has been tested by me to help ensure your success in the kitchen. All eaters are welcome here 🙂
Abbie says
Can I use 100% natural Himalayan pink salt? I only have that on hand aside from iodized salt which cannot be used.
Summer Yule says
Hi Abbie, I've done this with finely ground Himalayan pink salt and it worked out well. The only issue is that the brine may end up a little cloudy and/or have a little residue at the bottom. Enjoy!
Rose says
Love this can’t wait to make
Summer Yule says
Thank you! I'd love to hear how it goes!
ashley says
Yum! I love trying out new fermented foods. Pickles are my favorite but I also love beets and have yet to try pickled turnips. Thanks for sharing!!
Summer Yule says
You’re welcome! Glad you enjoyed the recipe!
ปั้มไลค์ says
Like!! Thank you for publishing this awesome article.
Summer Yule says
Thank you for visiting!
Terrified Amateur says
Not yet, though your post provides inspiration!
Terrified Amateur says
Ah, new takes on kimchi!
Creative way to expand the culinary universe, Summer. I especially like your idea of using these as garnishes/dressings for burgers and sandwiches.
Plus, I read they have sterling health benefits - probiotics and all.
Summer Yule says
I’ve yet to try making my own kimchi! It’s a slow food project I’d love to take on in the future. Have you made your own?