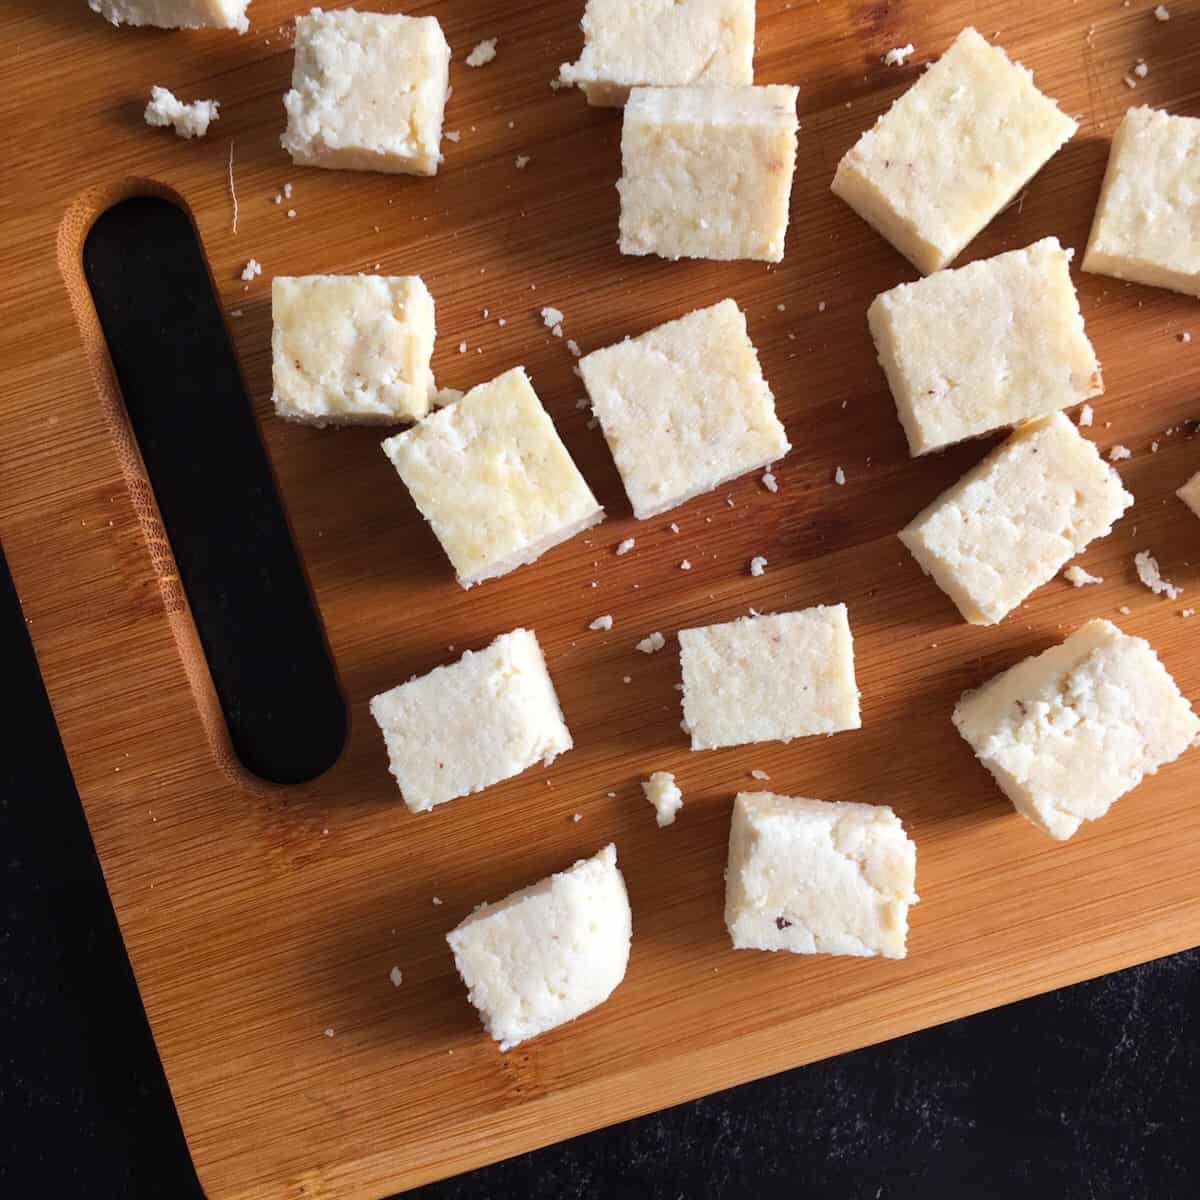
Learn how to make Instant Pot paneer (AKA Indian cottage cheese)! Homemade paneer made in a pressure cooker is an easy, hands-off recipe. You’ll love the versatility of paneer, an Indian soft cheese that doesn’t melt while heated. Paneer cubes will hold their shape in all of your favorite Indian recipes. This paneer in Instant Pot recipe is low carb, keto, gluten free, and vegetarian.
Want to save this post?
Enter your email below and we'll send it straight to your inbox. Plus you'll get great new recipes from us every week!
Today you’ll learn how to make paneer at home, and I’m going to teach you three ways to make it! You can make this milk paneer recipe using the yogurt function on the Instant Pot, on the stovetop, or you can pressure cook it! Pressure cooker paneer is the best way to make paneer, IMVHO.
If you’ve made my homemade ricotta or low sodium cottage cheese recipe, you’ll find the process of making paneer very similar. Technically, the recipe that I gave you for “ricotta” is actually for paneer. (Tricky, tricky!)
“Traditional ricotta is made from whey that’s leftover from the cheesemaking process in which rennet or lactic acid has been used to create the formation of curds.” However, most of us make homemade “ricotta” from milk, since we do not have that type of leftover whey. This cheese, compressed from the curds that formed from milk and acid, is technically paneer.
We’re going to use lemon juice this time as our acid, instead of white vinegar. The lemon juice results in a milder cheese, with no traces of sharp vinegar aftertaste to be found.
However, the curds that form from the juice are much softer than with vinegar. To create a firm cheese that cuts into cubes for the recipe, you will need to press it well. I’ve got tips on the best way to press paneer below!
Table of Contents
- ⭐ Instant Pot Paneer Benefits
- 🥘 Instant Pot Paneer Ingredients
- 🔪 How to Make Paneer in the Instant Pot (Pressure Cooker)
- ️⏲️ How to Make Paneer in an Instant Pot (Yogurt Maker Setting)
- 🧀 How to Press Paneer
- 🌡️ How to Store Paneer
- 🥛 Paneer Whey Uses
- 🥣 How to Use Paneer in Recipes
- 📋 Calories, Net Carbs, Protein
- FAQs
- 👩🏻🍳 More Instant Pot Recipes
- 👩🏾🍳 Other Indian Recipes
- 📖 Recipe Card
- 💭 Expert Tips from Dietitian Summer Yule
- 💬 Comments
⭐ Instant Pot Paneer Benefits
Why make paneer in Instant Pot? Here are some benefits of this easy Instant Pot recipe:
- Hands off: If you make pressure cooker paneer, you don’t need to bother with fussy timing to help the milk reach certain temperatures. It’s a dump and go, easy lazy one-pot recipe. You don’t need a kitchen thermometer at all.
- High-quality vegetarian protein: Paneer is a dairy product that provides high-quality vegetarian protein. Per Cronometer, a 2-ounce serving of paneer provides 12 grams of protein. You can make paneer more protein dense (higher protein per calorie) by making it with low fat milk.
- Rich in essential nutrients: Paneer is an excellent source of certain minerals that support bone health, such as calcium and phosphorus. In addition, it’s a good source of riboflavin and vitamin A.
- Special diet friendly: Paneer aligns with a variety of special diets, including low carb, keto, gluten free, and vegetarian.
- Super delicious: Paneer is a mild cheese that’s kid friendly. Even picky eaters will usually accept paneer. It’s very tasty!
🥘 Instant Pot Paneer Ingredients
What do you need to make paneer in an Instant Pot? You only need two ingredients! Here’s the shopping list:
- Dairy milk
- Freshly squeezed lemon juice
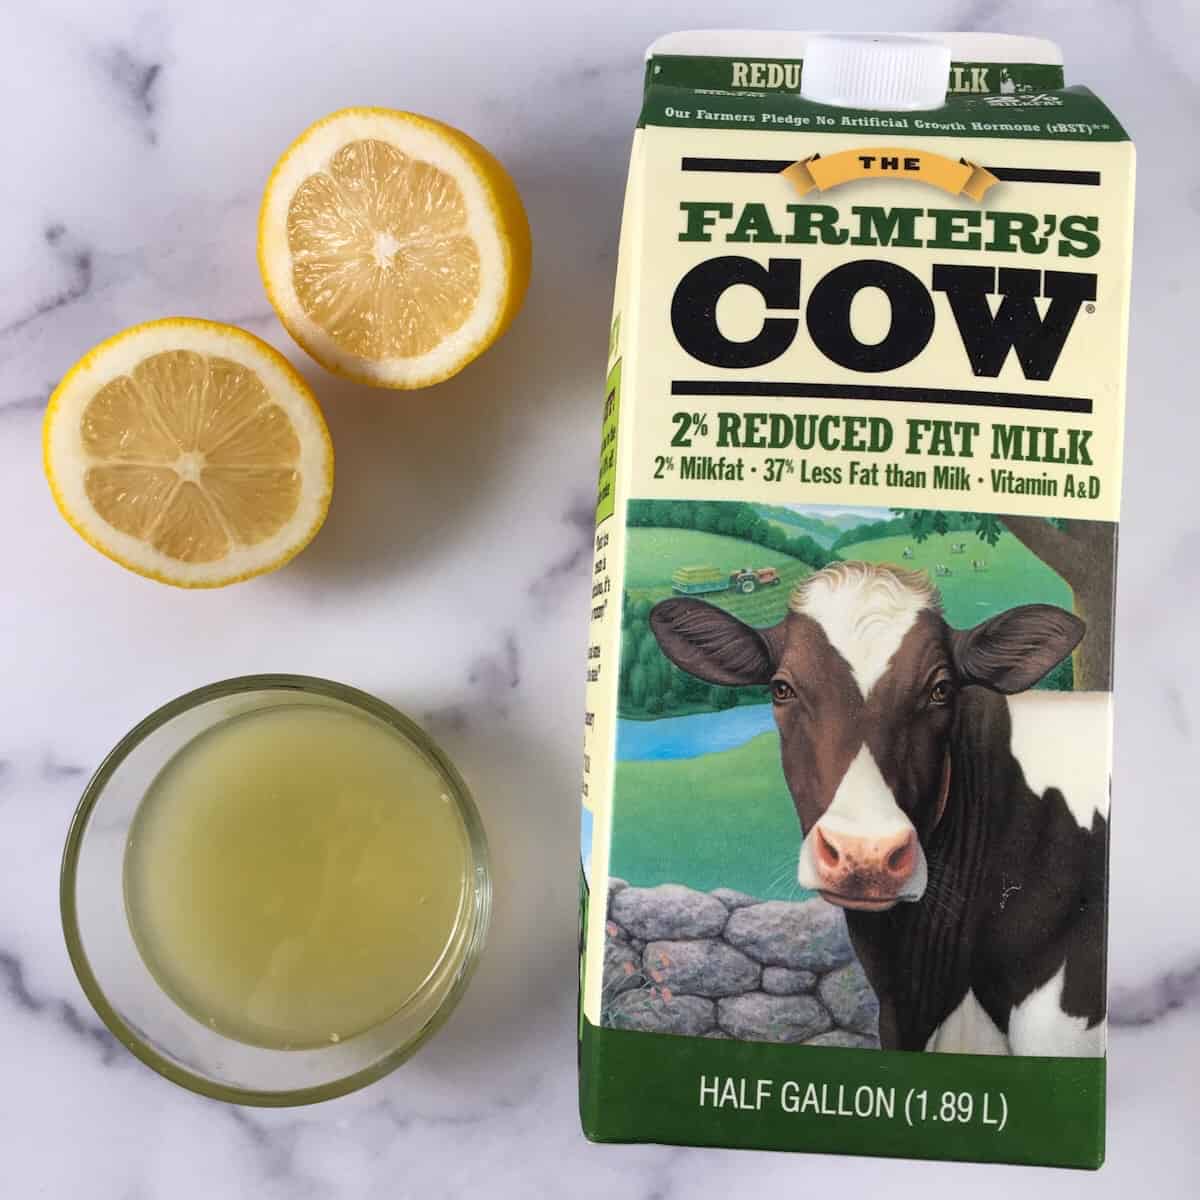
As always, precise quantities of ingredients are in the recipe card at the end of the article.
I’ve made paneer with whole milk, 2% milk, and skim milk. I’ve heard you can also use half and half or cream. Though these options all work, in general, you will yield more paneer with higher fat milk options.
There will also be some yield variation between batches and by cooking method used. I usually get a lower yield of cheese with the pressure cooker method. (The ease of making paneer in a pressure cooker makes the small loss worth it!)
Some say UHT milk doesn’t work for making paneer. (Just an FYI.)
I also would not use a plant based milk alternative for this recipe. Soy milk “paneer” is basically tofu. You’d need to add some sort of thickener to get almond milk or oat milk to form into a block.
Also, I don’t recommend using bottled lemon juice for making paneer. For the best flavor (and no preservatives!) fresh lemon juice is the way to go.
🍽 Equipment
Here's the kitchen equipment you need to make paneer in Instant Pot:
- Instant Pot
- Manual Lemon Squeezer
- Cheesecloth
- Colander
- Paneer Press
- Wooden Spoon
- Candy Thermometer (not needed for pressure cooker paneer)
The Instant Pot I use is a Crock-Pot Express 6-Quart Pressure Cooker. You can use whatever Instant Pot you have for this recipe, such as the Ninja Foodi. If your pressure cooker is very small, you may need to divide this recipe into batches.
You’ll need cheesecloth to drain the whey from the paneer curds. I highly recommend Olicity Cheesecloth, because it is washable and reusable. The cheap single-use cheesecloth in many stores may actually cost you more in the long run.
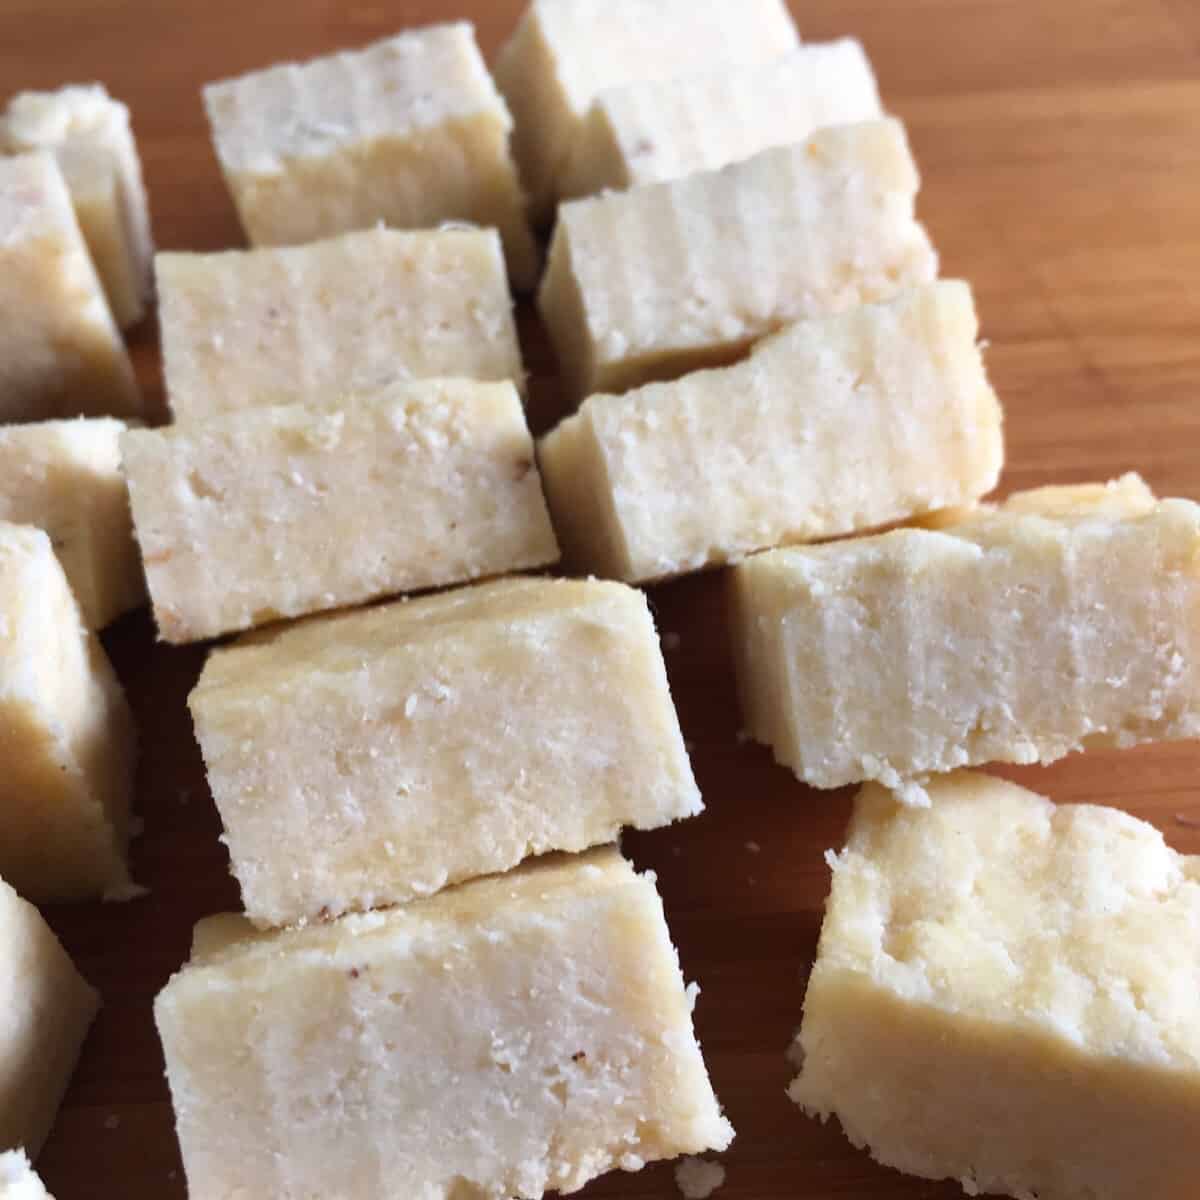
The first few times I made paneer, I used a cheese press. The paneer I made was always a bit crumbly, and never cut into perfect cubes.
Later I figured out that the best paneer press is actually a tofu press! This tofu press is AMAZING. I use it in my crispy air fryer tofu recipe and it’s at least as good at pressing paneer.
I mean, look at those neat paneer cubes. Perfection!
Whenever you have to stir something in an Instant Pot, use a wooden spoon, not a metal one. I scratched the bottom of the pot of my Instant Pot pretty badly with metal utensils. Don’t make a similar mistake!
🔪 How to Make Paneer in the Instant Pot (Pressure Cooker)
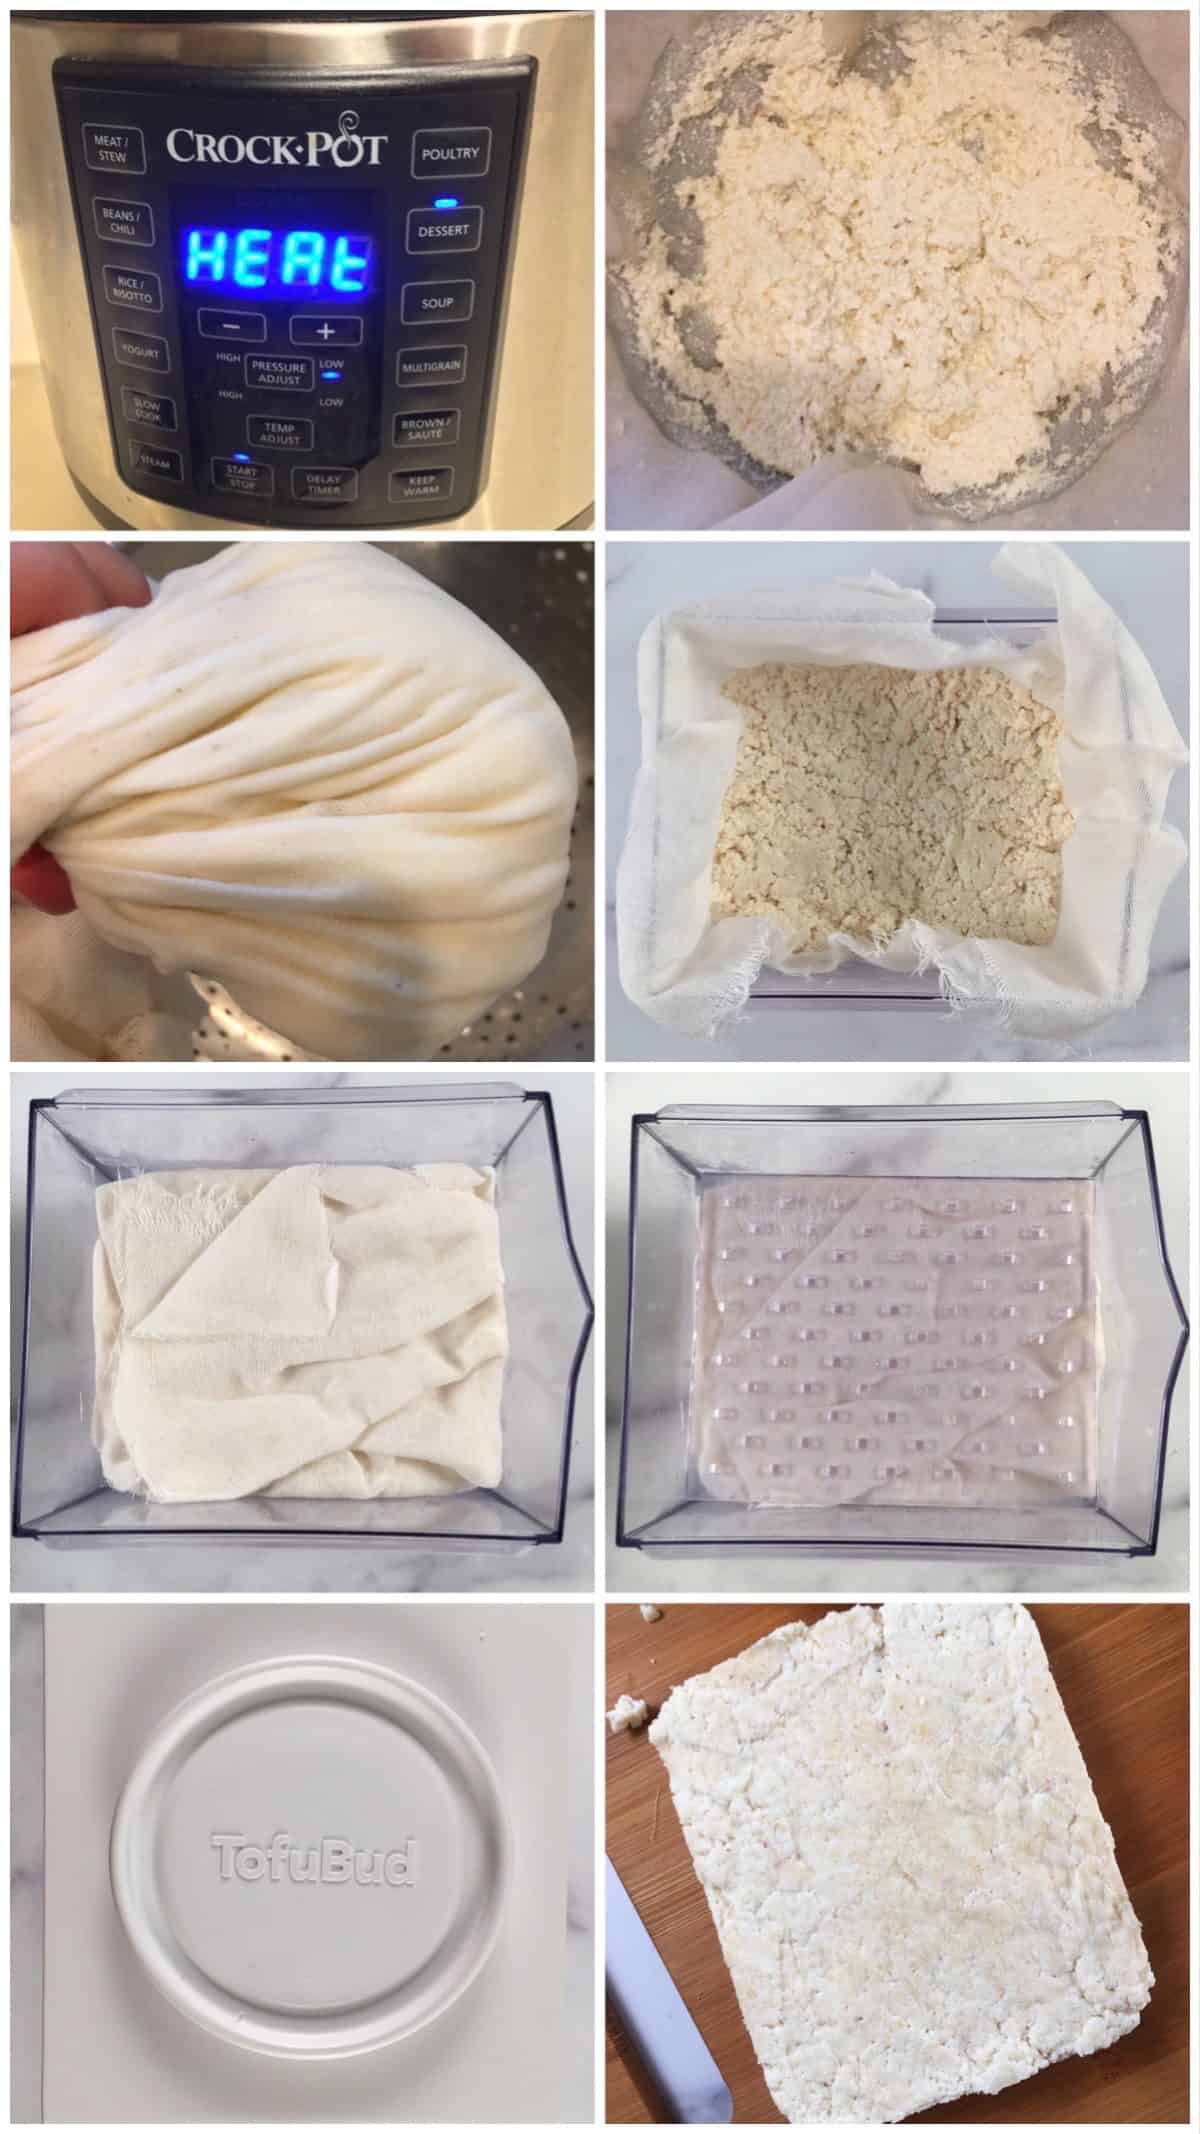
If you will be pressure cooking paneer, put the milk and lemon juice in your Instant Pot and give it a stir. Put the lid on the Instant Pot and close the vent.
How long do you cook paneer in the Instant Pot? Pressure cook paneer for 5 minutes using the “desserts” setting under low pressure. Allow the pressure to release naturally for 15 minutes before carefully opening the vent on the lid.
DON’T stir or scrape the cheese curds out of the Instant Pot after cooking. Some milk may have browned at the bottom of the pot and you don’t want that in your finished paneer.
Carefully drain the whey from the paneer cheese curds. To do this, I pour the milk mixture into a large colander lined with four layers of cheesecloth. If some white curds are stuck to the pot, you can gently release them with a wooden spoon after pouring the liquid out.
Bring the edges of the cheesecloth together and twist it into a ball, squeezing more liquid from the cheese curds. Next, spread the cheese curds into a compact, even layer in a cheesecloth-lined tofu press. Cover the curds with more cheesecloth, and put the lid on the tofu press (follow the instruction manual for your press).
Press the paneer for 30-60 minutes. Remove the paneer from the press and gently unwrap it from the cheesecloth. Refrigerate the paneer for several hours to firm up more before cutting into cubes.
It would probably be more ideal to only pressure cook the paneer for 3-4 minutes. Unfortunately, many pressure cookers (mine included) have a minimum pressure cooking time of 5 minutes. The results still turn out great using low pressure.
️⏲️ How to Make Paneer in an Instant Pot (Yogurt Maker Setting)
Pour the milk into the Instant Pot and put it on the yogurt setting on high (keep the lid off). Whisk it occasionally so the milk doesn’t stick to the pot.
When the cycle has finished, ensure the milk reached 180°F (82°C) using a candy thermometer. If it hasn’t reached this temperature, use the high sauté setting on the Instant Pot to get it there.
Once it reaches 180°F (82°C), remove the inner pot from the outer heating vessel and stir in the lemon juice right away. You should begin to see the yellowish whey separating from the curds immediately. Allow the curds and whey to cool at room temperature for approximately 30 minutes.
Line a colander with four layers of cheesecloth. Put the colander in a large bowl or in the sink (if discarding the whey).
Pour the curds and whey into the lined colander. Let drain for 5 minutes. The curds will stay in the cloth while the whey will drain away.
Gather up the edges of the cheesecloth so that the curds are collected into a tight ball. With clean hands, squeeze the ball gently over the sink to release more whey. If you are concerned about a lemony taste remaining, you can run the ball under gently running water and squeeze again, if desired.
Unwrap the cheesecloth. Put the cheese into a cheese press or cheesecloth-lined tofu press in an even layer. Press the cheese for 30-60 minutes as described above.
Refrigerate the cheese for several hours until ready to use. It should form into a firmer block.
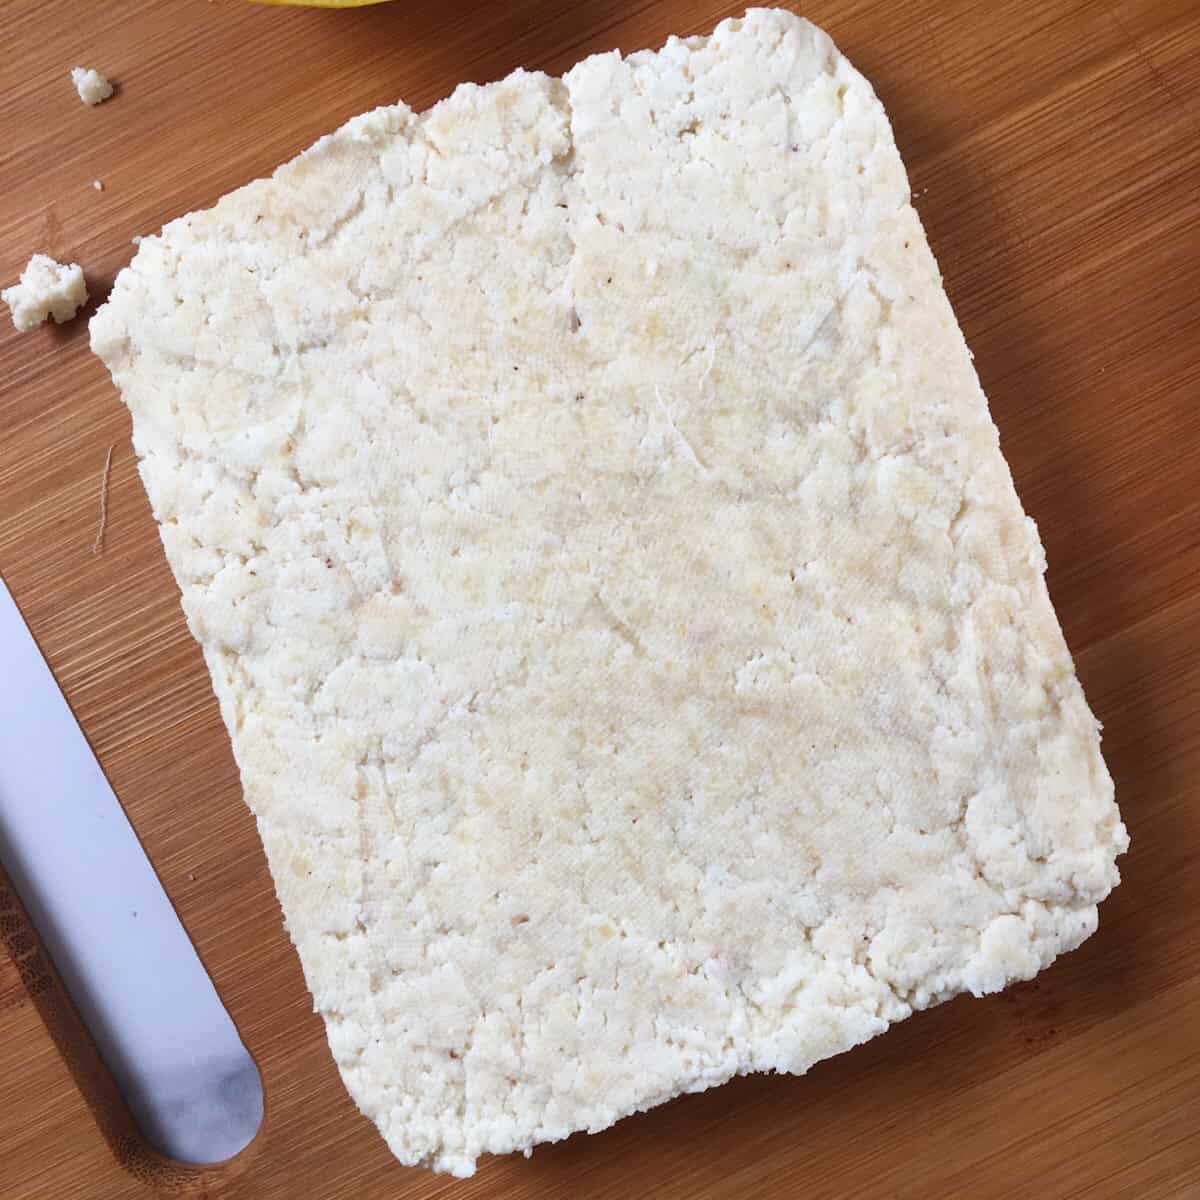
You can also use these directions to make paneer on the stovetop instead of in an Instant Pot. You’ll need a medium saucepan and a candy thermometer to make paneer on the stove.
🧀 How to Press Paneer
The firmness of your finished paneer depends greatly on how well it is pressed! This small cheese press produced a crumbly (but still yummy!) paneer. This tofu press is responsible for the beautiful paneer cubes in the photos.
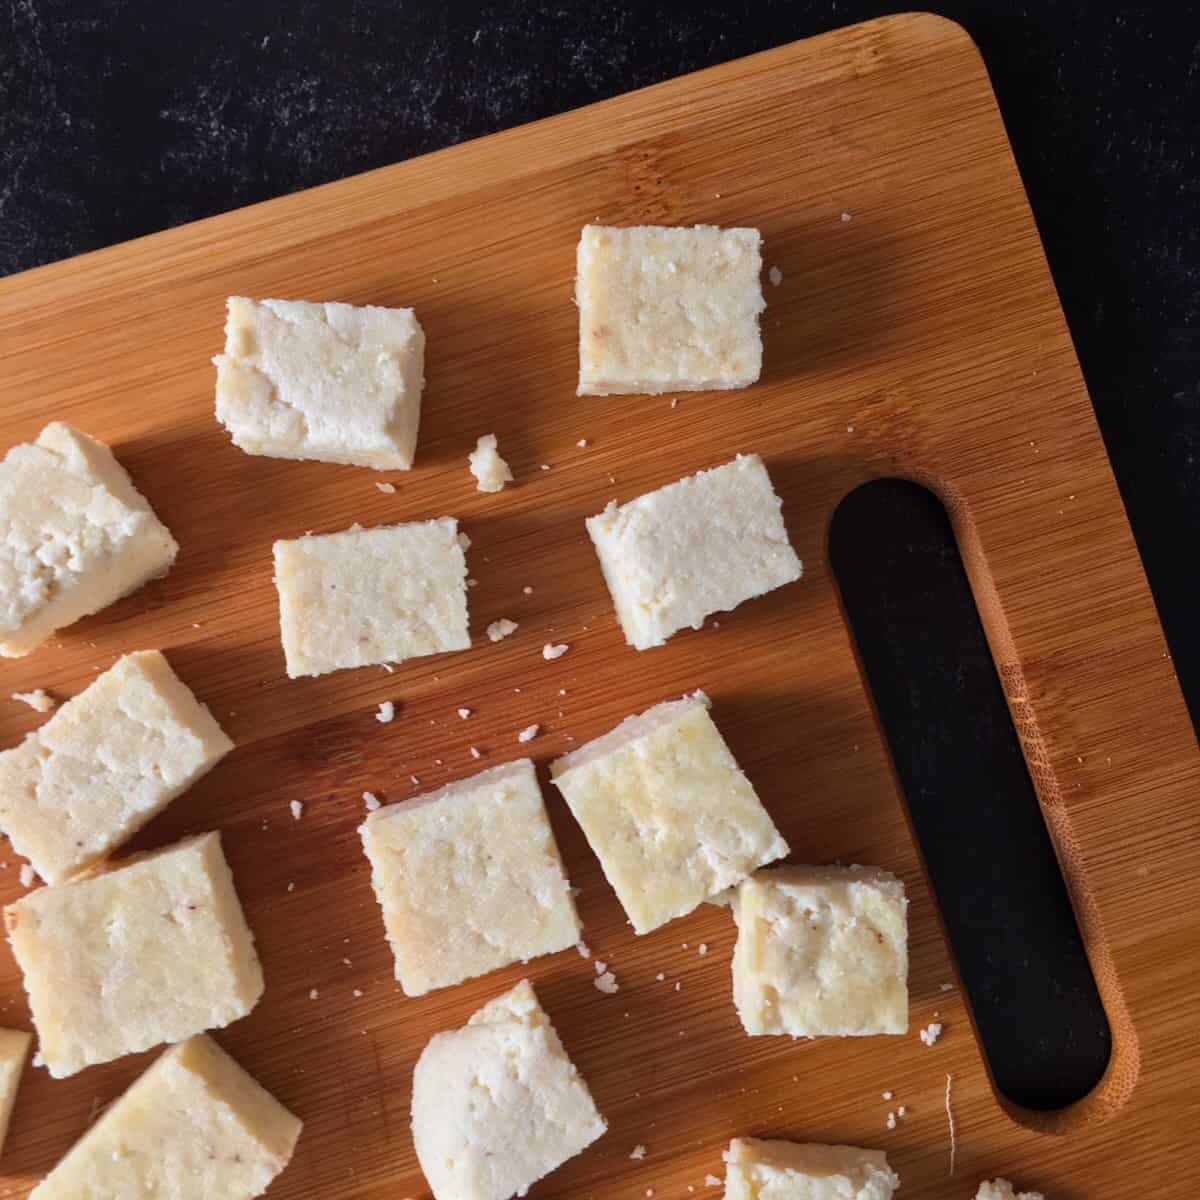
If you are on an extremely tight budget, pressing your cheese between two plates may do in a pinch. Wrap the cheese curds in cheesecloth before pressing. Try weighing the top plate down with heavy books or a piece of cast iron cookware.
I used to do something similar to press tofu, back when the extra-firm tofu was not found easily in supermarkets. It worked reasonably well to get the liquid out. However, the paneer will probably be more crumbly than if you use a good tofu press.
🌡️ How to Store Paneer
To store paneer, wrap it in plastic wrap or put it in an airtight container. You can keep paneer in the fridge for up to 3-4 days.
Paneer also freezes well. Let the paneer thaw fully in the fridge before using in your favorite Indian recipes.
🥛 Paneer Whey Uses
You can discard the whey from making paneer or save it to use in another recipe. I usually discard it since it tastes strongly of lemon. However, it can be used to cook lentils or other legumes.
Alternatively, use a little whey in a dough that includes an acid (such as vinegar or lemon juice). I’ve read it can be used in Indian roti or naan recipes. You can also add a little whey in curries.
🥣 How to Use Paneer in Recipes
How to flavor paneer? The mild flavor of paneer is a blank canvas, ready to be spiced up in your favorite Indian Instant Pot recipes! I’ve seen it used in Indian desserts, as well as these savory meals:
- Instant Pot Paneer Biryani
- Instant Pot Paneer Korma (and other Instant Pot Paneer curry)
- Matar Paneer (AKA Mutter Paneer)
- Paneer Tikka Masala
Or you can try my super DELICIOUS Instant Pot Palak Paneer Recipe with cream and dried fenugreek leaves (methi). (Seriously, if you already have the paneer, you need to try this one!)
📋 Calories, Net Carbs, Protein
One 2-ounce serving (57 grams) of Instant Pot paneer has 209 calories, 1 gram net carb, and 12 grams protein. This information was taken from Cronometer, and will vary depending on whether you use whole milk or a reduced fat variety.
FAQs
Why is my paneer crumbly?
Crumbly paneer is often the result of not pressing the paneer adequately to get the moisture out. Paneer can also crumble apart if it hasn’t been refrigerated for several hours after pressing. Use a good tofu press and pop that pressed paneer in the fridge to prevent crumbling.
Is paneer available in the USA?
Paneer can be tough to find in mainstream supermarkets in the USA. Asian stores carrying Indian groceries should have paneer in the refrigerated and/or freezer sections. If you can’t find paneer at a local grocery store, you can buy paneer on Amazon. (Better yet, make this Instant Pot paneer recipe!)
How to make paneer from yogurt?
I’ve heard that you can use plain yogurt in place of the lemon juice to make paneer. I haven’t tried this yet, but it seems like a worthy experiment if you need an alternative to lemon juice.
How to make paneer using vinegar?
You can make paneer with vinegar easily by substituting the lemon juice in this recipe for an equal amount of white vinegar. So easy! Keep in mind that the vinegar imparts a sharper flavor to the paneer than lemon juice.
What’s a good vegan substitute for paneer?
My favorite dairy free substitute for paneer is tofu! Cubed extra firm regular tofu is great in curries, or try cubed firm silken tofu in dessert dishes. It’s a great option to make Indian dishes vegan and add some plant-based protein.
👩🏻🍳 More Instant Pot Recipes
Want more recipes for the Instant Pot? After making paneer in the Instant Pot, try one of these:
- Instant Pot Grape Leaves (Dolmas)
- Instant Pot Beef Vegetable Soup
- Pressure Cooker French Fries
- Instant Pot Stir Fry
👩🏾🍳 Other Indian Recipes
Are you all about good Indian cuisine? I’ve got you! Here are some more recipes for Indian food you may enjoy:
- 20 Best Air Fryer Indian Recipes
- Egg Kheema (Vegetarian Egg Curry)
- Mango Lassi Smoothie
📖 Recipe Card
Watch How to Make It!
Instant Pot Paneer Recipe (Pressure Cooker)
Ingredients
- 2 liters milk (Equals 8 cups. I used 2% milk; whole milk, 1% milk or skim milk may be used.)
- 6 tablespoons lemon juice, fresh squeezed
Instructions
How to Make Pressure Cooker Paneer:
- Put the milk and lemon juice in your Instant Pot and give it a stir. Put the lid on the Instant Pot and close the vent.
- Pressure cook paneer for 5 minutes using the “desserts” setting under low pressure. Allow the pressure to release naturally for 15 minutes before carefully opening the vent on the lid.
- Hot tip! DON’T stir or scrape the cheese curds out of the Instant Pot after cooking. Some milk may have browned at the bottom of the pot and you don’t want that in your finished paneer.
- Carefully pour the milk mixture into a large colander lined with four layers of cheesecloth. If some white curds are stuck to the pot, you can gently release them with a wooden spoon after pouring the liquid out.
- Bring the edges of the cheesecloth together and twist it into a ball, squeezing more liquid from the cheese curds. Next, spread the cheese curds into a compact, even layer in a cheesecloth-lined tofu press. Cover the curds with more cheesecloth, and put the lid on the tofu press (follow the instruction manual for your press).
- Press the paneer for 30-60 minutes. Remove the paneer from the press and gently unwrap it from the cheesecloth. Refrigerate the paneer for several hours to firm up more before cutting into cubes.
How to Make Instant Pot Paneer (Using Yogurt Setting):
- Pour the milk into the Instant Pot and put it on the yogurt setting on high (keep the lid off). Whisk it occasionally so the milk doesn’t stick to the pot.
- When the cycle has finished, ensure the milk reached 180°F (82°C) using a candy thermometer. If it hasn’t reached this temperature, use the high sauté setting on the Instant Pot to get it there.
- Once it reaches 180°F (82°C), remove the inner pot from the outer heating vessel and stir in the lemon juice right away. You should begin to see the yellowish whey separating from the curds immediately. Allow the curds and whey to cool at room temperature for approximately 30 minutes.
- Line a colander with four layers of cheesecloth. Put the colander in a large bowl or in the sink (if discarding the whey).
- Pour the curds and whey into the lined colander. Let drain for 5 minutes. The curds will stay in the cloth while the whey will drain away.
- Gather up the edges of the cheesecloth so that the curds are collected into a tight ball. With clean hands, squeeze the ball gently over the sink to release more whey. If you are concerned about a lemony taste remaining, you can run the ball under gently running water and squeeze again, if desired.
- Unwrap the cheesecloth. Place the cheese curds in an even layer into a cheese press or cheesecloth-lined tofu press. Press the paneer for 30-60 minutes .
- Refrigerate the cheese for several hours until ready to use. It should form into a firmer block.
Notes
💭 Expert Tips from Dietitian Summer Yule
This is a level 2 recipe (transition or weight maintenance). Paneer is not the lightest option around since it’s cheese. I noticed I tend to eat more calories when I use paneer as my source of protein in meals. (Who can blame me though, it’s just so good. Haha) If you want paneer with lower saturated fat and lower calories, try using skim milk or reduced fat milk. For high calorie paneer, use whole milk. The type of milk you use will impact the taste, so choose a type of milk you enjoy. Psst... don’t miss my Instant Pot Palak Paneer Recipe if you need an amazing way to use your paneer! Nutrition information is for one 2-ounce serving (57g). Nutrition information was taken from Cronometer, and will vary depending on your yield and whether you use whole milk or a reduced fat variety.
nutrition info disclaimer
All recipes on this website may or may not be appropriate for you, depending on your medical needs and personal preferences. Consult with a registered dietitian or your physician if you need help determining the dietary pattern that may be best for you.
The nutrition information is an estimate provided as a courtesy. It will differ depending on the specific brands and ingredients that you use. Calorie information on food labels may be inaccurate, so please don't sweat the numbers too much.
"To taste" means to your preferences, which may have to be visual to follow food safety rules. Please don't eat undercooked food x
Nutrition
Join our community! Subscribe for all of the latest and greatest recipes, and follow me on Facebook, Pinterest, Instagram, and YouTube!

Hello! I'm Summer, a registered dietitian and home chef who loves to cook, eat, and create high quality content for you! Every recipe on this site has been tested by me to help ensure your success in the kitchen. All eaters are welcome here 🙂


Comments
No Comments