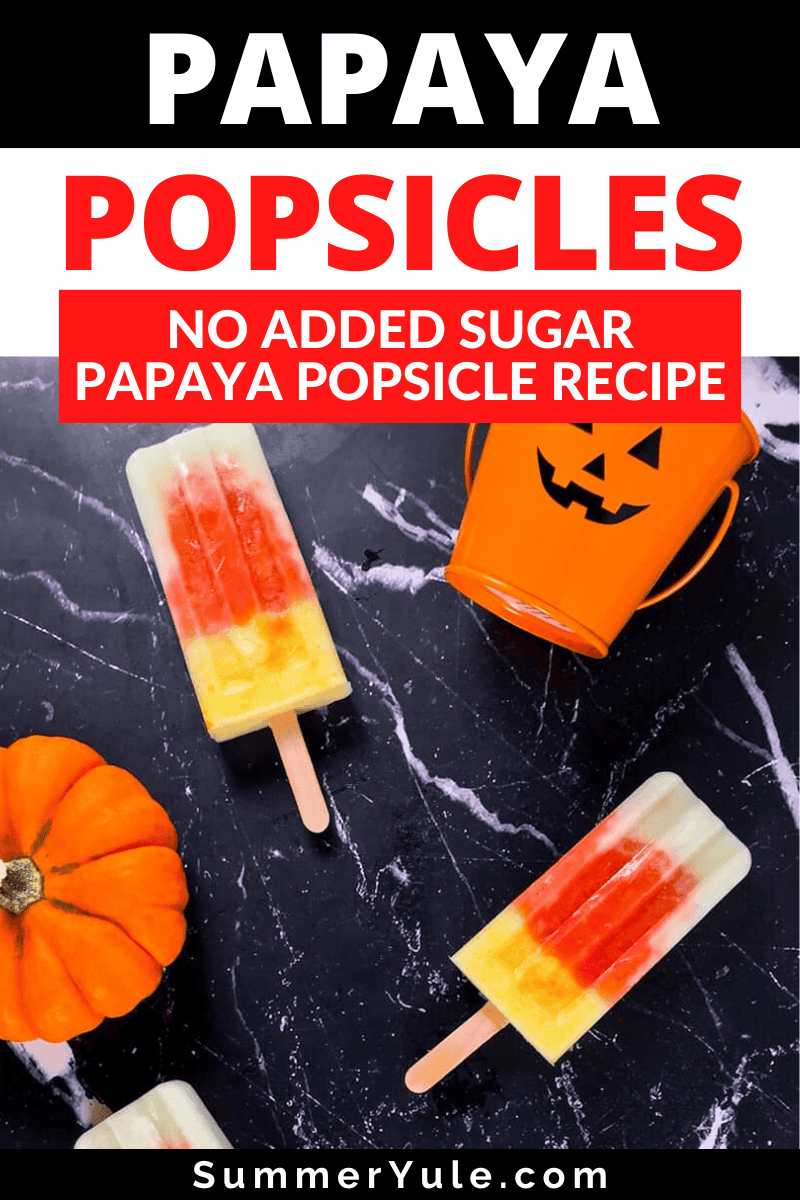
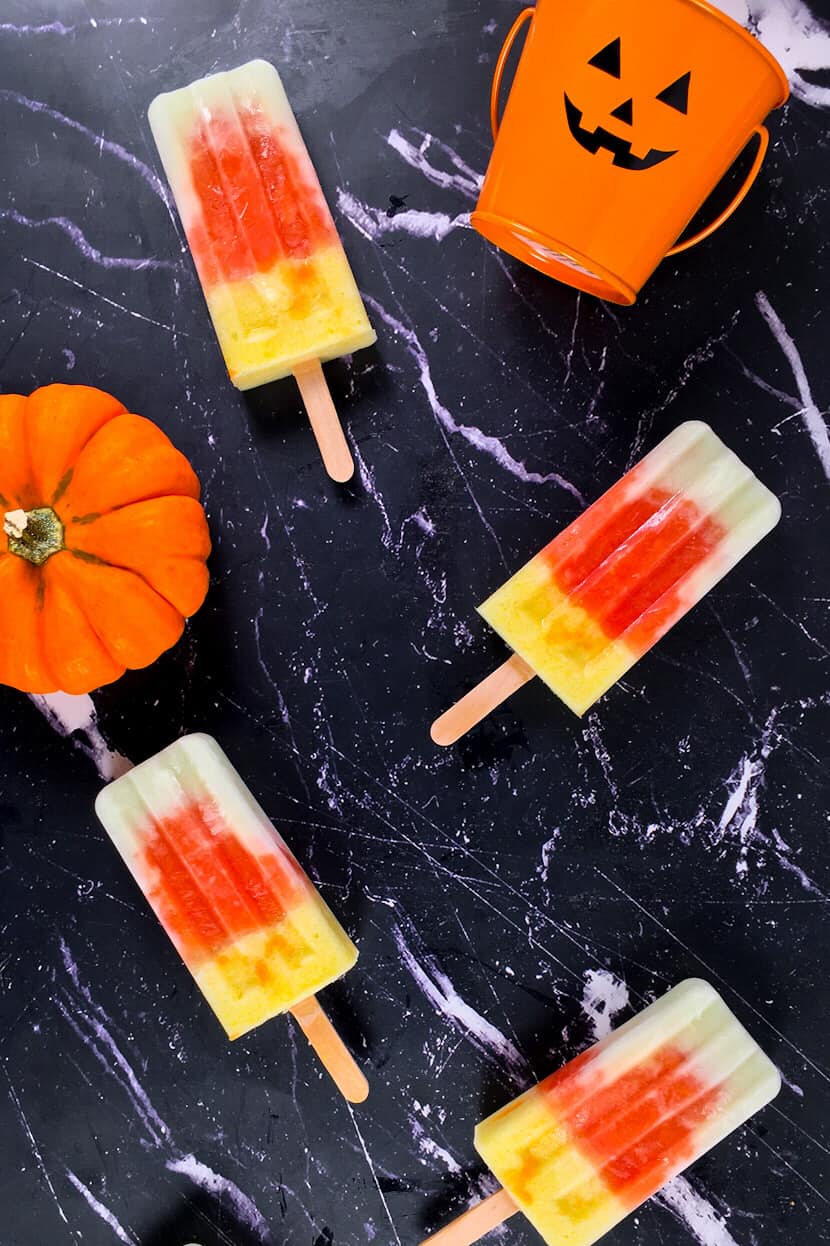
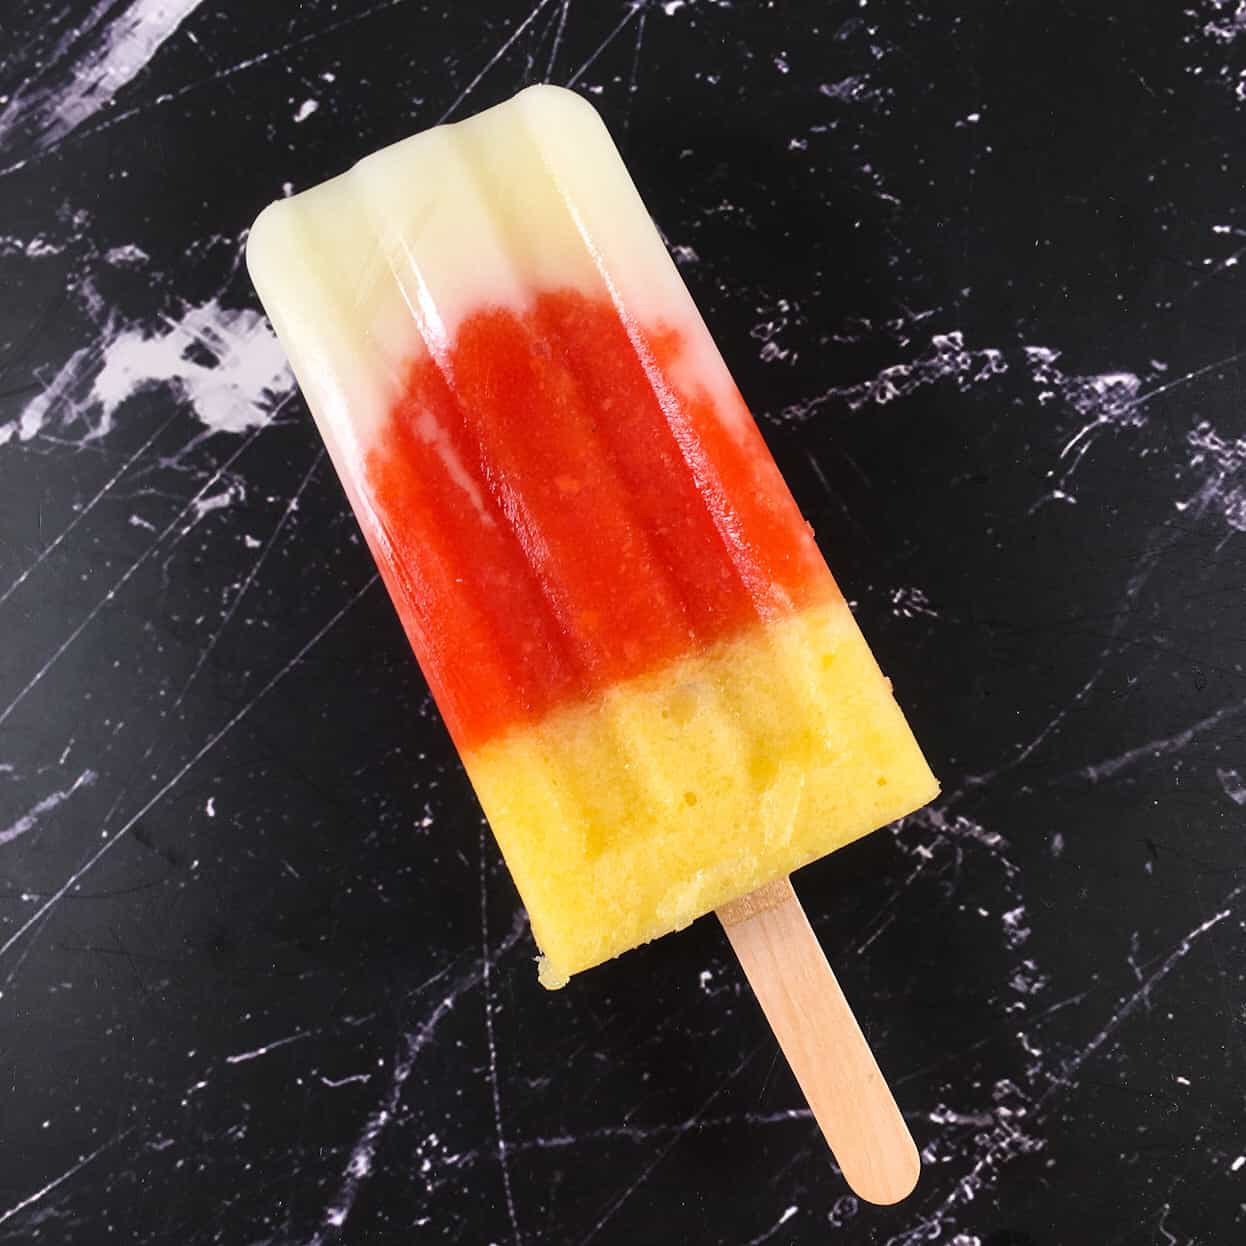
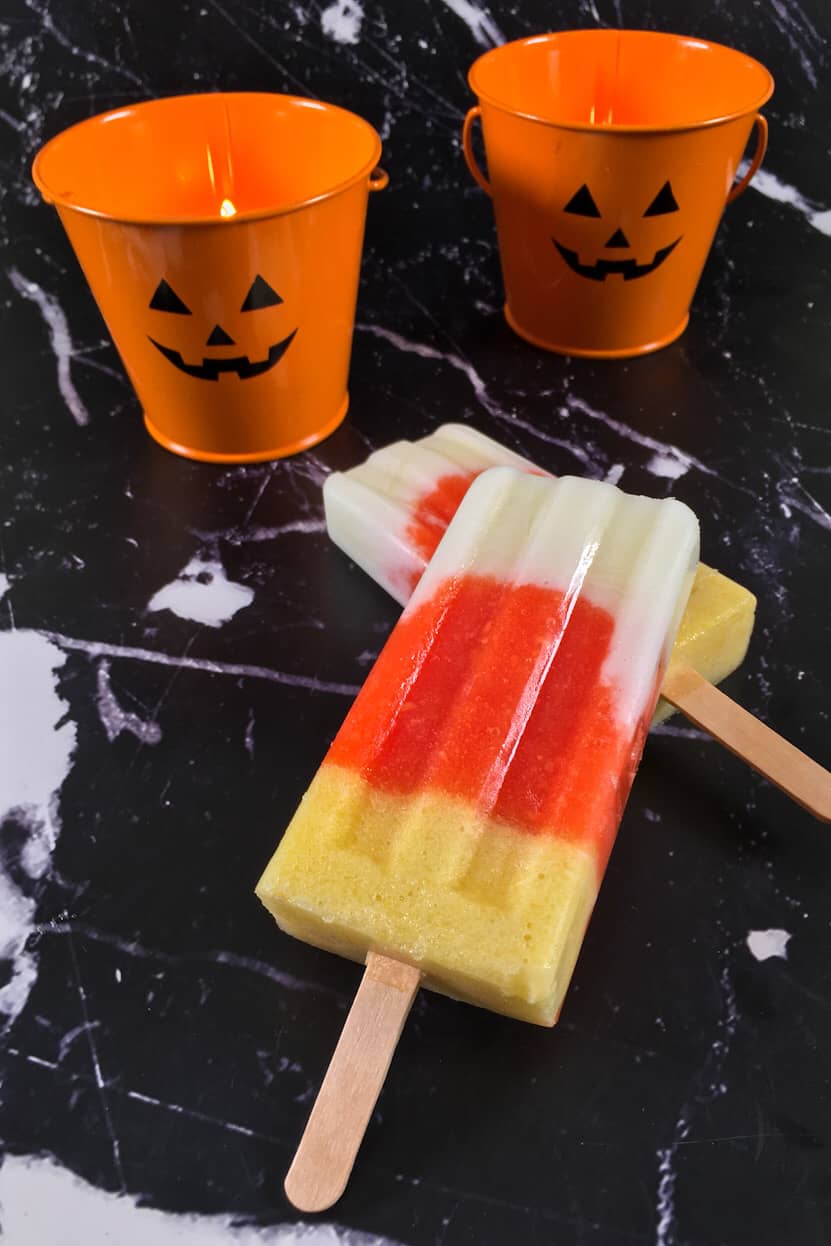
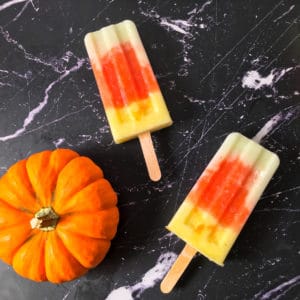
My papaya popsicle recipe is a treat that looks like candy corn, but with no sugar added! Today I'll show you how to make papaya popsicles with pineapple and melon. I'll also discuss which type of papaya is best for this recipe. Make these tropical popsicles vegan and dairy free with coconut milk yogurt or use regular yogurt. With only four ingredients, why not try this easy and healthy snack recipe?
Want to save this post?
Enter your email below and we'll send it straight to your inbox. Plus you'll get great new recipes from us every week!
Here's a fun and simple recipe that I've been hanging on to for a while now. I usually make these popsicles that look like candy corn around Halloween. However, with ripe tropical fruits on sale right now, it was really the perfect time for me to make them.
Table of Contents
➕ Papaya Popsicles Ingredients
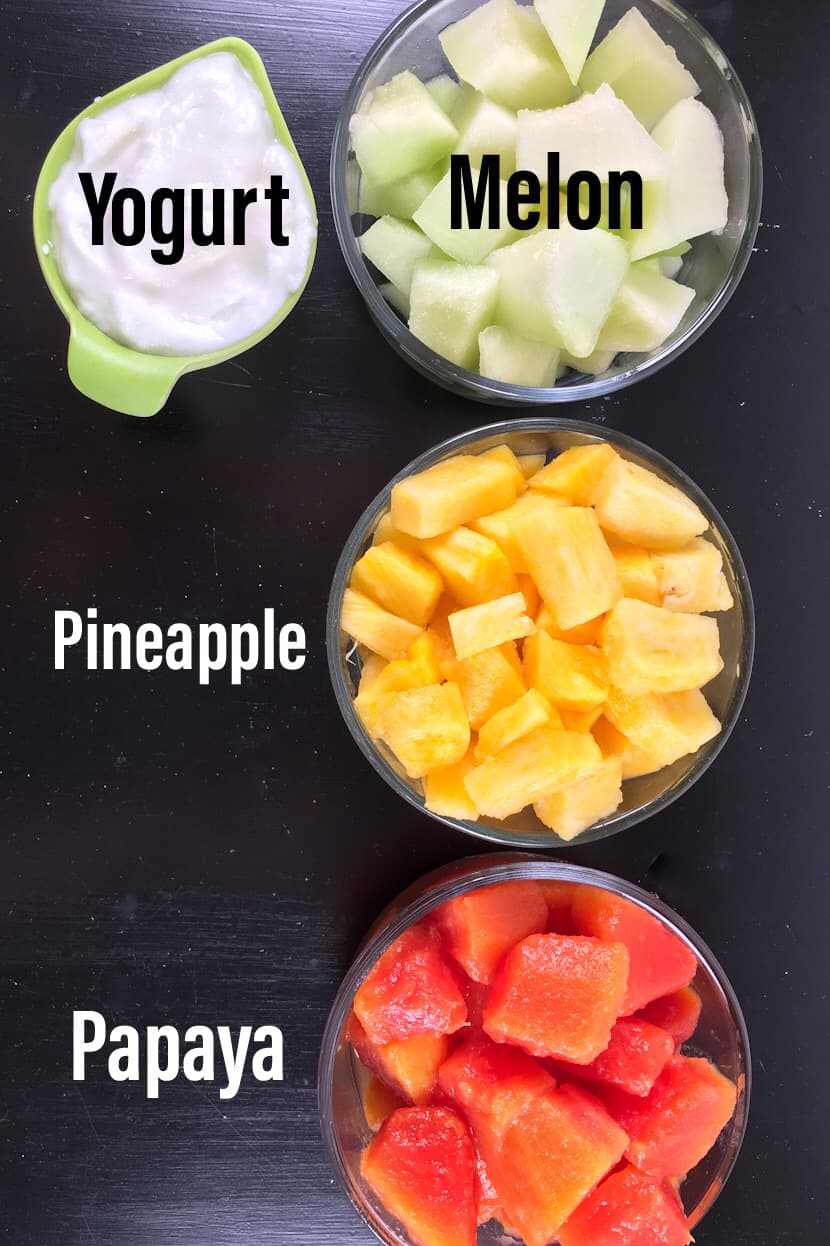
Here's all you need to make papaya popsicles:
- 1½ cups chopped papaya (fresh or canned)
- 1½ cups chopped pineapple
- ¼ cup plain Greek yogurt (or use coconut yogurt for a vegan alternative)
- ½ cup chopped honeydew melon (or another melon with a white-ish interior)
Get a printable recipe card below!
My first choice for the papaya layer is to use a fresh Royal Star papaya. This papaya has a high Brix content that makes it one of the sweetest papaya varieties available.
They also have a long shelf life compared to other varieties of papaya. This is particularly beneficial for those who live far from the tropical regions papayas are shipped from.
If you can't obtain fresh, ripe papaya, canned papaya will work too. I like the Native Forest papaya chunks, as they are canned in pineapple juice with no added sugar.
Either way, it is very important to use the ripest fruit you can find for these popsicles. Since all of the sweetness in these popsicles comes from the fruit, underripe fruit has no place here. The difference between using ripe and unripe fruit in this recipe is HUGE.
Additionally, you'll need this equipment for papaya ice pops:
- Knife
- Food processor
- Popsicle molds and sticks
For a simplified variation on this recipe, I sometimes make popsicles with just the papaya.
😋 How to Make Papaya Popsicles
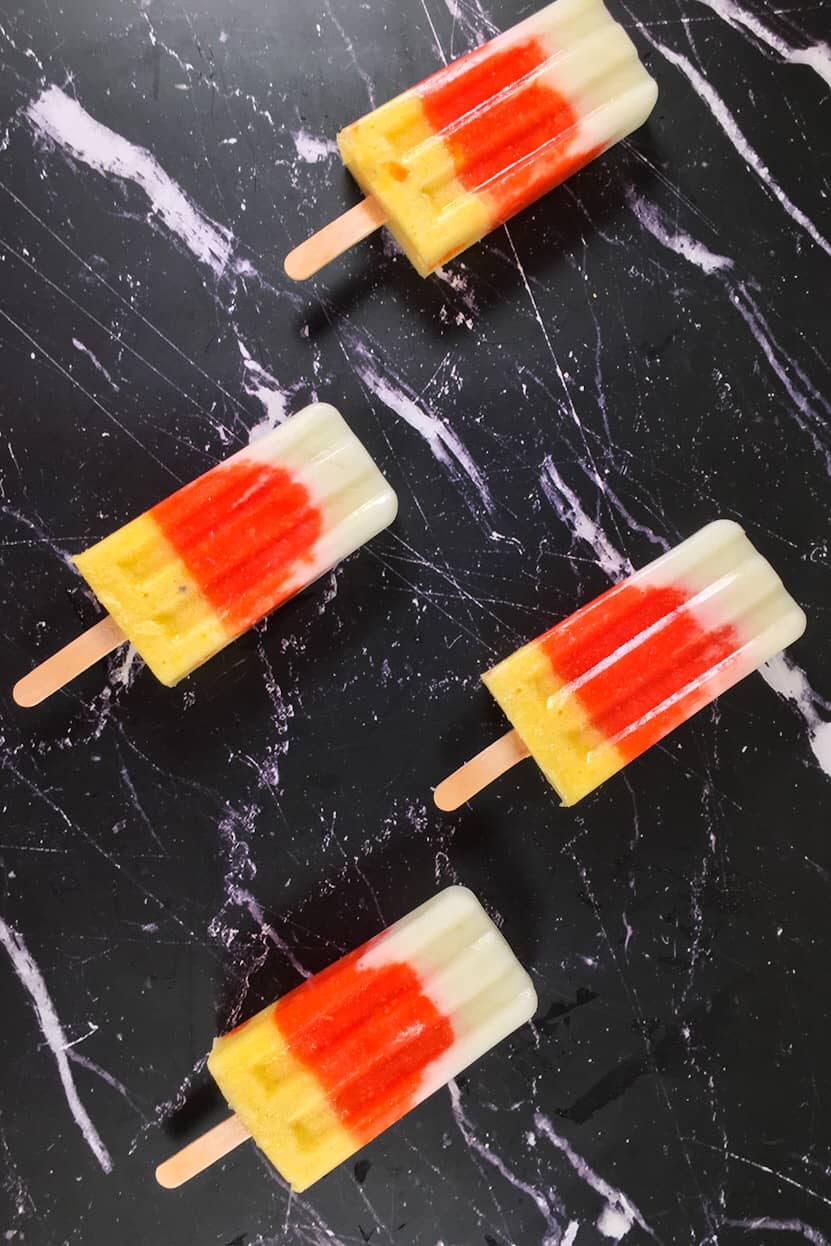
The basic instructions for making popsicles with whole fruits is to blend the fruit to a smooth puree and then fill the popsicle mold. Since we're making layered popsicles, we need to blend each fruit layer individually. Using whole fruits means that the purees are thick enough that you don't need to freeze the ice pops before adding the next layer.
To make the popsicles look like candy corns, the color layers should go in this order: white, orange, yellow. Next up is the breakdown of how this is going to work.
First Popsicle Layer
Cut your fresh melon in half lengthwise and scoop out the seeds. Using a melon baller or a knife, scoop (or cut) the amount of melon needed for this recipe. Aim to use the white flesh of the melon that was closest to the seeds.
Put the melon in a food processor with the yogurt. Blend it into a smooth puree. You may need to stop the food processor to scrape down the sides with a spatula if ingredients are sticking.
Pour the melon puree into your popsicle molds. I distributed this mixture evenly between 8 ice pop mold compartments. You only want a little in each mold, not ⅓ full. The level of this (rather thin) layer will rise when the next layer is added.
If the melon and yogurt run down the inside of the mold as you pour, no worries. Just wipe off the inside of the mold with a clean Q-tip or a bit of clean paper towel. This will help to keep the layers of your popsicle looking tidy.
Papaya Popsicle Layer
For fresh papaya, cut it in half lengthwise and scoop out the seeds. Chop the papaya into pieces, removing the skin of the fruit from the flesh as you work. Canned papaya only needs draining.
Pop your papaya chunks into a clean food processor and puree. After it becomes smooth, distribute it evenly between 8 pop molds. Try to make sure the papaya puree completely covers the melon yogurt layer.
Third Popsicle Layer
Peel and core your fresh pineapple and chop it into chunks. Put your pineapple chunks in the food processor and puree until smooth. The pineapple will become very airy and creamy. Use a spoon to distribute it between your 8 popsicle molds.
You may have some extra pineapple. How many popsicles you end up with will ultimately depend on the size of your ice lolly molds. I use a silicone popsicle mold, so the finished popsicles release easily.
After completely filling the molds, add the popsicle sticks and place the molds in the freezer overnight. The next day, you'll be ready to enjoy your papaya pops!
💡 Papaya Popsicles Tips
Are you wondering why I didn't just make the white layer of these papaya popsicles with yogurt and no melon? Making the popsicle layer with yogurt alone (or yogurt plus milk) resulted in a really hard layer. Like, jawbreaker hard. We had a difficult time biting into the ice pop when the tip was 100% yogurt.
The melon makes the pop softer, while the yogurt helps to make the layer snowy white. You are getting the best of both worlds with this combination.
📖 Recipe Card
Watch How to Make It!
Papaya Popsicle Recipe
Ingredients
- 1½ cups fresh papaya, chopped (OR use 1½ 14-ounce/397 gram cans of papaya in juice)
- ¼ cup plain, unsweetened Greek yogurt (use coconut milk yogurt for vegan)
- ½ cup honeydew melon, chopped (whitest parts of flesh)
- 1½ cups fresh pineapple, chopped
Instructions
- Blend the chopped melon and yogurt together in a food processor until smooth. You may need to stop the processor occasionally to scrap down the sides with a spatula if the ingredients are sticking.Distribute the mixture evenly between your popsicle molds. I used eight ice pop molds, though your yield may vary. You only want a little of this mixture in each mold, since the level will rise when you add the next layer (i.e., do not fill ⅓ full). Wipe the inside of the mold with a clean Q-tip or paper towel if the mixture runs down the side.
- Next, rinse your food processor and blend the chopped papaya until smooth. If you are using canned papaya, make sure to drain the papaya well first. Again, you may need to scrape down the processor's sides with a spatula if the fruit pieces are sticking. Use a spoon to distribute the papaya puree between eight ice pop molds. Try to make sure the papaya puree completely covers the first layer.
- Rinse your food processor out once again and blend the fresh chopped pineapple. It will become completely smooth and creamy. Use this pineapple puree to finish filling your eight popsicle molds. (You can make additional popsicles with any extra fruit.)
- After completely filling the molds, add the popsicle sticks and place the molds in the freezer for 6-8 hours (or overnight). I hope that you enjoy this healthy treat!
Equipment
Notes
⭐ Papaya Popsicle Benefits
This is a level 1 recipe (may help support fat loss). Papaya provides the antioxidants vitamin A and vitamin C which may boost immunity. Papaya also provides folate, potassium, and magnesium. Additionally, the fiber in papaya may offer digestive benefits. Using plain Greek yogurt in this recipe adds protein with no added sugar. If you don’t like plain yogurt, you could always add a sugar substitute or use your favorite (sweetened) vanilla yogurt instead. (Keep in mind that using sweetened yogurt will change the nutritional information for the recipe.) These popsicles are low calorie because they are made with fruit and yogurt only, potentially making them a good choice for adults with a weight loss goal. In addition, the fun presentation of these Halloween-themed popsicles makes them appealing for kids. Picky eaters may be more likely to eat fruit if it is served as a colorful popsicle. Nutrition information is for one serving of the recipe and was calculated using nonfat Greek yogurt.
nutrition info disclaimer
All recipes on this website may or may not be appropriate for you, depending on your medical needs and personal preferences. Consult with a registered dietitian or your physician if you need help determining the dietary pattern that may be best for you.
The nutrition information is an estimate provided as a courtesy. It will differ depending on the specific brands and ingredients that you use. Calorie information on food labels may be inaccurate, so please don't sweat the numbers too much.
"To taste" means to your preferences, which may have to be visual to follow food safety rules. Please don't eat undercooked food x
Nutrition
👨🍳 More Homemade Popsicle Recipes
Homemade popsicles can be a fun way to help increase your fruit and veggie intake! I almost always have a batch of frozen fruit pops in the freezer. Here are some other no sugar homemade ice pop recipes that you may enjoy:
- Sugar Free Banana Popsicles
- Cherry Mango Popsicles
- Sugar in Watermelon Popsicles
- High Calorie Popsicles with Mango
- Watermelon Mango Popsicles with Pineapple
- Tovolo Popsicle Molds Recipes
👩🍳 Other Snack Recipes
Join our community! Subscribe for all of the latest and greatest recipes, and follow me on Facebook, Pinterest, Instagram, and YouTube!

Hello! I'm Summer, a registered dietitian and home chef who loves to cook, eat, and create high quality content for you! Every recipe on this site has been tested by me to help ensure your success in the kitchen. All eaters are welcome here 🙂
Terrified Amateur says
Wonderfully tempting, Summer! Plus, I like that you've added yogurt, which must give these almost a creamy feel. They may look like popsicles, but they eat more like ice cream bars, I'd wager.
Plus, you can't go wrong adding pineapple. What a great combination of flavors!
Summer Yule says
Thank you! We must like them because they tend to disappear from my household fast!
Jason says
I love this idea (and now find myself craving a popsicle...and candy corn)! I’m not a fan of melons (pretty much the only food I don’t like), so I’m wondering if you have any suggestions for a substitute for the honeydew melon that would work well.
Summer Yule says
Thank you! If you wanted to keep things on a healthier path, I think canned lychee or peeled seedless green grapes might work out well. Of course, you could always use softened vanilla ice cream for the white layer too. 🙂